4 Smart Ways To Customize Your Woocommerce Shop Page In 2024
Online customers prefer an experience that prioritizes their time and needs. So, e-commerce websites have a better chance of succeeding through innovative customer experience solutions. One of the easiest ways to do so is a strategically customized Woocommerce shop page. However, the aim isn’t to offer the best deals or use the most artistic theme or layout.
Conversions happen thanks to content that is straightforward and helps speed up purchases. What you need to do is help buyers make informed decisions. At first, the shop page might not seem the best place to do that. However, you’d be surprised at what a well-organized storefront can accomplish.
The Power Of A Custom Shop Page
Picture a reliable storefront whose main focus, aside from selling goods, is to cater to its valued customers. Whether you’re a physical or online retailer, a good first impression depends on the following:
- A professional presentation
- Speedy and responsive service
- The promise of personalization
- Easier browsing
For WooCommerce stores, the shop page serves as an interface to achieve all of the above, and then some. It forms the basis of your categories, product pages, and other assets. With it, you can leverage aesthetics, CTAs, and functionalities that are conducive to greater conversions.
The ultimate struggle for buyers is to speed up checkout and manage cart abandonment. To get there, however, they need to wow buyers that land on the website. By showcasing your inventory all at once, you can delight visitors and pique their interest.
It’s a step-by-step process. We’ll be taking a look at the primary first step, i.e. how to set up a WooCommerce shop page effectively.
Innovative Solutions for Custom WooCommerce Shop Pages
Typically, online businesses have to tick a few boxes for a decent shop page. This includes mobile responsiveness, a cool layout, clickable buttons, and product details like prices, coupons, and HD images. However, sticking to the default setting and these boilerplate tactics isn’t enough.
The e-commerce arena is full of new trends and developments. So, online stores have to adapt to keep up with evolving customer needs. So, we’ll be looking at a few creative suggestions for a custom woocommerce shop page layout and design.
- Personalized Product Recommendations
For returning or frequent buyers, don’t wait til they reach checkout to suggest purchases. By tracking their previous comments, cart items, and search history, you can leverage custom product recommendations.
The Product Recommendations plugin allows you to set up recommendations as well as cross-sells and upsells in WooCommerce. With it, you can customize recommended product to better match potential buyers.
It uses an algorithm that detects frequently bought items, seasonal purchase trends, and preferred product attributes. Plus, you can help buyers narrow down options based on prices, coupons, discounts, size, colour, and much more. Such laser guided product marketing demonstrates how to customize the Woocommerce shop page for better conversions.
- Augmented Reality for Confident Purchases
Online stores tend to enjoy a fraction of the conversions that brick-and-mortar businesses do. Part of that is because, in the latter, buyers can actually judge the product before purchasing. Digitally, you have to take product page descriptions, images, and tutorials at their word. However, with AR technology, buyers can visualize products from their devices. By enabling this feature, you can help them make more informed decisions when buying items. This takes a little doing, as you’ll need to optimize the product view for honest results. Luckily, there are plugins that help you do that.
- Dynamic Shop Pages
A dynamic layout and content can be a wonderful mix of minimalism and moving images. It can allow you to showcase different content types in a single shop page. It’s ideal for presenting promotions and ads, introducing standout products, or announcing business pledges.
To make the most of this, you’ll need to understand how the page layout and features resonate with buyers. Experiment with different themes and use A/B testing to find out which approach works the best.
- Social Proof
Nothing reassures customers like positive feedback from like-minded customers.Typically, that involves incorporating reviews, user-generated content, and social mentions to your website. But we’re looking to customize WooCommerce shop pages. So, it’s worth expanding your horizons.
For instance, you can allow users to highlight certain goods in their shop reviews. That way, new buyers can click on those links. Alternatively, you can integrate social media sharing of your cart items or wishlists.
- Add Progress Bars
Progress bars aren’t just for multi-step checkout pages. Let’s say you wish to create urgency by compelling buyers to rack up points or selling limited edition goods. In these cases, a little progress indicator for loyal customers can be just the push they need. This is a fantastic way to curb cart abandonment and improve sales organically.
Tailor Your Storefront Today
To sell online, the recipe success requires a dedication to your audience and standing by your brand. That way, your online business becomes a more inviting, professional, and lucrative endeavour. There’s more than one way to customize your Woocommerce shop page. If you’re not interested in social proof or technology like AR, the possibilities are endless.
How To Set WooCommerce Coupon Exclusions On Your Products
As a business owner, maintaining your bottom is just as important as giving the customers what they want. You just need to strike the right balance. That proves to be true when you’re setting up a WooCommerce Coupon strategy. For financially sound results, knowing when and how to exclude products from coupons becomes essential.
Setting these restrictions isn’t that complicated, so long as you have the right tools. We’ll be taking a look at the main ways to implement them in your online shop. But before that, let’s address how to make the right decision.
When Might Excluding Coupons Become Necessary?
Who among us doesn’t love a bargain? Coupons are a great way for online stores to maintain competitiveness and offer amazing offers to buyers. And they certainly work, a little too well in fact. And being too generous to buyers can sometimes come at the expense of your profits.
So you have to draw a line.
Besides, online stores need not rely heavily on discounts and promotions for conversions either. Building trust and designing a user-friendly online store can do a lot of heavy lifting. Plus, there are some cases where keeping coupons in WooCommerce active simply makes no sense.
- Launching A Product: It’s better to provide a brand-new product at face value to build interest, at least initially. This becomes crucial if that new product falls under a category-wide coupon discount.
- Taking Advantage Of High Demand: If sales are inevitable for a certain product, why bother making it more attractive with a coupon deal. During the holiday season, for example, lights, ornaments, and other decorations are bound to be sold out. Reducing their prices isn’t affecting anything other than your income.
- The End Of Seasonal Offers: And like those decorations, it’s best to take down the holiday discounts on gift items and other eligible goods once Christmas is over.
These are just a few examples of when or why coupon exclusions must take place. Now let’s go ahead and address the how.
Activating WooCommerce Coupon Exclusions On Products
Excluding products from WooCommerce coupons is fairly simple. You might want to exclude either a single product or category, or broaden these exceptions. Let’s discuss how you can do that.
Exclude Specific Products
To remove a certain item or category, you can use the default options available in WooCommerce. Simply go as follows.
- Through the WooCommerce admin panel, navigate to WooCommerce > Coupons. Here, you’ll find all the coupons applicable to your products.
- Click Edit under the one you’re after and go to the Usage restriction settings.
- To exclude a product, type its name or id in the Exclude Product field.
- To exclude a category, type its name in the Exclude Category field.
- Repeat steps 3 and 4 as needed to exclude other products or categories from this coupon.
- Click on Publish to finalize these changes.
Restrict Multiple Coupons
So, that’s how you can exclude products a specific WooCommerce coupon. But what about restricting the availability of multiple coupons at once? The bad news is that WooCommerce doesn’t inherently let you do that.
Luckily, with the premium version of WebToffee’s Smart Coupons plugin, that becomes possible. Start by buying, installing, and activating the plugin. After that, just go as follows.
- Find and click on the plugin through the WordPress admin panel.
- Head over to All coupons.
- Find and go to the coupon that you want to restrict.
- Go to Coupon data > Usage restriction.
- In the Coupon can’t be used with field, specify which coupon to disable while this one is under use.
- Save changes by clicking on Update.
This becomes useful if, say, a product falls under both loyalty and seasonal offers. You can choose to disable one of those to ensure breaking even sales-wise.
Restrict Based On Product Attributes
This useful ability is unfortunately not available by default or through the WebToffee plugin. Instead, Smart Coupons by StoreApps is the tool for the job. After getting and activating it, here’s what you need to do.
- Through the admin panel, go to Marketing > Coupons.
- Find the target coupon and go to Usage restriction.
- Specify the item in the Products field.
- To restrict the coupon to a single attribute, type that attribute in the Product attributes fields.
- To exclude products with a particular attribute, add that attribute to the Exclude attributes field.
- Publish your changes.
This option is available for streamlining both existing and new coupons. Aside from attributes, you can also add restrictions based on user roles or spending limits.
A Coupon Strategy That Preserves Sales
WooCommerce coupons are a great tool for marketing, but that’s about it. You cannot expect to run a robust, high-converting business if they come at the expense of other essentials, like UX and security. Luckily, you don’t have to choose one or the other.
By being selective about which products get discounted or when, you can maintain sales as well as public favour. And with this guide, that’s an easy balance to achieve.
4 Best Plugins For WooCommerce Product Add-Ons For 2024
Online shopping today is all about customizability and options; the more, the merrier. Online stores can adopt different approaches to meet diverse customer demands. Luckily, a simple and surefire solution exists in the form of WooCommerce product add-ons.
After all, online shopping doesn’t have to be a hasty affair. Customers appreciate the ability to elevate and customize their orders, even if that comes at a cost. So, stores can opt for plugins that enable extra product options for WooCommerce. Let’s discuss why and how this approach can benefit online buyers and sellers alike.
WooCommerce Product Add-Ons: A Powerful Tool
In WooCommerce, a standard product page should include product images, add-to-cart buttons, price details, and descriptions. These are the things that will help online stores avoid cart abandonment. However, there’s more to selling online than that.
Through product add-ons for WooCommerce, stores can allow customers to make further changes for a more personalized order. These add-ons usually include product fields, swatches, text boxes, radio buttons, and many more.
Through WooCommerce product add-ons, you can convince buyers to take several actions to improve their order. Typical examples include gift wrapping, product variations, quantity options, coupons, promotions, or warranty plans.
However, there are some industry-specific examples as well, like
- Custom design options for fabrics and apparel
- Personalized engravings for jewellery or stationery
- Extended warranty options for electronics
- Insurance or room upgrades for hotel stays
- Upsize options for food deliveries
Benefits Of Product Add-Ons
Improved Customer Relations
Added WooCommerce product options are guaranteed to impress buyers thanks to personalized offers and solutions. It fuels loyalty, return visits, and customer lifetime values.
Increased Average Cart Totals
You can offer services like gift wrapping and custom engraving for a flat or added fees and turn a profit. Customers might be more than happy to pay extra depending on the add-on. Plus, add-ons can contribute to upselling and cross-selling, leading to higher-value purchases.
Competitive Advantages
Personalized product add-ons in WooCommerce can help your store stand out, leading to better sales.
Top Plugins For WooCommerce Add-Ons
Like the WooCommerce checkout page, the functionality of the product page can benefit greatly from added fields. Advanced Product Fields for WooCommerce allows you to add and custoomize new fields to the product page as add-ons.
You can create labels, group fields, and lay out CTAs to help guide buyers to a personalized order. The developer’s choice of example involves customizing pizza toppings, where buyers can select or deselect from a list of options. This can also apply to other features, like luxury bundles or hospitality bookings.
Essential Features
- Intuitive builder for the backend.
- 10 fields types, including text, number, URL, radio buttons, checkbox, etc.
- Option to add flat fee.
- Lightweight and SEO-friendly.
- Added perks for paid version.
Providing all your product addons for WooCommerce users on the product page can boost conversions. Product Add-Ons by WooCommerce is a versatile and powerful, but easy to use, extension that lets customers personalize their orders.
Alongside individual and dropdown fields, you can add sample images to your products for a better customer experience. For each add-on, be it an engraving or variation, you can set a flat, dynamic, or percentage-based fee of your choosing. It’s a feature-rich extension that’s bound to give your product offerings a custom makeover.
Essential Features
- Allows your customers to leave comments or upload their own images.
- Create add-ons globally or specific to individual products.
- Compatible with WooCommerce Subscriptions and Bookings.
For UX-centric extra product options, it’s hard to go wrong with WooCommerce Product Add-Ons by Acowebs. With its lightweight design and drag-and-drop capabilities, it can help you extend add-ons above the add-to-cart button with little to no fuss.
Although not the most feature-rich example in our list, this plugin emphasizes straightforward product page management for more potent results.
Alongside HTML tags, it supports over 20 field types that let buyers streamline their orders and stores gather valuable information. You can arrange these fields in a grid for a professional and ergonomic layout, and also add text boxes for receiving additional customer notes.
Essential Features
- Provides text, email, colour picker, and other product fields.
- Drag-and-drop builder for forms.
- Conditional logic for cleaner, more intuitive add-ons.
- Two-column grid layout.
WooCommerce is known for its developer-friendly platform. Similarly, the PH WooCommerce Product Add-Ons plugin is a highly customizable choice for introducing add-ons to customers. You can edit fields and other product elements to match more branding and achieve a cohesive, eye-catching layout.
It allows you to add text fields, boxes, radio buttons, and drop-down menus for a more versatile add-on experience. Plus, dynamic pricing means that you can customize how much each add-on costs. Thus, you can optimize add-ons for each product for unique results.
Essential Features
- Five flexible pricing options.
- Over a dozen field types to choose from.
- Conditional logic for fields.
- Built-in variation swatches.
- Reusable product add-ons for WooCommerce.
Give Your Customers Something Extra
As we’ve learned, you could be in the business of selling food, clothing, or luxury gifts. A surefire way to impress customers and boost sales impressions is to give them more options with each purchase. These plugins make it easier for online stores to leverage product add-ons for WooCommerce and achieve exactly that.
Google Analytics For WooCommerce: A Guide For Online Stores
Any good business needs a plan for long-term survival, especially the ones working online. With time, online stores must learn from their performance to improve themselves. That’s where analytics and statistics come into play. One of the most widespread trends among responsible businesses has to be investing in Google Analytics for WooCommerce.
With time, businesses must revisit how to use resources, align their marketing, and interact with buyers. Analytics make this task easier, allowing businesses to improve earnings and control both their spending and their overall brand image.
But before discussing how to add and implement Google Analytics, let’s get into why it’s the need of the hour for your online shop.
How Google Analytics Changed E-Commerce Forever
Tools like Google Analytics for WooCommerce have made it easier for budding stores and shops to manage their own site metrics. It provides a state-of-the-art, user-friendly platform for measuring website interactions and using reports for improving your website.
Even with a limited technical background, you can make tremendous changes to your website with the insights that Google Analytics integration provides. And with its freemium offerings, it’s a highly accessible and affordable resource.
How To Use Google Analytics
Google Analytics offers WooCommerce stores the ability to track and measure a number of metrics. These include
- User interactions and behaviours
- Page visits
- Conversion and bounce rates
- Site performance
- Average orders per value
- Cart abandonment
- Customer lifetime value
- Traffic sources
- Used devices
- Ad revenue
Keeping track of all these metrics is essential for long-term success. But these are just examples of what a store may or may not choose to keep track of.
Broadly, however, there are two categories that most e-commerce metrics fall under. These are
- Event-based metrics, which assess store actions and interactions
- Item-based metrics, which track the items involved in an event
For instance, let’s say you’re measuring the traffic that your online store is attracting.
Here, the “event” metrics reflect what your visitors are doing, like page views, conversions, or bounce rates. Meanwhile, the “item” metrics can be the sites or platforms that your visitors are redirected from, like a search engine, social media posts, or a backlink in a blog article.
Together, both these parameters can give you a clearer idea of who you’re selling to, where they come from, and how both facts correlate. The resulting information can help you approach marketing, store presentation, and troubleshooting more effectively.
How to Set Up Google Analytics in WooCommerce
The great thing about Google Analytics integration is that is works with pretty much all of the major e-commerce platforms, like WooCommerce, Shopify, Prestashop, Magneto, and more. Of these, WooCommerce is arguably the most versatile and robust choice that is available for free.
So, knowing how to set up Google Analytics in WooCommerce can open up immense possibilities for aspiring entrepreneurs. Luckily, this setup is also fairly straightforward, as follows.
- Create and set up an account with Google Analytics. Click on Start for free if you’re not commiting to a paid plan just yet.
- Click on Admin and then Create property under the account that you choose.
- Set up the property details like name, time zone, and more.
- To enable data collection in your store, head over to Admin > Data collection and modification and click Data Streams.
- Click Add stream and specify the device that you’re primarily using.
- After setting up the property, you’ll receive your tracking ID for Google analytics, which you’ll need to add to your WordPress user settings.
- Through your WooCommerce admin panel, find the “Google Analytics for WooCommerce” plugin.
- Activate and install the plugin.
- In WooCommerce, go to Settings > Integration and paste the tracking ID.
- Verify the installation status of the ID through your GA account.
Configuring Analytics for Your Online Store
Once you’ve installed and integrated Google Analytics, your next move is to set up its metric tracking and measurement features. To do that, simply
- Go to Settings in your GA account.
- Toggle Enable E-Commerce and Enhanced Ecommerce Reporting to turn them on and click Save.
- Navigate through the options to determine which settings you have chosen. Under each option, read the descriptions that tells how they will benefit your store.
If any of the useful options like global tags and error messages are unchecked, check them manually. If, however, you don’t need any of the checked settings, disable them. For example, if you’re a beginner, it is recommended to not check “Use Data Layer”.
From there, you can follow up on your site activity and track metrics through the GA sidebar. Aside from this, you can use Google Analytics for WooCommerce to achieve all manner of goals. Online stores can use it to
- Create custom metrics
- Validate their e-commerce setup
- Apply discounts to different event items
- Define goals, like completed purchases, subscriptions, or conversion tracking.
Aside from commercial considerations, Google Analytics integration can also help stores filter out unwanted data and finetune their marketing campaign. Plus, Google Analytics is compatible with other WooCommerce plugins, and the results are quite impressive.
With Salesforce integration, GA can help businesses pinpoint more profitable marketing channels and streamline attribution models that help understand customer journeys. Meanwhile, Google Analytics and Mailchimp can help you create more potent, results-driven email marketing campaigns.
Conclusion
For online stores, trying to sell without consulting website analytics is like navigating unfamiliar seas without a map or a compass. In this competitive market, Google Analytics helps WooCommerce businesses measure their performance and make more informed decisions to proceed.
So, with this guide, you too can guide your small business to greater sales and conversions.
8 Tips For Creating A Faster WooCommerce Checkout Page
When you go to a restaurant, you don’t necessarily expect the service to be lightning fast, as that wouldn’t be practical. But if your order takes an unreasonably long time to prepare and present, you’ll quite reasonably want to eat elsewhere next time. The same applies to online businesses, specifically those operating a WooCommerce checkout page.
In e-commerce, time is money. Online buyers tend to be even less patient than customers at a restaurant, and the competition to impress them is tight. Optimizing your checkout page for speed is the best way to accomplish this goal, and there are a few ways to do this.We’ll be discussing these strategies, as well as the importance of a quality WooCommerce checkout fields plugin.
Why A Quick Checkout Is A Winning Checkout
Speed is of the essence in e-commerce, and the checkout process mustn’t be a lengthy gauntlet for buyers to run. Obviously, it’s impossible to completely avoid cart abandonment, especially online where it’s much higher. But knowing what causes it can help online stores close the gap and sell more proficiently.
Managing WooCommerce checkout is the easiest way to do this if you know what the problem is. Online buyers don’t appreciate a slow checkout process, and are more likely to abandon their carts if they come across one.
This can be due to one of several issues, like server lengthy forms, payment or shipping hurdles, server downtime, or poor site performance. Whatever the reason, you need to assess the situation and prescribe a potent, lasting solution.
Plugins For Checkout Management
Like many other aspects of running an online store, expediting your WooCommerce checkout page can benefit from a dedicated plugin. The best tools are small business-friendly, professionally developed WooCommerce checkout field plugins that are easy to use, but also afford quality results.
How To Speed Up Checkout In WooCommerce
- One-Page Checkout
Shoppers might feel instantly overwhelmed by a checkout process spread across more than one page, or one that requires nearly endless scrolling. Instead, go for one page checkout in WooCommerce by deleting unnecessary fields and keeping things nice and condensed. Use autofill to help speed things up further.
- Create A Checkout Flow
Don’t just throw in checkout fields and radio boxes as you please. Build a stepwise process that offers a smooth journey from clicking “Add to cart” and confirming the purchase after payment.
- Conditional Logic
Use conditional fields or sections that remain or become unavailable or hidden unless your buyers fulfil criteria like cart totals or previous checkout actions. For instance, if a customer chooses a digital download, hide the shipping section.
This approach boosts customer experience and also helps achieve one page checkout in WooCommerce without sacrificing necessary fields.
- Use Custom Validators
Expedite online purchases by making sure that customers don’t make mistakes that require starting the process again from start. Validators ensure that the information entered in WooCommerce checkout pages, like emails, passwords, and others are accurate and error-free.
- Shipping Solutions
Transparency doesn’t just build trust among customers; it can also help cut down the minutes spent making your order. When listing shipping options, detail what makes them different like prices, delivery times, and added services like gift wrapping or express handling. This helps buyers make informed decisions more quickly without frustration.
- Payment Gateways
Multiple payment gateways are a staple of a good WooCommerce checkout page, but be careful when choosing. If possible, try to avoid gateways that redirect to a separate page or mobile app to complete payment. If the shipping or delivery address is already covered in a separate field, you can add a cash-on-delivery option that buyers can click to confirm.
- Multilanguage Settings
Many online customers may experience difficulty in navigating checkout if the page isn’t in their native language. This can lead to higher rates of cart abandonment. Tools like WPML can help speed things up by translating every single checkout detail, from text to strings and URL slugs. It also offers currency switching for maximum convenience.
- Responsive Checkout
Poor site speed and performance aren’t just bad for customer experience, but also for SEO. This becomes especially problematic for mobile users who are more likely to abandon checkout at a moment’s notice.
There are a number of steps you can take to make your checkout more responsive, like
- Choose the right host.
- Enable lazy loading for larger files.
- Caching.
- Image compression.
- Mobile-first web design.
Balancing Your Checkout Needs
Poor checkout speed can really spoil online shopping, but it’s not alone in doing so. A number of factors can lead to poor checkout, and focusing primarily or entirely on speed might not be enough to convince buyers.
To combat cart abandonment more effectively, you need to pinpoint the complaints that buyers have and fix them. A super-fast WooCommerce checkout page is no good without the following.
- No Hidden Charges
Be transparent when it comes to payment and shipping costs from the get-go. Surprise costs can drive customers away, never to return.
- Security
Validators, encryption, and secure payment gateways help protect your buyers from cyber threats, while trust badges offer them peace of mind.
- Flexibility
A customizable checkout process can cater to your buyers’ needs more effectively, leading to more sales.
Conclusion
Speed isn’t the only criterion of a functional WooCommerce checkout page, but it’s certainly up there in terms of importance. The faster your buyers can have their purchases at their doorstep, the better. And with the right WooCommerce checkout page plugin, you can expedite checkout without any knowledge of coding.
Setting Up Product Variations In WooCommerce In 2024: A Guide
Personalization is a common goal in e-commerce and for a good reason. It’s what helps online stores bridge the gap between online and in-person shopping experiences. One example of this is product variations in WooCommerce and other platforms for setting up online stores.
Providing variable products isn’t exactly a must for business, but they’re certainly a valuable addition to your product pages. These days, it’s hard to come across a store that doesn’t provide different versions of a product to its buyers. We’ll get into why that is in a moment.
Plus, there’s more to properly setting up variations than adding swatches of products in different colours or sizes. Let’s examine, starting with some basics.
Product Variants In A Nutshell
Variations of a product are the different shapes, sizes, colours, flavours, or other forms, or attributes that a product is sold in. These attributes can be “global”, meaning they apply to all products in a website, or “custom” for specific products or categories.
When discussing product variants, the most common examples include clothing, like t-shirts or pants, sold in different sizes or colour schemes. Others include sets of decorative stationery in different themes, like light, dark, seasonal, or minimalist.
Alternatively, product bundles could be sold as variants. For instance, when buying luxury gifts, rather than offering the gift box as an add-on, you can make its addition an attribute.
The point is that there are several different ways to present variable products in WooCommerce. These can have the same or different prices, cater to different audiences, or even be a marketing tool.
Advantages of Variable Products
Customer Satisfaction Through Choices
Getting different options for a product can improve shopping experiences for different buyers. In some cases, the decision to add variations can be optional, like phone cases in different shades. This can improve conversion rates down the line.
A Sales Booster
Then again, some product variations in WooCommerce might be the only way to satisfy some buyers. Let’s say someone is looking for vape products to move on from tobacco. Vaping is an acquired taste for beginners, and one single flavour might not cut it for everyone. But more than one different tasting product can cater to more buyers, thus increasing sales.
Fewer Returns
Online stores don’t love having their products returned, and many buyers aren’t too fond of making such a request. But if someone buys a pair of shoes online and they don’t fit, they don’t always have a choice but to return them.
At least with WooCommerce variable products, they can buy the right goods without a refund. In fact, variants make it so that customers can confidently make informed decisions from the get-go, reducing returns as well as cart abandonment.
Enhancing Store Appeal
Product variations in WooCommerce can help jumpstart your store’s image as a brand. For instance, beauty companies now sell products in much more shades than before, including darker ones.
This showcases their dedication to buyers who may otherwise struggle to find makeup that matches their exact skin tones. Such inclusiveness is just one way in which an online store can improve their image and appeal among consumers.
How To Add Product Variations in WooCommerce
As you can see, product variations are a staple for selling online. Setting them up is fairly simple, depending on the level of personalization and customer service you’re going for. There are three main methods of enabling product attributes and variations, and we’ll be going through each of them.
Method 1: Directly in WooCommerce
The default WooCommerce user interface allows stores to not only add products, but also customize them. This includes adding attributes and product variations in WooCommerce, which help categorize your products, beef up recommendations, and of course, set up variations. Here’s what you need to do.
- Through your admin panel, head over to Products.
- Here, you can add or edit new products. When doing so, go to the Product Data dropdown.
- Select Variable product.
- Now, go to Attributes.
- Either choose a global attribute or select the custom option to create a new one.
- Enter the attribute name and slug.
- Choose Select all if you want to add all the attributes to the product variations.
- Check Used for variations and Visible on the product page if they aren’t already.
- Click on Save attributes.
- Now, go to Variations and select your variations before adding images, information, SKU data, prices, and other details.
- Save changes.
Method 2: Through Coding
If you want flexibility and control of your product pages, coding is the way to go.
Here’s the set of code that you need to institute product variations in WooCommerce.
/**
 * Create a product variation for a defined variable product ID.
 *
 * @since 3.0.0
 * @param int   $product_id | Post ID of the product parent variable product.
 * @param array $variation_data | The data to insert in the product.
 */

function create_product_variation( $product_id, $variation_data ){
    // Get the Variable product object (parent)
    $product = wc_get_product($product_id);

    $variation_post = array(
        'post_title'  => $product->get_name(),
        'post_name'   => 'product-'.$product_id.'-variation',
        'post_status' => 'publish',
        'post_parent' => $product_id,
        'post_type'   => 'product_variation',
        'guid'        => $product->get_permalink()
    );

    // Creating the product variation
    $variation_id = wp_insert_post( $variation_post );

    // Get an instance of the WC_Product_Variation object
    $variation = new WC_Product_Variation( $variation_id );

    // Iterating through the variations attributes
    foreach ($variation_data['attributes'] as $attribute => $term_name )
    {
        $taxonomy = 'pa_'.$attribute; // The attribute taxonomy

        // If taxonomy doesn't exists we create it (Thanks to Carl F. Corneil)
        if( ! taxonomy_exists( $taxonomy ) ){
            register_taxonomy(
                $taxonomy,
               'product_variation',
                array(
                    'hierarchical' => false,
                    'label' => ucfirst( $attribute ),
                    'query_var' => true,
                    'rewrite' => array( 'slug' => sanitize_title($attribute) ), // The base slug
                ),
            );
        }

        // Check if the Term name exist and if not we create it.
        if( ! term_exists( $term_name, $taxonomy ) )
            wp_insert_term( $term_name, $taxonomy ); // Create the term

        $term_slug = get_term_by('name', $term_name, $taxonomy )->slug; // Get the term slug

        // Get the post Terms names from the parent variable product.
        $post_term_names =  wp_get_post_terms( $product_id, $taxonomy, array('fields' => 'names') );

        // Check if the post term exist and if not we set it in the parent variable product.
        if( ! in_array( $term_name, $post_term_names ) )
            wp_set_post_terms( $product_id, $term_name, $taxonomy, true );

        // Set/save the attribute data in the product variation
        update_post_meta( $variation_id, 'attribute_'.$taxonomy, $term_slug );
    }

    ## Set/save all other data

    // SKU
    if( ! empty( $variation_data['sku'] ) )
        $variation->set_sku( $variation_data['sku'] );

    // Prices
    if( empty( $variation_data['sale_price'] ) ){
        $variation->set_price( $variation_data['regular_price'] );
    } else {
        $variation->set_price( $variation_data['sale_price'] );
        $variation->set_sale_price( $variation_data['sale_price'] );
    }
    $variation->set_regular_price( $variation_data['regular_price'] );

    // Stock
    if( ! empty($variation_data['stock_qty']) ){
        $variation->set_stock_quantity( $variation_data['stock_qty'] );
        $variation->set_manage_stock(true);
        $variation->set_stock_status('');
    } else {
        $variation->set_manage_stock(false);
    }

    $variation->set_weight(''); // weight (reseting)

    $variation->save(); // Save the data
To simplify things, all you need is to tweak a few functions to achieve the desired results, as follows.
- Using wp_insert_post(), set the post type to ‘product’ and add your new product.
- Make your product ‘variable’ by adding that command to wp_set_object_terms().
- Add new attributes for the variable product through update_post_meta().
- For each variation, create a new post with the post type product_variation and set the parent to the ID of the variable product.
- Set the attributes for each chosen product variation with update_post_meta().
Coding is open-source and provides more options than the direct method with minimal side effects. But if you’re unfamiliar with PHP or WordPress hooks, as many store owners are, you might have to outsource this to a coding expert.
Method 3: With Plugins
A quality WooCommerce product variations plugin can offer the perfect middle ground between the first two methods. It offers the flexibility of coding without the complication of having to learn it.
There are many quality plugins to choose from. One of them is Variation Swatches by Cartflows, which lets you set up product variations in WooCommerce as little coloured icons. Once you’ve installed and activated it, here’s what you need to do.
- Through your admin panel, find and click the plugin.
- Under “Global settings”, set up your default variation and attribute settings.
- To add attributes, navigate to Products > Attributes and set up specifications, default functions, and your desired aesthetics.
- In the attributes table, click on Configure terms and add attribute names and slugs like specific colours or sizes.
- Go to Variations and select your variations before adding images, information, SKU data, prices, and other details.
- Save changes.
Key Strategies For Variable Products
Once you’ve set up your desired product variations in WooCommerce, the next step is to position and customize them effectively. Here are a few crucial steps that you’ll to take.
- Price Effetively
Know how to set different prices for your variations. Items in different colours can have the same price, but you’ll need to set different prices for products in different sizes or capacity.
- Bulk Management
Enable functions that allow you and your buyers to handle multiple product types at once, like editing or bulk orders. The Bulk Table Editor can help expedite this function.
- Quality Media
Use images for each variation that are high quality and consistent in terms of lighting, dimensions, and how they showcase the unique variant.
- Attributes As Categories
Make products easier to search by displaying global and custom attributes on the shop page. Product Table Lite let’s you do exactly that in the form of a user-friendly table.
Conclusion
For something that’s entirely optional, product variations in WooCommerce can revolutionize how online stores position their inventory. With the right tools and entrepreneurial mindset, you can find new ways to diversify beyond colours, sizes, and seasonal bundles.
WooCommerce Digital Downloads: A Complete Guide For 2024
Many online businesses find innovation to be quite rewarding. But sometimes it’s best to refer to the classics. For selling through the internet, that means optimizing your WooCommerce digital downloads mechanism. After all, not every valuable e-commerce interaction needs to come with a shipping charge.
But downloads aren’t just a convenient perk. They can be vital for business, and it’s important to have a plan in place for rolling them out. That’s what this guide is for.
Understanding Digital Downloads
Digital downloads are the different items that your buyers can purchase and download directly from the store. Like the physical products that you can order online, downloadable products are versatile. You can purchase everything from download electronic books and recipes to music, movies, software, etc.
While we’re on the subject of digital goods, it’s worth noting that downloads aren’t the same as WooCommerce digital products. The latter can include several items with a digital component but otherwise exist as a physical or non-downloadable purchase. These can be booking products, subscriptions, or services.
Setting Up Digital Downloads in WooCommerce
WooCommerce is a versatile and highly accessible platform for small businesses. Like many other actions, enabling downloadable products in WooCommerce is fairly simple. To do so, you have two options: either directly or through a WooCommerce digital downloads plugin.
Method 1: Direct Setup
The default downloads setup in WordPress is ideal for straightforward results. It requires no additional costs and allows users to save a range of items to their device. If you already have WooCommerce installed, here’s what you need to do.
- In Setttings, head over to Products>Downloadable products
- You’ll find three options for selecting a download method. These are
- Force download: Secure, no-URL download through PHP.
- X-Accel-Redirect/X-Sendfile: Secure, no-URL download; requires a module for handling larger files.
- Redirect only: Redirects to the download URL; quick and versatile, but not secure
Choose the download method that you think is ideal for your offerings or your audience. If you select one of the first two, enable Allow using redirect mode (insecure) as a last resort as a backup.
- In Access restriction, select how you want downloads to be available.
- Choose Downloads Require Login in order to restrict WooCommerce digital downloads to registered customers.
- Grant access to downloadable products after payment allows buyers to download once payment is submitted, i.e. before processing completes.
- Make sure that Append a unique string to filename for security is active by default. If not, enable it. This should make downloads more secure by attaching a unique, unguessable string of characters to it. This can be useful if you select the Redirect only download method to simplify things.
- Set up your WooCommerce digital products as usual. Set up descriptions, variations, pricing, and payment gateways, and configure the download settings.
- Save your changes.
Method 2: Use a Plugin
While the default approach is easy to set up, it’s not a very versatile choice. WooCommerce digital download plugins allow access to advanced download settings and more customization. Plus, if you wish to present catalogues of downloadable goods, this is the way to go.
Easy Digital Downloads is a premiere tool for this job as it is
- Easy to install
- Flexible
- Localized
- Secure
- Compatible with themes and tools, like your WooCommerce checkout fields plugin
- Comes with e-commerce reports
- Freemium
Once you have installed and activated this plugin, here’s what you need to do.
- Head over to Downloads > Settings in your admin panel.
- Configure location settings.
Note: Since you’re not shipping your downloadable products, the purpose of this is to comply with local tax and other guidelines when selling these items.
- In Payments, set up and configure your payment gateway.
- In General, adjust the currency settings if needed.
- To set up your download, go to Downloads > Add New. Here you’ll upload the file, which can be any type that WordPress supports. Afterwards, provide your download with
- A name
- A description
- Pricing (if any; free downloads can be established)
- Categories and tags
- Media, if necessary
- Choose a theme.
- In Downloads > Settings, under the Emails tab, customize your download emails with a greeting, logo, checkout form, etc.
- Save changes.
As you can see, plugins offer a lot more choices that WooCommerce cannot guarantee on its own. Aside from this plugin, you can opt for other downloads tools like MemberPress, Podia, and more. The overall setup scheme should be similar, save for some differences.Of course, when using a plugin, make sure that it’s compatible, not burdening your site, and actually useful for setting up WooCommerce digital downloads without becoming overkill.
Managing Digital Downloads
After enabling downloads, it’s important to revisit their effectiveness from time to time. To manage your downloadable products in WooCommerce, here are a few essentials.
Organize
Setting up categories, tags, and naming conventions makes it easier for buyers to search or keep track of certain downloads. Plus, you can paginate your goods to improve user experience without affecting load times or resource usage.
Test and Update
Regularly test that your download functions are working as they should, without any problems in completing downloads, security, or payment processing. If you’re using a plugin, make sure that it stays updated with your WordPress store.
Benefits of Digital Downloads
Downloadable products in WooCommerce can include free stuff like PDFs, or the usual premium goods like books, educational material, SaaS investments, and media files. In any case, enabling digital downloads has a number of advantages, as follows.
- Easy To Manage: You don’t need to invest in a shipping system or space for physical inventory.
- Promotional Prospects: Downloads are readily available to worldwide users, making them ideal for advertising or marketing purposes.
- Reduced Wait Times: Instant availability of products means that buyers won’t have to stay in wait.
Conclusion
WooCommerce digital downloads can offer just the boost that your business needs. They’re easy to set up, customizable, and can help you broaden your e-commerce offerings. With this guide, you too can leverage and make the most of downloadable products in WooCommerce.
How To Win The WooCommerce SEO Game, One Step At A Time
Being able to sell online may have levelled the playing field for small businesses, but it has also crowded the market. So, with competition at an all-time high, getting noticed won’t be easy. But in this journey, you’d be mistaken to treat the issue of SEO as a formality, as many businesses foolishly do.
Instead, think of it as an opportunity to stand out and innovate. With that in mind, before we dive into the essentials, let’s revisit some things.
The Go-Tos Of SEO, And Why They Matter
SEO encompasses all the tactics and tools that help your site achieve the spotlight in search engine results pages, or SERPs. WooCommerce SEO services should cover on-site and off-site strategies on the internet, as well as local SEO which we’ll get into later. In any case, the key to SEO success is to
- Understand your audience
- Assess your competition
- Keep it simple
- Avoid black-hat SEO at all costs!
The Ultimate Checklist For WooCommerce SEO
Consult Analytics
Instead of listing the first WooCommerce SEO services that come to mind, start by looking at the numbers. Tracking key performance indicators, or KPIs, can help you stay one step ahead of your competitors. These include conversion rates, load times, domain authority, backlinks, and more.
Analytics also help keep your keywords fresh and up-to-date. You can keep tabs on trending keywords relevant to your industry, popular among audiences, and distinct from your competitors.
RankMath offers a range of built-in analytics tools as well as a nifty dashboard to keep an eye on your SEO status. You can track everything from keywords to site impressions and content optimization. Plus, it also offers Google Analytics integration for a more insightful SEO campaign.
Optimize URLs
Incorporating keywords in your product page URLs can help boost impressions and make your site more search-friendly. To do that, simply focus on the “slug”, which appears at the very end of the URL. To modify your slug, simply navigate to the product page and click on “Edit”.
Another tactic is to translate URLs into languages spoken in overseas markets for multilingual SEO. WPML allows you to translate and localize every written inch of your website. That includes translating page slugs and formatting the URLs for each language.
Taxonomy Structure
In WooCommerce stores, and other websites, the taxonomies include the groups and labels that different pages fall under. These are mainly page categories and tags, and both are essential for SEO. Whether you’re navigating through menus and widgets or searching for a product, tags and categories speed up your searches.
But it’s not just about adding them. You need to
- Make sure that you only use groups of pages that are relevant to the brand or reflect popular keywords.
- Consider removing unnecessary taxonomies so that your sitemap isn’t crowded.
- If there are many pages, try dividing them into subcategories.
Winning Product Content
There is an art to showcasing your products, especially when visibility is on the line. Along with quality images, create unique and compelling descriptions that paint a clear picture of your goods.
The goal isn’t just to integrate as many keywords as possible. Detailed product descriptions are the best way to mimic the in-person shopping experience that e-commerce cannot otherwise provide. This can have just as much of an impact on traffic and rankings as your keywords.
Make sure that all your headers follow the proper hierarchy. Plus, use meta descriptions for each page to provide a quick overview. Make sure to keep them between 150 to 160 words.
Image Strategies
Quality visuals are everything in e-commerce, as they too help fill the gaps in virtual shopping. When using quality images, there are a WooCommerce SEO services that can make them more useful.
Alt Text
Alt text is essential, as it adds a text-based description to images. To make your web pages rank better, you can use alt-text to differentiate your products and highlight essential keywords. The Bulk Alt Text plugin helps you manage alt text appropriated from page titles, URLs, descriptions, and even keyword analytics like Yoast into each image.
Compression
You need to make sure that your images aren’t weighing your site down, as slow performance can drain rankings. Optimole offers compression formats like WebP and AVIF, which reduce image size without compromising quality. It also activates lazy loading, where larger images can finish loading later without slowing down the rest of the page.
Activate Breadcrumbs
Breadcrumb trails are a navigation feature that helps users know the page they’re on and the path that leads to the main page and the rest of the websites.
They’re an important part of your WooCommerce SEO strategy. They can ensure that your bounce rates remain low through a more user-centric design.
AIOSEO offers customizable, “smart” breadcrumbs, accessible through the user end as well as the shortcode. Simple “Enable” them and you can make navigation a breeze.
Go Mobile-First
Google priotizing mobile-friendly sites for SEO has been a relatively recent development. Nonetheless, optimizing your themes, checkout pages, forms, and other WooCommerce features for smaller devices can broaden your audience. This helps fuel SERP rankings.
Local SEO
Local SEO helps you boost not just site traffic, but also foot traffic to physical stores through online optimization. Yoast SEO specializes this through a number of features that help amplify local businesses. You can
- Showcase key details about your local store.
- Optimize information for each location.
- Bring contact details and Google Maps into one.
Smart Rich Snippets
Rich snippets are the added bits of information that accompany each entry in a search result. They allow your search engine to display information about a page based on what someone has searched for. This helps improve click-through rates.
“Schema markup” is what allows these snippets to show the relevant information on SERPs. Rank Math facilitates that with over a dozen schema markup models for phenomenal rich snippet integration, as well as FAQs and other features.
Conclusion
SEO is a must for online businesses, but it’s also an exciting and ever-changing challenge. Effective WooCommerce SEO enables stores to keep their business fresh and relevant. With these strategies, you can accomplish that goal on a more sensible budget and no added stress.
WooCommerce Hosting: An Essential Guide For Online Stores
Being online has changed the way businesses keep in touch with buyers. But while it has opened new doors for smaller online stores, it has also led to skyrocketing demands for the right solutions. Among them, proper WooCommerce hosting is a top concern. Hosting is important for all websites, but for online shops, it’s essential.
So, if you’re operating an online business, it’s worth knowing how to choose the right hosting provider. Understanding the importance of hosting helps accomplish that, so let’s begin.
The Importance of Hosting
A web host isn’t just a hub that supports your web content. It provides all the architecture to make sure that your online store is functional and customer-friendly. Of course, not all hosting solutions are built the same. You’ll find that quite a few may prioritize a few aspects of running a site more than others.
However, businesses cannot risk placing their valuable enterprises in the hands of subpar solutions. They need to select the best WooCommerce hosting solutions available to them. Luckily, you don’t have to understand the technical details of how hosting actually works.
Instead, focus on how hosting transforms the online shopping experience for the better. Here’s a some crucial advantages.
Cost-Effectiveness
Online businesses often struggle to balance earnings with the costs of running a business. A cheap, subpar host isn’t the solution. Instead, a reliable host helps you optimize costs and create a more profitable business in the long run despite its costs. Luckily, many quality hosts are available as freemium or highly affordable small business solutions.
Simplifying Management
Operating a store becomes much easier with strategic WooCommerce hosting. You risk less downtime and your data becomes more secure. Plus, since it’s budget-friendly, you can allocate your resources more responsibly when keeping your store operational.
More Scalability
Growth is a key goal for small businesses, and it helps to be able to expand your services without any disruptions. With the best WooCommerce hosting provider, this gradual transition becomes more seamless and suited to your budget and time.
Reliable Performance
A web host ensures that your website enjoys a more stable performance. So, users won’t complain about problems in loading speed and responsiveness. This helps preserve conversions as well as your SEO.
Availability
Unexpected downtime can put a real damper on the online e-commerce experience. It puts shoppers at an inconvenience and also disrupts the flow of a bustling business. Robust hosting ensures that your business is insured against these problems, and fights the root causes of downtime like poor speed, subpar server resources, outdated themes, or configuration issues.
How To Choose A WooCommerce Hosting Service
While it’s important to choose a WooCommerce host that suits your budget, don’t settle for the cheapest option out there. Stuff like cheap servers and shared hosting might look tantalizing, but they can be much more restrictive and less secure.
Start by focusing on the difference that effective hosting makes for websites. Then, make a list of important features that it should bring to your store. This helps you make a more informed investment in the health of your online store.
We’ve already discussed the importance of performance, scalability, and long-term financial savvy. Other than that, here are some essentials for choosing a host.
Key Factors to Consider When Choosing a Hosting Provider
- Dedicated Support: See that there’s round-the-clock support to help resolve any issues that may arise with troubleshooting and other issues.
- Security: Make sure that your provider has measures in place to protect your data, as well as that of your site visitors.
- User-Friendly Interface: Don’t just be wowed by the most aesthetically pleasing solution that there is. Look for hosting sites that value usability and UX for maximum customer satisfaction and back-end control.
- Cloud Services: From adding flexibility to your operations to offering a platform for securing valuable data, cloud-based hosting is a must for today’s online businesses.
Examples Of Quality Hosting Providers
SiteGround
SiteGround has emerged as one of the most versatile and in-demand names in hosting, especially for WordPress users. Its pricing suits small businesses, and it is known for its speedy, secure, and supported features.
Key Perks
- Easy setup
- Accessibility
- In-house performance optimization
Cloudways
Cloudways is the premiere WooCommerce hosting provider that specializes in cloud-based services. It too is a secure choice with a minimal learning curve for those with little extra knowledge. With cloud hosting, it further ensures top loading speeds and easier management, with 24/7 support as the cherry on top.
Key Perks
- Managed hosting services
- Automated backups
- Cloud support with DigitalOcean
GoDaddy
Aside from being the leading provider of domain services, GoDaddy is also a leading hosting service. It caters to WooCommerce stores through its solutions for managing inventory, shipping, and payment processing.
Key Perks
- Tools for client management
- AWS servers for maximum performance
- Free access to vast WooCommerce extensions
Hostinger
Hostinger is one of the best WooCommerce hosting providers for businesses of all sizes. You can create and personalize your online store in a flexible and controlled fashion. Choose from a range of hosting plans that best suit your budget, goals, and scope.
Key Perks
- Single-click installation for WordPress
- Managed hosting
- Domain connection
Best Practices For Superior Hosting
Image Compression
Use image compression formats to reduce the load on your server.
Caching
Improve speeds by caching every element of your website.
Managed Hosting
Save time and focus by outsourcing the bulk of round-the-clock host management services to dedicated professionals.
Regular Updates
Keep your WooCommerce and plugins updated to ensure compatibility and security.
Conclusion
The right hosting provider for any WooCommerce store is a decision where your needs and goals deserve top billing. Luckily, as we’ve discussed, some of the best WooCommerce hosting solutions are highly accessible, versatile, and don’t require that you be a technical whiz. Just understand how it makes a difference, and your e-commerce endeavour should be a success.
Bookings For WooCommerce: 5+ Must-Have Plugins For 2024
Selling online isn’t the only thing that WooCommerce has made easier. When consumers aren’t ordering items or paying for subscriptions or services, they’re making appointments and reservations. Therefore, many businesses must present a competent and straightforward WooCommerce booking system.
Now, bookings aren’t a new concept, but they’ve come a long way since the very first sold-out hotel. Modern consumers come with a lot more expectations and demand a more personalized and cost-effective system. For many in the hospitality and service industry, WooCommerce booking plugins are the way to go. Let’s examine.
Booking Solutions For WooCommerce
When you think online, or even offline, bookings, it’s not just hotels, restaurants, cinemas, and transportation providers that need a system for accommodating buyers. Simplifying bookings for WooCommerce is found in healthcare facilities, spas, boutiques, event planners, and much more.
There’s no default booking solution in WooCommerce, but worry not. There are quite a few plugins that can help businesses sort out a smooth system for appointments and reservations. But how does a hotel manager or restauranteur go about picking the perfect extension for their site?
Essentials For Online Bookings
If your business stands to benefit from a booking system, it’s worth running down some of the basics. Implementing a WooCommerce bookings solution is a serious investment. Luckily, it’s an achievable goal, as long as you can ensure the following.
- Set A Calendar
This is a given when it comes to setting up bookings for WooCommerce. Reservations and appointments are a time-sensitive procedure. So, a well-organized and dynamic calendar is crucial. It helps you manage and keep track of your scheduled bookings and maintain your operations and customer relations accordingly.
- Simplify Checkout
Some WooCommerce booking plugins may come with a built-in checkout management system. If not, you can always run yours with a user-friendly WooCommerce checkout fields plugin. Either way, to enable bookings and payments, you need a checkout form.
When putting one together, keep it simple, intuitive, and free of friction. Reservation abandonment is a real thing, and a compact, customer-centric checkout can help prevent it.
- Notifications And Reminders
Keep your customers in the loop about their appointments in WooCommerce. Implement a booking system that, after making a reservation, activates routine notifications. These can work as a reminder of forthcoming events or appointments, or alert customers of any update, rescheduling, or cancellation ahead of time.
- Payment And Processing
When adding payment gateways to the booking form, don’t just add as many as possible. Make sure that the methods of payment are secure, accessible, and inclusive. Use plugins that support efficient payment processing that is compliant with legal guidelines and industry standards.
- A Management Plan
Prepare a detailed plan to map out how you intend to handle your accommodations and bookings in WooCommerce. This leads to a standardised approach to improving customer relations and interactions.
- Time Blocking
Many businesses end up overbooking or okaying clashing appointments. This is often due to requests that become granted outside of work hours when there’s no one to properly verify availability.
To rectify this, “time blocking” or “holiday blocking” helps lower the number of bookings to a more manageable extent. Businesses can block requests for appointments in WooCommerce during lunch breaks, leaves of absence, holidays, or outside office hours. This leads to greater ease for everyone involved.
Plugins For WooCommerce Bookings
- WooCommerce Bookings: The Powerhouse
WooCommerce Bookings is a powerful plugin that turns your site into a fully functioning reservation system. Highlights include an intuitive interface that simplifies navigation. Plus, it offers flexible scheduling through customizable WooCommerce booking options that cater to different business models.
It allows you to create and manage all types of bookings with ease. The plugin also supports multiple payment gateways and has a customizable booking form. Plus, it’s very much compatible with the MyTravel tours & hotel bookings WooCommerce theme, which is a top choice for many.
- Bookly: A User-Friendly Tool
Bookly offers a fully customisable interface that provides a professional, customer-centric booking experience. It enables automated notifications, a built-in calendar, and the ability for buyers to make direct payments.
- Sales Igniter: The Versatile Pick
Sales Igniter can handle any type of booking thanks to its tailored approach to building a booking system. It offers appointment management, custom pricing, and integration with multiple payment gateways. Plus, it’s the perfect match for a variety of existing WooCommerce setups.
- YITH Booking and Appointment: A Feature-Rich Solution
It’s adaptability enables the YITH Booking and Appointment to offer a robust booking strategy suited to all manner of businesses. Its basic capabilities include booking management, confirmations, and payment gateway integration.
Beyond that, it offers multilingual and multicurrency support. So, you can accept bookings and appointments in WooCommerce from a more diverse audience.
- Amelia: User-Centricity Galore
Built with simplicity and functionality in mind, Amelia is a WooCommerce booking plugin that truly prioritises UX. From its booking management system to automated reminders, it’s a winning booking solution. Plus, it combines a modern, aesthetically stunning interface with real-time availability updates for maximum ease of use.
- WpRently: A Cross-Industry Solution
WpRently is the tool you need whether you’re running a resort, booking patient appointments in WooCommerce, or renting out vehicles, space, machinery, or even clothing. For customers, it comes with real-time availability updates, flexible pricing, and a responsive booking interface. For businesses, it combines state-of-the-art insights with robust rental management.
Conclusion
Managing appointments for WooCommerce can be a tricky process. However, having a system can help, and choosing the right WooCommerce booking plugin makes your operations more efficient. That way, you can focus more time and energy on ensuring a positive customer experience. It’s a win-win!
Create The Perfect WooCommerce Coupon Strategy For Your Store
Nothing improves an exciting shopping spree, or even a menial little purchase, quite like a good deal. Stores can use these incentives to their advantage, both offline and online. For many online businesses, a WooCommerce coupon strategy can work wonders for improving customer relations.
Of course, a secret sauce cannot work its magic without the right recipe. Coupons aren’t exactly a necessity for online stores. Some might argue that your store doesn’t even need to offer any. But in fact, a tactical approach to e-commerce incentives can be a win-win for shops and shoppers alike. Let’s examine.
The Popularity Of Coupons In E-Commerce
You could be an online store, booking website, or streaming service. In any of these cases, coupons present a versatile way to spark promising interactions with your target audience. The secret is to market and position your coupon deals effectively.
A robust WooCommerce coupon solution should work well for small businesses just as it would for a larger company. Some of the crucial benefits of a proper strategy include
- Greater Sales: Be the discount is fixed, percentage-based, or in the form of a get-one-free deal, it increases the chance of conversion. This can contribute to steady sales growth.
- Promoting Your Business: Coupons are a surefire way to impress new or existing buyers. Enough of them may happily spread the word on your behalf.
- Store-Customer Relationship: Loyalty programs and reward schemes are a great way of showing your appreciation to buyers. This, combined with an effective audience profile, boosts customer lifetime values and yields a stronger base of target buyers.
- Strategic Marketing Applications: You can tie WooCommerce coupons and promotions to particular goods or audiences. This enables you to tailor your marketing for more targeted conversions.
Basics of an Efficient Coupon Scheme
Despite their benefits, coupons work best if you have a plan to present them. After all, you’re not just providing buyers with a better deal. A coupon scheme is optional, but implementing it can be costly. To actually profit from one, you need to play your cards right, and here’s how.
Define Your Goals
Understand what the purpose of your WooCommerce coupons is. Are you hoping to boost sales or expand your audience? Plus, it’s worth noting that some businesses don’t need coupons. If your product is already in high demand or if your profit margins are a bit slim, coupons are entirely optional. A proper roadmap can lead to a successful campaign.
Create Attractive Offers
Seize the chance to go all out on your offers from time to time. Consider get-one-free deals or discounts of over 50%. Tailor your deals to suit different buyers in order to target them more effectively.
The soul of any coupon strategy lies in the offers it presents. From percentage discounts to buy-one-get-one-free deals, understanding the different types of offers allows you to tailor them to your audience effectively.
Set Clear Terms & Conditions
Make sure that the advertised offer is clearly written and accurate. List every detail, from the exact discount to any terms and conditions to ensure a positive experience.
Promote Your Coupons
To spread the word of incoming deals, use a mix of marketing channels to promote your store. Use product feeds, social media, or search engine ads to announce your WooCommerce coupon deals
Simplify Redemption
Redeeming coupons is fundamentally like any other interaction your audience will have with your store. So, the process must be clear and free of friction. Ensure that things are straightforward to prevent customer frustration.
Best Practices for Providing E-Commerce Coupons
Personalized and Time-Sensitive Strategies
Targeted WooCommerce coupon strategies are a common attention-grabbing tactic for stores. Online stores can make their campaigns more effective and foolproof through user data and information. Personalization can lead to greater clicks and fosters a healthy customer lifetime value for lasting conversions.
Another strategy is creating FOMO through the use of time-sensitive offers. This works well for new customers looking for a bargain, further helping improve your client base.
Enhancing User Experience
Gamification adds an element of excitement to the coupon redemption process. It makes the interaction more dynamic and offers more insight into the buyer’s preferences and behaviour. This, combined with a user-friendly process, helps improve customer relations in the moment as well as down the line.
Leveraging Social Media and Referral Programs
Make use of social media feeds to spread out your WooCommerce coupons. Consider segmenting your customers or subscribers and tailoring their gifts accordingly for maximum impact. Consider referral programs to incentivize buyers to help increase your visibility and reputation.
Recovering Lost Sales and Encouraging Repeat Business
Coupons can help stores regain losses from cart abandonment. Use email campaigns to remarket cart items as part of a get-one-free deal or discounted prices. Alternatively, you can consider implementing post-purchase coupons to encourage repeat business.
Bundled Discounts
Use package deals across your product recommendations and cross-selling scheme to help buyers increase their cart orders. This offers them a bargain and enables you to improve your average cart totals.
Invest In Coupon Tools
To simplify adding and implementing a WooCommerce coupon scheme, consider using specialized plugins for this job. The best coupon plugin for WooCommerce is one that
- Enables coupon customization
- Streamlines redemption
- Can set up dynamic pricing and discount rules
- Offers transparency
- Sets up Woocommerce Coupon codes and URLs
- Doesn’t affect the performance of your store
The following are some tools worth considering.
- Implement a store-wide discount scheme
- Cart total-based offers
- Bundle deals
- Conditional pricing
- Set up free products
- Custom BOGO deal variants
- Shipping-based coupons
- Giveaway deals
- Enable shortcode and URLs
- Sets up coupons based on user roles
- Implements buy one, get one, or BOGO, deals
- Enables store credit options
- Adds coupon conditions for error-free usage
Conclusion
A well-planned strategy for WooCommerce coupons isn’t just any old marketing tactic marketing tactic. It’s a way to propel your conversions, outreach, and long-term customer relations. So, why turn a simple discount program into a win-win for you and your buyers?
WooCommerce CRM for Small Businesses: Top 8+ Tools For 2024
Part of running a successful shop, be it physical or digital, is the rapport between the owner and his clientele. Thus, creating an online store demands a WooCommerce CRM strategy. With the explosion of internet shopping, CRM, or customer relationship management, has evolved from a central concept to a vast industry.
Luckily, sustainable CRM for small businesses can be an achievable goal. The emergence of specialized tools has helped level the playing field, even for those who are hearing about CRM for the first time. Speaking of which…
A Quick Refresher On CRM
Things like managing roles, user complaints, rewards programs, and personalization all fall under WooCommerce CRM. Effective CRM for small businesses helps strengthen the usual connection between businesses and their audiences.
This is important as, despite their benefits, online stores often fail to capture the in-person shopping experience. And that’s a big deal, given how most e-commerce conversion rates are around a tenth of what brick-and-mortar retailers enjoy.
Types Of CRM
Based on the task or goal at hand, some experts divide WooCommerce CRM strategies into three types: operational, analytical, and collaborative.
- Operational CRM focuses on the main store operations, like sales, marketing, and different in-store services. This might include implementing a helpline at checkout or overseeing automated emails.
- Analytical CRM uses data like user behaviour, store analytics, and sales records to aid in decision-making. This information becomes useful in recommending products, segmenting buyers, and predicting future sales trends.
- Collaborative CRM works by dividing specific tasks related to a common goal across departments or experts. For instance, when launching a product, product development and marketing professionals, among others, would team up for an impactful presentation.
These are the more well-known trio in the realm of WooCommerce CRM, as well as other platforms. However, many also recognize the fourth type of CRM, which is strategic CRM. This approach involves building CRM tactics with the customers’ needs on top of the list of priorities.
CRM Essentials – A Quick Guide
Setting up CRM for a small business, the best course of action is to define your goals and needs. These include
Contact Management
Tracking user contacts in the form of emails, cell numbers, and other contact delils
User Interaction Monitoring
Recording and assessing a user’s journey across your virtual storefront.
Managing Leads
Keeping an eye out for opportunities for converting buyers or landing a lucrative sale.
Email Strategies
Using email campaigns platforms to finetune marketing or communication and tracking analytics.
Task Management
Setting up and allocating tasks, schedules, and deadlines for more efficient store operations.
Reporting and Analytics
Measuring the success of your campaigns and operations by assessing user and store stats and auditing past performances.
Customization And Personalisation
Creating a unique and tailored navigation and e-commerce journey, using the data compiled through analytics and interaction tracking.
Must-Have CRM Tools For Your WooCommerce Store
The Zoho CRM system is one of the premiere e-commerce tools for entrepreneurs and smaller stores. It supports everything from lead management to automating your workflow. If you intend to grow your business, it provides many useful capabilities for free, and much more for a reasonable price tag.
Plus, it’s easy to use. Connecting WooCommerce to Zoho CRM requires no added setup and takes a few minutes. With it, you can streamline lead generation and design the perfect WooCommerce CRM ecosystem.
Jetpack provides a straightforward CRM for small businesses that gives you full control of how your store interacts with customers. Highlights include sublime client management, transaction tracking, and a built-in lead generation tool.
Ninjodo allows stores to scale their CRM strategies per their changing needs. You can use it to automate your email marketing, adjust your workflow, and revamp your upselling game. So, you can regain lost customers, win over new ones, and boost average cart orders. As a WooCommerce CRM solution, Ninjodo also supports webinars and Slack privileges. What’s not to like?
As a one-stop shop for running a conscious and dynamic business, Salesforce is certainly one of the more notable names in the business. While the pricing is on the higher end for enabling CRM for small businesses, you certainly get your money’s worth.
If the theme of your e-commerce goals is productivity, this tool very much delivers with both hands. It provides robust contact management, and user data services, and even offers training resources.
The marketing side of CRM can be a tireless, often tedious process. So, why not automate your campaigns and subscription offerings through FluentCRM? You can save yourself the effort while adding some much-needed efficiency to your operation.
Plus, FluentCRM offers much more as a WooCommerce CRM juggernaut, like centralized customer management, segmentation, automated imports, and analytics.
HubSpot is another recognizable name in effective and robust CRM for small businesses. Its WooCommerce integration capabilities are just one of several benefits for businesses aiming to align marketing and sales efforts.
This plugin provides several useful and innovative avenues for building leads. From newsletter campaigns to versatile forms and live chat, it opens many doors for high-converting interactions.
Agile CRM for WooCommerce offers a virtual toolbox for taking your conversion tactics to the next level. It combines customer tracking and campaign development as the flagship ingredients for potent and laser-guided CRM for small businesses.
Its basic tools include contact management, mobile-friendly WooCommerce CRM, and a virtual documentation and calendar service. It provides a platform for collaboration through e-mail and joint chat, along with dozens of marketing resources and productivity solutions.
ReadyCloud is a workflow powerhouse suited for businesses that are looking to boost efficiency. Need to effectively segment your audience? Looking for a pioneering shipping solution that needs no third-party maintenance? These are just a few perks of this tool.
This easy-to-use WooCommerce CRM tool offers a range of critical solutions that many small businesses wouldn’t otherwise enjoy. You can create customer profiles for more targeted interactions, set up events and tasks, and experiment with different marketing models. It’s a holistic game-changer like no other.
Odoo comes through with a modular approach to WooCommerce CRM, enabling businesses to enjoy a more integrated approach to contact management and analytics. It provides state-of-the-art monitoring tools, order management, and enabling personalization through customer data, resulting in more conversions.
Conclusion
CRM for small businesses is easier and more necessary than ever. To make the most of it, you must understand your needs and choose tools that can help you set achievable goals. So, make the most of these CRM solutions and grow your online store for the long haul.
How To Set Up WooCommerce Payment: Step-by-Step Guide For 2024
With e-commerce dominating the market, the barriers to selling online have gotten easier to conquer. Setting up an online store should be your ticket to a stable income. However, there’s a lot more mapping out a proper WooCommerce payment strategy than that.
While online businesses enjoy greater reach, their average conversion rate is a mere fraction of what brick-and-mortar retailers bring in. A step-by-step approach ensures a seamless and high-converting payment mechanism. To do that, it’s important to understand what can go wrong here.
Step 1: Identify Key Issues
The ultimate goal of enabling payments in WooCommerce is to ensure a seamless and high-converting payment mechanism. To do that, it’s important to understand what can go wrong here.
Payment Gateway Setup
Getting payment gateways just right can be a tricky balance. Common problems include poor compatibility, limited scope, or problems with setup or updates. Failure to address these issues can frustrate buyers and lead to cart abandonment.
Theme Incompatibility
The WordPress theme serves as the backbone for a functional WooCommerce shop. Sometimes, your WooCommerce payment integration can be hampered due to incompatibility with the theme.
Transaction Delays
An optimised system of payment should allow for quick and efficient transactions. If your store isn’t built to withstand large traffic or other unusual activity, your customer might experience delays in order processing. Misconfigured payment settings can also lead to this issue.
Payment Fraud
Cyber threats put your business and your customers at risk. Payment gateways require vetting that ensures they don’t lead to fraudulent transactions or any type of online theft.
Step 2: Key Considerations
Being able to sell online becomes much easier with the right planning. To create a payment system that works, remember the following points.
Offer Multiple Options
It’s not just a matter of inclusivity. More payment gateways ensure that online stores can increase their source of revenue. If a buyer has trouble purchasing with one gateway, a backup portal ensures that the transaction can be completed.
Selecting Payment Gateways
The best payment gateways for WooCommerce stores tend to align with their business model and target audiences. So, there are multiple things to consider when choosing gateways, like transaction fees, global availability, active currencies, and compatibility with WooCommerce payment integration.
Preventing Cart Abandonment
Cart abandonment can arise due to a range of issues surrounding payment. From checkout-related friction to lack of transparency, different customers might be put off by different things. Test your checkout and uphold a customer-centric approach to your payment system.
Step 3: Setting Up WooCommerce Payments
WooCommerce offers several channels for accepting payments, both on and offline. Let’s discuss how to make the most of them.
Integrate Payment Gateways
Online payment gateways exist in the form of plugins that should seamlessly integrate into your checkout page. Adding each of them might involve some distinct steps, but the overall process is similar across these gateways. Strip and PayPal are two of the most popular options for WooCommerce payment integration.
To activate Stripe in WooCommere, make sure that you have an account registered and are using the latest updated version of either plugin. From there, just go as follows.
- From the admin panel, go to plugins and search for the Stripe Payment Gateway.
- Install and activate the plugin.
- Go to Payments in Settings.
- Turn on “Stripe (Credit Card)” before logging into your Stripe account.
- Click on Manage and go to Settings.
- Click the “Enable Stripe” option to activate the gateway.
- Configure the API keys and test webhooks to your liking.
You can apply some version of this sequence for adding most payment gateways to WooCommerce. For instance, along with Stripe, you can set up a Squareup WooCommerce payment gateway as well. Just make sure to test your gateway and ensure that it suits the needs of your store and customers.
Activate Offline Payments
Offline transfers make it easy for buyers to complete a purchase without a Wi-Fi signal. WooCommerce offers three options for enabling offline payments, which are
- Card transfers
- Payment by check
- Cash on delivery (COD)
Enabling these means of payment offers greater flexibility and options to buyers who are momentarily short on credit or the Internet. To activate them, simply go as follows.
- Navigate Settings in WooCommerce.
- In Payments, find and toggle each of the three offline payment options.
- Click “Finish set up” to configure each option.
- Add titles, descriptions, or any required instruction to each option.
- Check “Enable” for each payment method.
- Save your changes.
Be sure to streamline each offline payment method for the best results. For instance, you can enable COD for virtual orders, or place an address where you can send a check.
Step 4: Fine-Tune WooCommerce Payments
Once you’ve set up the payment mechanisms, the final step is to keep them functional and customer-friendly. Here are a few key things to remember.
Currency Conversion
Tools like WPML offer currency-changing capabilities at checkout. So, you give overseas buyers the option to pay in their local currency. When implementing multiple currencies, make sure to test the conversion rates and maintain clarity and transparency at checkout.
Collect Recurring Payments
This is more of an optional step, but absolutely worth considering. With your payment mechanism set, a subscription-based model can prove to be a win-win for sellers and buyers alike.
Collect recurring revenue and offer a valuable product, along with some perks like discounts or free newsletters or gifts. Crucially, however, don’t force buyers to subscribe. Keep it optional and let them decide what’s best for them.
Security Measures
Invest in robust online security with SSL certification and two-factor authentication. The promise of safe transactions is a central requirement for collecting payments online. It also helps stores stay on the right side of online compliance guidelines.
Update And Monitor
Multiple payment gateways mean that your store has a lot of activity that needs to go smoothly. Routine testing and updates make sure that the performance, presentation, and security of your WooCommerce payment gateways remain up-to-date.
Guest Checkout
Make sure that non-registered buyers have the same access to your payment offerings as your loyal subscribers. This increases sales and further lowers the risk of cart abandonment.
Conclusion
Planning a foolproof WooCommerce payment setup is important for online stores. With e-commerce shoppers harder to impress than ever, a little effort goes a long way. Keep your payment options convenient, well-managed, and inclusive. A diligently thought-out payment strategy is just what your store needs to thrive.
Automate Your Store Through WooCommerce: A Small Business Guide
Creativity and innovation have allowed hundreds of small businesses to thrive online. With the right mindset, they too can now enjoy the same luxuries as more established e-commerce ventures. This includes automating stores in WooCommerce for greater efficiency.
For SMEs, this isn’t just a question of convenience and clocking out early. A smaller budget often means less staff to handle your more menial and repetitive tasks. But that doesn’t make balancing core responsibilities with stuff like marketing, site backups, or CRM any less difficult.
So, to make selling online more streamlined and free of fuss, automation is a solution that isn’t limited only to larger companies. But how does a small-scale e-commerce store approach this effectively?
Automation Through WooCommerce
WooCommerce does a lot more than provide the basic materials to build a virtual storefront. With it, you can tailor your shop to perfection. This includes being able to set up certain important, but tedious, tasks to be automated.
Several WooCommerce tools let you do this. Some are dedicated entirely to automation while others work that feature into a larger, more focused e-commerce strategy. But before we get into those, automation isn’t something to dive straight in if you’re a novice.
Sure it’s helpful, but only if you do it right. So, it’s worth understanding the basics of running an automated store.
Things To Consider
Know What To Automate
Automation in e-commerce is usually done to make a task more convenient more effective, or both. However, you need to understand which tasks would benefit from it and which won’t. Let’s take WooCommerce social media marketing automation as an example.
You can schedule notifications, ads, and DM messages if you’re sending too many followers at a time. However, for a post or a story, it’s best to take things head-on, even if you plan on using an AI-powered copywriter.
Choosing Tools
Many plugins offer automation capabilities, including those compatible with or hosted on WooCommerce. But before you burden your online store with them, take into account their value to your online store.
Steer clear of plugins that have poor compatibility or add friction to the task you’re trying to automate rather than eliminate it. Consult reviews and ratings to rule out any technical and security issues when downloading or using any automation software.
Long-Term Considerations
Automating stores isn’t a perk that lets businesses escape from responsibility. It is meant to help advance your business. Update your store regularly and test to ensure that your automated processes are running smoothly. As your business evolves, make sure that your online store can keep up.
What Can You Automate, And How?
Inventory Management
Keeping track of your stocks and products helps buyers fill up their carts and finish their purchases more quickly. Automated store inventory helps keep your books in order and your buyers satisfied without the need to keep an eye on them yourself.QuickBooks specializes in automating various financial and stock-related responsibilities. Thanks to its centralized, cloud-based inventory tracking, stores can keep their full range of goods in order with minimal stress.
Email Marketing
Tools like MailPoet make it easier to plan WooCommerce email automation for your campaign. You can set up custom templates and schedule them based on given intervals or customer actions.
Map out welcome emails, newsletters, notifications, alerts, and much more. It’s also useful as it helps with automated cart recovery emails and upsells, improving sales and conversions.
SEO
SEO is a continuous process that demands tireless keyword analysis and competitor research. But these are the things that store owners or a resident SEO expert should tackle head-on. How can you automate your pursuit of higher rankings?
Yoast SEO can take several important tasks off your hands. It can output insights that can help store websites improve copies for rich snippets. You can also plan meta tags and optimize XML sitemaps with this tool. So, you can satisfy Google’s crawling requirements without having to constantly dive into the little details by yourself.
Order Fulfillment
A few things fall under “order fulfilment”, like drop shipping, order processing, shipping rates, and more. WooCommerce offers a few built-in functionality to automate store fulfilment duties. Aside from those, you can use tools like ShipStation for more robust results.
Backups
The risk of outages or a security lapse make backups essential. But routine backups can become a chore to oversee. Even if they aren’t that frequent, they can be time consuming and hard to plan or look forward to. Luckily, automated store backups are super easy to ensure.
Backups are often at risk when a WordPress store must undergo a major update. To combat this, UpdraftPlus is a useful plugin for WooCommerce stores. It performs automatic backups ahead of pending updates, ensuring that your data and progress remain intact.
Advantages Of Automation
Eliminate Friction And Errors
Automated stores are less likely at risk of human error, as they enjoy a more streamlined mode-of-action. Plus, automation significantly speeds up tasks that may otherwise take time to complete, like managing inventory or sending stock email reminders.
Personalization
Product recommendations and marketing are important strategies for boosting sales. Automation fuels greater data collection and email marketing campaigns that can help create tailored shopping experiences.
Round-The-Clock Operations
Through automated store functions, buyers from any time zone can interact with an online business at their leisure. From customer support to order fulfilment, you can offer a more substantial customer experience while performing your own management duties at your convenience.
Conclusion
It doesn’t matter whether you’re sending out welcome emails or ensuring that your site backs up on time. Automating stores can help businesses save money, increase conversions, and eliminate inefficiency from every aspect of their venture. And thanks to WooCommerce, automation is a luxury that even growing businesses can make the most of.
Starting An Online Selling Business: A Store Owner’s best Guide
It’s been a while since e-commerce took the world by storm. However, the practice of running an online selling business has come a long way since. Even with increasing competition, resourceful shop owners are able to make the most of growing trends and niche markets.
For many, what seems like an uncertain future can be a time of opportunity. In this arena, WooCommerce has played a key role in levelling the playing field for selling online. More and more small businesses and entrepreneurs can find their place across all manner of industries.
To make the most of this, it’s worth understanding the strategies and tools that can lead online stores to e-commerce success.
The Perks Of Selling Online
Improved Accessibility
This benefit is twofold. Firstly, an online selling business is better positioned to reach new commercial audiences and B2B partnerships. Secondly, you don’t need to be a massive conglomerate to get noticed either.
Platforms like WordPress are versatile, robust, and, crucially, open source. You can design the perfect online store with a sensible budget fit for a small business.
More Sales And Marketing Channels
The magic of good marketing has been known long before the internet arrived. So, an online business has multiple avenues to make itself more visible and boost sales. From SEO and social media to affiliate marketing, Google Ads, press releases, and local advertising, the possibilities are endless.
Financially Sound
Even with free platforms like WooCommerce, e-commerce has its investments and long-term costs. However, to buy and sell online, businesses don’t need the massive down payment that many physical retailers have to cough up. You can allocate a suitable amount of resources to web hosting, store development, worker compensation, and other purposes.
Personalizable E-Commerce
Forms are a staple of online shopping, whether you’re logging into a store website, navigating checkout, or taking a survey. These forms are an excellent means to collect customer data that would otherwise be close to impossible in person.
With this information, stores can personalize and finetune their customers’ shopping experience for more convenience, value, and satisfaction. You can tailor everything from themes, navigation, and checkout to store policies and marketing products.
Sell Niche Goods
Having an online selling business offers access to customers and buyers whose demands transcend geographical barriers. You can sell unique, limited edition, and specific goods and services to meet the needs of customers that other store cannot.
Easier Remarketing
Being able to track user behaviour to improve your sales and conversions is a serious perk of selling online. You can use the information you have to amplify your returning customer base. Use email marketing and personalized ads to reach out to online window shoppers and remarket abandoned carts.
Shopping Comparisons
Being able to compare goods makes shopping much more exciting for many. With online selling businesses, buyers can quickly and comprehensively compare different products in terms of pricing, model, discounts, and more. This has two major benefits.
For a start, this upholds the transparency that builds trust in your customer base. Plus, it compels different online businesses to adjust their competitive pricing and marketing strategies. This makes for a dynamic and exciting e-commerce scene that keeps buyers tuned in and ready to spend more.
Customer Service Opportunities
Platforms like WooCommerce offer several solutions for businesses to keep in contact with their followers. You can set up channels for responding to queries and complaints more quickly. Plus, you can offer flexible pricing, loyalty and rewards programs, and product recommendations to maintain optimal customer relations.
Interacting with customers is pivotal for any business. WooCommerce provides a platform for direct communication, ensuring timely responses to inquiries and concerns. Exceptional customer service can be a key differentiator in the crowded e-commerce landscape.
The Best Ways To Sell Online: A Guide
Choosing A Platform
Let’s start with the essentials. To effectively buy and sell online, you need the ideal platform. Aside from WordPress, there are plenty of ways to start. Squarespace and Wix also allow you to design stunning websites. And if you’re hoping to grow your thriving business online, Shopify is an excellent choice.
However, WooCommerce can also provide exceptional service and functionalities free of cost. Sure, you may encounter some costs like integrating plugins and marketing your businesses. But these are more reasonable for small businesses and solo entrepreneurial ventures.
Hosting Your Store
A web host is the backbone of any functional website and is critical for running an online selling business. A good web host is one that is
- Flexible
- Performance-friendly
- Secure
- Highly compatible
- Full of useful features
Woo Express is one of the best WooCommerce hosting solutions, as it uses existing WordPress architecture to support your business. So, you can design a fast, secure, and highly customizable online store without a third-party service.
Setting Up An Audience Profile
Instead of wasting marketing revenue on those who won’t be buying from you, why not focus on your most compatible target market? The ideal audience profile, or buyer persona, represents customers for whom your products, services, and brand values are perfectly suitable.
By catering largely to them, you can save on marketing and customer acquisition and retention. This approach guarantees lasting conversions and a community of loyal customers.
To target these audiences, you must either find or fully understand them. Carry out market research and use analytics to understand their behaviour and preferences. Reach out through social channels and online forums.
Marketing And Outreach
WooCommerce provides the ideal toolkit for connecting with audiences and understanding their pain points. You have a number of options, like organic SEO or paid ads in search engines, social media, and other feeds. Email marketing is another useful approach, for which tools like MailPoet are perfect for small businesses.
Product Presentation And Management
Online selling businesses can benefit from an intuitive system for inventory management and product presentation. Using high-quality media is a great way for showcasing different product angles and variations.
Meanwhile, inventory management tools help WooCommerce stores keep track of their stock. This makes for easier order fulfilment and introduces ways to back up and manage important store data.
The Cart-To-Doorstep Pipeline
To avoid abandoned carts, make sure that your checkout process is transparent, flexible, and convenient. Small businesses could benefit from a quality WooCommerce checkout field editor free plugin to overhaul their checkout forms, pricing, and shipping policies.
Conclusion: Online Selling Business
Starting an online selling business has become easier than ever before. And with the right tools and techniques, you can put together the complete flowchart of starting, running, and maintaining a flourishing WooCommerce business.
Build With WooCommerce: How To Revitalize Your Online Store
There is no constant in running a successful business. Without investing in your store and shaking things up from time to time, you’ll have no chance against your competitors. Building with WooCommerce offers a great start to your journey. But getting it right takes a generous dose of effort, with a side of trial-and-error.
Understanding what makes a business pop out is essential to any WooCommerce strategy. Unfortunately, there are too many ways in which your marketing or shopping experience can fall flat. So, when building a website with WordPress, take a moment and focus on getting every little and large detail right. Let’s discuss.
The Untold Struggles Of E-Commerce
Transitioning to selling online is famous for being easier than opening a physical store, which in some ways it is. But in the same breath, it’s not practical to overlook what makes e-commerce uniquely or similarly challenging. If you’re an aspiring WooCommerce e-tailor, here are some things to be concerned about.
Technical Challenges
Technical difficulties are a given when operating an online store. WooCommerce is a robust and highly useful e-commerce solution, but it’s by no means perfect. Without proper security details and optimization, WooCommerce stores frequently fall behind in securing conversions.
Marketing Struggles
Advertising is a practice as old as time, but the internet brings some unique benefits, as well as struggles. On one hand, there’s access to much more innovation in marketing. On the other, you’re faced with a greater volume of rivals. This, combined with the lack of experience and crucial marketing pitfalls, can offer a disadvantage.
Staying Competitive
Speaking of market rivals, making yourself known among your audiences requires more than a marketing plan. Setting up handsome product prices isn’t always enough. You need a more holistic WooCommerce building strategy that sets you apart.
Fundamental Rules Of Selling Online
Have Control of Your Storefront
Store management is a significant responsibility, both on and offline. You need to be able to handle your various operations in a way that helps preserve your identity as a brand or a business. Plus, it helps you manage your inventory and finances more effectively, from knowing how to balance spending and how to display your products through WooCommerce.
Emulating In-Person Shopping
Even with the rise of e-commerce, there’s a certain appeal to brick-and-mortar retail that many online shops fail to mimic. As a result, e-commerce customers tend to be less patient and attentive, which makes landing a conversion more tricky.
So, there’s a need for WooCommerce stores to somehow emulate the real thing. While there are some limitations to this, steps like free shipping, flexible payment options, and product quality assurance via detailed descriptions and images can prove useful,
Keeping It Simple
While maximalism is an acquired taste in home design, it has no place in commercial web design. Build a WooCommerce shopping space that is uncluttered, easy to navigate, and descriptive. Maintain product and checkout pages free of clutter and confusion, error-prone, or overcrowded elements.
Understanding Your Customers’ Perspective
The customer’s needs are second to none in e-commerce, and it helps to be able to walk in their shoes. Maintain a theme and shopping experience that isn’t just superficially attractive, but addresses key pain points and is substantially customer-centric.
Everything from little store and interface details to your overall business model should make your buyers feel heard, welcome, and satisfied. Communication, UX, loyalty programs, and agreeable store policies are all essential considerations.
Utilizing the Right Tools for Success
More than just a platform, WooCommerce is the ultimate toolkit for competitive e-commerce. From web-building tools to SEO and marketing plugins, it has everything you need. But don’t crowd your server with unnecessary extensions.
The most valuable tools are premium-grade, versatile and fully supported plugins that offer assistance with analytics, store management, and marketing.
Strategies For Streamlining Your Store
Efficient Store Management
Running your WooCommerce store like a well-oiled machine requires setting priorities and adopting a balanced approach. For instance, you can automate repetitive tasks that don’t require round-the-clock attention. Tools like MailPoet allow you to set up email marketing, while Advanced Shipment Tracking simplifies order fulfilment.
Inventory tools like ATUM help you organize, regulate, and present your stock more effectively. Regular updates help you secure your WooCommerce business in the event of downtime or cyber threats.
Prioritizing User Experience
High traffic doesn’t mean more conversions. To provide a superior user experience, you need to address bottlenecks and errors in your store’s important touchpoints.
For example, checkout management with a WooCommerce checkout fields plugin is an important step against cart abandonment. To ensure higher sales and customer satisfaction, checkout needs to be
- Quick and frictionless
- Uncluttered
- Secure and transparent
- Inclusive in terms of payment, language, user role, and mobile users
Similarly, use “lean” methodologies when setting up themes, templates, product sliders, shopping carts, and more. This, combined with CDN and caching, keeps your store free of unnecessary, performance-diminishing updates and add-ons.
Boosting Sales
Maintaining and fueling sales in WooCommerce has an art to it. Use inventory management tools to address gaps in your supply chain and sales funnel. Be smart in your marketing, and use plugins like Yoast SEO to make yourself more visible to your customers.
Added Value For Shoppers
Think beyond the usual WooCommerce building process and show your customers that you care. Use loyalty programs, upselling, and subscriptions to generate greater income and build customer lifetime values. Tools like the One Click Upsell Funnel provide immense sales power and compatibility for improved cart orders and customer satisfaction.
Conclusion: Woocommerce
Building with WooCommerce makes selling online more accessible, but it’s not always easy. It’s a continuous process of understanding your responsibilities and meeting customer expectations.
The secret behind e-commerce success is minimalist, customer-centric, and conversion-friendly web design. With an intuitive approach, and the right tools, you can position your store for greater sales and compete more confidently in the cutthroat arena of online shopping.
How To Brace Your WooCommerce Store For Black Friday Sales
As Thanksgiving heads upon us, stores everywhere must prepare for the onslaught of enthusiastic, discount-loving shoppers. But while Black Friday can be a bit stressful compared to your typical commercial event, it’s considerably more lucrative. And businesses operating a WooCommerce store rather than a physical market have some advantages.
Aside from the usual Black Friday sale, there is the “Cyber Monday” event, which is the former’s online counterpart. This discount and sales spree can often last for a week, during which shoppers are more likely to spend, provided that the deals are there.
But despite this golden opportunity, preparing for Black Friday online can be a high-stakes undertaking of its own. Dropping the ball here will be another win for your competitors. Luckily, there should be enough buyers to go around. Let’s examine how you can plan the perfect WordPress Black Friday sales strategy.
How Knowing Your Audience Helps
Having a well-defined profile of your best possible audience is a winning strategy in e-commerce. For niche stores and small businesses, knowing who to market to offers laser-focused visibility and savings in advertising costs.
Plus, it offers insights on how you can redesign your promotions, ads, and customer relations to better suit these target audiences. We’ll discuss the areas where this information can prove useful. But for large-scale sales events, smaller WordPress stores can make big bucks with an almost intimate understanding of their most loyal audiences.
Marketing Through WooCommerce
Engaging Email Campaigns
If your store is using a subscription-based model, now’s the time to cash in on that investment. Use visually pleasing copies to deliver email reminders and newsletter pieces to connect with consumers. Offer Black Friday promotions, deals, and limited, early-bird offers. WooCommerce offers built-in tools and useful plugins to aid your efforts.
Using Social Media Platforms
A large portion of online customers refer to social media for online shopping and product recommendations and referrals. So, your brand’s social media links can help bring more audiences to your store. Use your posts, stories, videos, and paid ads to announce discounts and store events during the Thanksgiving weekend.
User Experience Solutions
Simplify Navigation
A glitchy, error-prone, and unoptimised WooCommerce experience is unwelcome most of the time. But Black Friday is the worst time to risk this unfortunate pattern. Make sure that your landing pages, payment gateways, searches, and site menus are functional. You cannot risk letting things slow down while your users are shopping for discounts.
Enhance Product Descriptions And Images
Quality product descriptions and media are always essential. For high-traffic events like Black Friday, it’s worth balancing the quality of your copies and images with minimalism. So, keep your descriptions eye-catching, but to the point. Use compression formats to lighten the load of heavy images and videos without losing their quality.
Mobile-First Store Tactics
Half of your Black Friday traffic likely comes from mobile users. Mobile-first design ensures responsiveness across all devices for a smoother experience.
Checkout Strategies
Checkout is the most vital touchpoint in online shopping, and the smallest oversight can speed up cart abandonment. The following considerations can help you maintain high sales ahead of Cyber Monday.
Streamline The Process
Keep your checkout fields and forms minimal, functional, and part of a smooth checkout process. Offer guest checkout to welcome new buyers to your WooCommerce store. If you’re not comfortable with coding, a WooCommerce checkout fields plugin makes things easier.
Offer Different Types Of Payment Options
Splurge on local and express payment and checkout options to satisfy clients in every locale and price range. In case of emergencies or tricky situations, ensure a backup payment portal or offer “cash on delivery” or “buy now, pay later” services to boost sales and facilitate cash-strapped buyers.
E-Commerce Offers And Incentives
Enticing customers with irresistible offers and incentives is a staple of Black Friday. Here’s how WooCommerce stores can improve their prospects.
Offer Discounts or Bundles Wisely
Take your buyers and your range of products into account when setting up Thanksgiving discounts and bundle offers. When in doubt, you can’t go wrong with limited edition offers, free giveaways, and major discounts.
CTAs and Sales Copies
Invest in compelling calls-to-action that prompt an immediate and decisive response from buyers without overwhelming them. Be transparent with your savings offers and display major deals across all your ads and marketing channels.
Reward Schemes
Returning customers and subscribers are your store’s most dedicated following and source of income. Black Friday is as great a time as any to reward their loyalty with exclusive deals, personalized experiences, and gifts. This leads to more referrals and excellent PR.
Contingency Planning And Follow-Up Services
Times of giving can be times of unspeakable stress and chaos unless you have the perfect planning in place.
Preparing Your Team
Ensure your WooCommerce team is prepared to handle a greater volume of inquiries and technical difficulties. Effective training and contingency measures can help address any real-time issues shoppers may have.
Setting Up a Returns and Exchange Policy
Black Friday is no time to ignore the requests of customers having second thoughts or cold feet. Make sure that your returns and exchange policy remains transparent and thorough. This can help meet the demands and expectations of the fussiest buyers during this sales extravaganza.
Best Practices For Black Friday
Leveraging FOMO
Being a limited-time event, Black Friday is the perfect opportunity to capitalize on the fear of missing out. Limited stock, exclusive items, and time-bound sales can trigger faster and greater sales, even online.
Personalize Customer Experiences
Use checkout data and subscriber histories to personalize shopping experiences. Offer unique and tailored recommendations and targeted content through store algorithms.
Automate Marketing and Other Processes
Automation can turn your hectic Black Friday sales into a well-oiled machine. Add a dose of efficiency to your marketing, social media campaigns, customer relation management, and more. That way, you’ll have more satisfaction and fewer issues to address head-on.
Conclusion: Woocommerce Store
Thanksgiving brings a rollercoaster of emotions not just in family gatherings, but also to retailers and e-tailers navigating their usual business.
Luckily, the perfect WordPress Black Friday and Cyber Monday strategy can help stores turn an administrative ordeal into a bonanza of revenue and conversions. All you need is the right planning and tools, starting with WooCommerce.
Craft Personalized Experiences with The Checkout Manager For WooCommerce
There is an art to setting up a checkout process that appropriately captures a buyer’s interest. In e-commerce, the rates of cart abandonment are high as shopping experiences often fail expectations. But rather than reflect badly on stores, this can be seen as an opportunity for innovation, especially with a reliable checkout manager for WooCommerce.
A surefire way to impress buyers is to design a seamless and attractive checkout. To many, that simply means designing uncluttered forms and mobile optimization. While those are undeniably important, your aim should be to make online shopping more memorable, intuitive, and tailored. To achieve that, the answer lies in personalization.
Understanding WooCommerce Checkout
In this market, constructing a viable business from scratch requires the right platform. WooCommerce is amazingly accessible and versatile, presenting a loaded collection of nifty e-commerce tools. So, if you want to run a competitive online store, this is the plugin that will help drive your WordPress business to lasting success.
One hallmark of WooCommerce is its default checkout page. This page offers some vital basics for enabling buyers to complete their purchase. But as a comprehensive checkout solution, it’s fairly one-size-fits-all.
E-commerce is a crowded industry made of diverse businesses, catering to all manner of customers and audiences. So, to stand out, it’s important to offer a checkout and online shopping experience that is flexible, client-centric, and tailored for inclusivity.
The Need for Personalization in E-commerce
Personalized web design is a surefire solution for igniting conversions and forming lasting customer relations. Thoughtful checkout page design adds substance to an e-commerce transaction, making it more meaningful and enjoyable. Like a song with immense replay value, it drives buyers to visit again and again without being disappointed.
Tailoring your checkout process conveys to buyers that you care about their needs. This leads to more robust connections and customer loyalty. It helps make a brand or store more reputable in the industry as a caring and conscious online business.
Strategies for Crafting Personalized Checkout Experiences
The benefits of a WooCommerce checkout fields plugin are that they’re easy to use and offer immense personalization capabilities. So, you can customize the default capabilities of WooCommerce checkout to something more focused and high-converting.
Here are some simple tactics that can help you catapult your user experience to the next level.
Dynamic Pricing
A flexible pricing strategy is a great way to keep buyers interested in your products. Set up pricing and deals based on user roles, behaviour, current trends, and buyer histories. It helps a store stay up-to-date with product pricing simply by making routine changes to price fields in your checkout page.
Inclusive Checkout
A single store can cater to a wide range of buyers, each from a different region or background, presenting various specific needs. A default, ready-made checkout experience might be insufficient to address all the needs of these user groups. Instead, it can prove to be restrictive and increase cart abandonment rates.
For instance, online stores that cater to local and overseas buyers enjoy more sales and conversions. A checkout plugin that’s compatible with multilanguage and multicurrency solutions like WPML can make this mission more productive. Similarly, different audiences may use different payment gateways, so it’s important to have multiple gateways at checkout.
Mobile-first checkout design is also more inclusive than the Desktop-first approach. It facilitates smartphone users, who make up the bulk of e-commerce traffic, without hindering checkout on laptops or PCs. Plus, enabling guest checkout facilitates scores of buyers that hoping to make a purchase without having to register first.
Strategic Use of Checkout Fields
Checkout fields play an important role in determining the flow of checkout. Things like placement, validation, and display conditions can make for a more structured checkout experience.
Crucially, fields help stores gather information that will later help supercharge personalization. The key, however, is to do so without overwhelming buyers. Using the appropriate amount of fields and decluttering the checkout form can make for a more flexible and enjoyable experience.
Advanced Customization
There are several ways in which you can upgrade small details in checkout. Use field labels and descriptions to present fun captions and short, informative descriptions or links. Many checkout plugins support custom CSS, which allows you to style your checkout into something more brand-savvy and user-friendly.
Store Recommendations
Upselling and cross-selling are not just ways for stores to boost sales through average cart totals. Customized product recommendations present a means to help buyers improve their purchases or checkout. They work best, however, with the option to opt-out if buyers find it annoying or intrusive.
Upselling helps recommend superior products, while cross-selling improves the value of purchases through cart add-ons or complimentary products.
Conclusion: Checkout Manager for Woocommerce
WooCommerce is a truly state-of-the-art platform for kickstarting an online business from scratch. This is thanks in part to its amazing and flexible default capabilities. But what truly sells it is the ability for businesses to tailor their virtual storefront to something more appealing and unique.
In a sea of uniformity, you can present a business that is competent and focused on user satisfaction. Investing in a premium-quality checkout manager for WooCommerce can help you personalize your checkout architecture, allowing your online venture to thrive.
Collect Tips And Donations With The Best WooCommerce Checkout Manager
Shaping customer experience in online shopping often hinges on the checkout page. The level of customizability and dedication to user experience hugely impact conversions. So, to address the issue of cart abandonment, a quality WooCommerce Checkout Manager is the helper your store needs.
But optimizing checkout isn’t all about filling in the gaps left by poor checkout page design or missing elements. In e-commerce, success often lies in trying out different ways to impress your buyers. Typically, asking for tips and donations doesn’t appear to fit that approach. But through e-commerce, it’s more flexible and offers a chance to endear your business to buyers.
But before adding these options to checkout, it’s worth understanding why they’re at least worth considering.
How Tips And Donations Translate To E-Commerce
Brand image plays a significant role in boosting conversions online. But at checkout, where buyers are in the process of completing a purchase, it’s not as easy to convey. However, asking for tips and donations at checkout can offer a few benefits.
For a start, there is less pressure in e-commerce than there would be in a physical location. Plus, online stores and businesses can exercise flexibility in the amount they or their customers can set.
Strengthening Customer And Employee Relations
Tipping is a staple of the service industry, and it can work just as well online. Gratuity is a means for customers to thank businesses for their service. By enabling it in checkout for an online restaurant or other business, you can give buyers the option to tip as they please, if at all.
This obligation-free approach works for buyers and even helps humanize brands without making them seem desperate for funding. Crucially, it also helps compensate your workers fairly while keeping your bottom line intact. The result is a stronger rapport with your audience and employees.
Fighting For A Cause
Many online businesses are predicated on providing goods and services while championing a central cause. These could be a company selling reusable straws as an alternative to environmentally harmful plastic, or a chocolate manufacturer dedicated to eradicating child labour from the cocoa industry.
Aside from spreading awareness and selling their responsibly sourced or aimed products, these businesses can solicit donations to help fund their mission. A pop-up or checkout donation option is a useful way to achieve this.
Emergency Or Relief Funding
Profitable businesses and corporations frequently use part of their funding to help those in need, like disaster relief or humanitarian aid. For smaller businesses, a more feasible option could involve contributions from buyers. This can help stores combat local or far-reaching issues by mobilizing funds from across the globe.
How To Set Up Tips And Donations In WooCommerce
For WooCommerce users, there is the option to add novel plugins to integrate donations and gratuity options. However, if you’re already using a checkout field editor to optimize your checkout page, that can be just as handy for setting up donation fields.
This approach is effective, offers customizability, and avoids overcrowding your online store with bulky extensions. Plus, the overall process is fairly simple, going as follows.
Adding Tips And Donations To WooComemrce – Step-By-Step
- Install and activate the WooCommerce checkout field editor free plugin.
- Locate and click on the plugin in your admin panel under “WooCommerce”.
- Click on “+ Add New Field”.
- Select “Checkbox” or, for multiple options, “Radio” as the field type and label the field as your preferred iteration of “donate” or “leave a tip”.
- If the “Required” box is checked by default, uncheck it.
- Give the checkbox a value signalling an agreement to tip or donate. For multiple radio buttons, you can add different fixed or custom amounts for tipping.
- In the price settings, click on “Enable pricing”.
- Select the price type of the field, either as fixed, custom, or a portion or the total or subtotal, as well as the tax settings.
- Save your changes.
Best Practices For Adding Custom Checkboxes
Keep It Optional
Earlier, we instructed you to ensure that the donation or tip field is not “required”. This is essential, as you aren’t meant to force donors into anything. Plus, tipping in e-commerce doesn’t translate the same way as in a restaurant setting.
The point is that these aren’t the same as fees for added services. This is the amount that buyers will have to give voluntarily in exchange for basically nothing else in exchange. So, you’ll have to leave it up to them to decide if, when, and how much they want to give. This zero-obligation approach will increase your chances of getting funds.
Consider Multiple Payment Options
A critical rule of checkout is to splurge on payment gateways. Many buyers are enthusiastic when it comes to tipping or donating. But as with billing, restrictive payment methods can hamper their online shopping journey. So, you must be inclusive when adding payment methods in checkout, including for charity or gratuity funding.
Use Social Proof
While we stated earlier that funds and donations are given in exchange for nothing, that doesn’t have to be true. A key motivation for donations is buyers wanting to help organizations make a change.
For small businesses, this offers a chance to highlight the positive impact of these contributions. From tangible reports to success stories, you can inform donors of the difference they make. When adding donation options to checkout, share a quick hyperlink redirecting buyers to this social proof. This builds trust and encourages others to join the cause.
Conclusion: Woocommerce Checkout Manager
Tools like the WooCommerce Checkout Manager present endless possibilities for online stores beyond making checkout more efficient and convenient.
By giving buyers the option to leave tips or donations, you can boost your engagement and enjoy greater funding to help forward your cause or brand. And with the right tool, this addition can be simple and highly customizable
Add A Custom Checkbox With The WooCommerce Checkout Manager
For online business, a smooth checkout is the need of the hour. There are many ways to achieve once, and using a professionally developed WooCommerce checkout manager plugin is a viable solution. As long as the aim is to make the process more refined and to-the-point, you can turn browsers into buyers.
A critical component of checkout is the fields that aid stores in collecting data and customers in customizing their orders. Special fields make the checkout experience more dynamic and focused. Among them, custom checkboxes are a surprisingly versatile tool for checkout. They don’t seem very impressive, but in fact play a crucial role in checkout.
To effectively utilize them, it’s worth understanding how they work and how to best add them to the checkout page.
Understanding Checkboxes In Checkout
Custom checkboxes help online stores offer a safer and more reliable checkout experience. These interactive checkout fields enable users to make a selection, often out of more than one option, to help continue the checkout process.
Their main purpose is to help online buyers make more informed shopping decisions and make navigation possible. This includes user agreements and opting in or out of store perks. For store owners, they provide essential feedback and data which can prove useful in marketing campaigns and store personalization.
Common Uses
Depending on the store or the exact action that the user is taking, checkboxes can help fulfil several functions. In the context of e-commerce, the following are some of their well-known applications.
Opt-Ins For Marketing Products
Newsletters, store updates, and discounts are all a necessary part of customer relations for online stores. However, not all buyers are interested in these offers. A checkbox gives them the freedom and choice to accept or decline them.
User Agreements
Policy agreements and terms are an essential legal requirement for online shopping. With them, checkboxes are essential for transparency and keeping businesses legally in the clear.
Cart Add-ons
When adding extra fees or additional services, like express shipping, premium handling, or gift wrapping, you’ll need to provide a checkbox.
Advantages of Checkboxes In Checkout
Streamlined Checkout
Custom checkboxes enable buyers to make informed choices that would otherwise require additional pages. This commitment to the one-page approach to checkout makes checkboxes much-needed in lowering cart abandonment. Less friction and faster checkout means more conversions and sales.
Opportunities For Higher Cart Totals
Speaking of sales, checkboxes are a common presence in checkboxes under product recommendations or added customer services. This upselling and cross-selling gears online stores for higher average cart totals and order values.
Feedback And Data
Checkboxes, like other checkout fields, provide information and insights into the habits and preferences of buyers. This, combined with regional and demographic data, can help stores tailor their marketing and
Customer Retention
Customization through checkboxes offers a sense of dedication to customer service. This fosters trust among buyers, which helps strengthen customer lifetime values. This simple addition can help online businesses save on customer retention costs.
A Legal Safety Net
A checkbox can act as a gateway between a customer and an online store. So, not agreeing to the store policies, age disclaimers, and T&C prevents them from viewing or buying products. This helps businesses stay compliant with e-commerce regulations and avoid legal setbacks as a result of issues beyond their control.
How To Add Custom Checkbox In WooCommerce
To implement a custom checkbox in your WooCommerce, make sure that you have the checkout field editor for WooCommerce installed and activated. This tool allows stores to customize their forms and add a range of field types for a more streamlined and secure checkout process.
With that step taken care of, here’s what you need to do.
- Locate and click on the Woocommerce checkout fields plugin under “WooCommerce” in your admin panel.
- Click on “+ Add New Field”.
- Select “Checkbox” as the field type.
- Give the field a name with which to identify it from the developer end.
- Add a label which the customer should be able to see. This might be “Age verification (Required)” or “I have read and agree to the terms and conditions”.
- Add a text description under the checkbox to further inform users of a required field or why the checkbox is there.
- Set up values like “yes” or “no” as the options for your checkbox.
- Check the “Required” box to make the checkbox mandatory, or uncheck it to make it optional.
- Set up rules to display the checkboxes in emails and order display pages.
Best Practices For Adding Custom Checkboxes
Added Customization
Use custom CSS to style your checkbox in a way that aligns with your brand aesthetic. Additionally, you can use conditional logic so that the checkbox appears if the customer satisfies a particular condition. For instance, for cart totals exceeding a certain threshold, you can activate a checkbox for free gift wrapping.
Inform Your Buyers
When asking users to agree with store policies or terms and conditions, supply the checkbox with a short description detailing why this step is necessary. Or, you can simply add a link redirecting users to the full-page terms and conditions. This offers transparency to the buyer while keeping your business legally in the clear.
Test Your Checkbox
After adding your custom checkbox, double-check to see that it is functioning correctly in the form. Test everything from the error messages to the position in the form, the surrounding text, and whether it’s working on all devices.
Conclusion: Woocommerce checkout manager
By making it more convenient and reliable, custom checkboxes are a staple of the checkout experience. To make the most of them, it’s worth appreciating their purpose and how lacking your form would be without them.
With that knowledge, assess your needs and utilize a quality WooCommerce checkout manager to customize your checkboxes to perfection.
Design A Best Lightweight Checkout With The WooCommerce Checkout Manager
A checkout page is no longer just an e-commerce formality for helping buyers complete purchases. Strategic checkout design has emerged as its own industry of innovation within e-commerce. Luckily, online stores enjoy many open-source solutions for this task, like a quality WooCommerce Checkout Manger.
To win over customers, you need to focus on upholding UX. Robust checkout is important for personalizing orders and gathering customer data. Crucially, however, it stands in the way of a completed purchase. So, it’s worth ensuring that it is free of any burden or unwelcome errors.
Signs Of A Hefty Checkout Page
A clumsy or time-consuming checkout experience tends to result in higher cart abandonment. So, how do you address it effectively? It’s worth understanding that a checkout page can be burdensome in multiple ways.
Primarily, checkout forms that are otherwise well-optimized but take longer to fill and confirm can turn off buyers. Similarly, heavy web design elements can slow down the overall process, leading to poor UX. To recover from this, let’s examine some common causes of a frustrating checkout experience.
Crowded, Confusing Forms
Checkout fields are necessary for gathering information and customizing orders. But not all checkout elements are necessary, and too many of them can overwhelm the checkout flow. Plus, arranging all of them in a sequential, streamlined manner is more difficult. The resulting cluttered checkout can make it harder for buyers to complete their purchases.
Lengthy Checkout Process
A long-winded journey across the checkout page is a cause of frustration for most online customers. Keeping things lightweight in this context means reducing the steps involved in checkout.
Unnecessary Checkout Fields
As mentioned earlier, too many checkout fields can hinder the process rather than facilitate it. But that’s not the only issue. Some fields are irrelevant or ask for more information than buyers are prepared to give. This can cultivate to mistrust in a business. So, it’s important that you keep the process compact and your fields sparse.
Loading Issues
Slow pages are a common issue in web design and can drain SEO, traffic, and sales. Online stores use bulky templates or unoptimized elements and media are at risk of slow performance.
Poor Responsiveness
Responsive web design is meant to ease navigation and design intuitive and interactive web pages. A lack of responsiveness in checkout can lead to problems in online shopping. Plus, a web experience that doesn’t translate well to smaller screens is also a major problem. Lack of responsiveness increases the chances of cart abandonment.
The WooCommerce Plugin Conundrum
For many WordPress and WooCommerce users, plugins and SaaS tools are often essential for running a functional business. But while plugins in particular have their use in e-commerce, they can be a double-edged sword. While extensions enhance store functionality, adding too many can also increase server load and contribute to slower speeds.
In spite of that, many plugins like WooCommerce checkout managers are known to have a transformative impact on e-commerce. They provide innovative, and often novel, solutions for checkout, including making it more compact and user-friendly.
Therefore, the key is to strike a balance between relying on more useful plugins and avoiding any unnecessary strain on your store.
Solutions For A Lightweight Checkout Page
One-Page Checkout
One-page checkout is an increasingly popular format for online stores. This approach utilizes complete checkout forms that are limited to a single page. This allows stores to expedite the checkout process without losing the ability to gather vital data.
However, since the success of this method lies in brevity, it’s important to be strategic. Not properly removing the clutter from a single-click checkout flow can backfire. Luckily, this is where the next solution proves useful.
Field Removal And Display Rules
Woocommerce Checkout Manager plugins make it easier to tailor checkout pages by adjusting fields. And since these fields take up space on the form, that sometimes means deleting or hiding them. So, delete any fields that are not required, like address fields for digital goods.
Use conditional logic to keep certain fields hidden unless certain conditions are met. Plus, consider adding drop-down fields to add more options to checkout without crowding the page.
Performance-Related Solutions
Like the rest of your online store, your checkout page could use some basic measures to help improve speed. This includes less complex themes, minimalism forms, and minified code and media. The resulting performance helps your store thrive in terms of rankings and traffic, leading to more sales and conversions.
Mobile-First Design
Mobile users make up an increasingly dominant portion of online shoppers. With mobile-first design, you achieve an online shopping experience that is more responsive on smaller screens. Plus, the functionality remains unchanged as you move upwards to Desktop. As a result, your checkout page is equally intuitive across all devices.
Auto-Fill Forms
If keeping certain checkout fields becomes unavoidable, you can still expedite the process. Auto-fill forms enable users to save certain details and complete checkout in fewer clicks and less typing. This reduces friction and provides a hassle-free completion of online purchases.
Conclusion: Woocommerce
A smart, nimble checkout is a key ingredient in the recipe for e-commerce success, which is just as well. The issues that lead to an unwieldy online shopping platform are a formidable adversary in the fight against higher bounce rates. Luckily, the most effective solutions are the simple ones.
Understanding the value of user experience means being aware of what’s burdening your store or causing frustration among your buyers. With that knowledge, and a top-tier WooCommerce checkout manager, you can ensure a more digestible online shopping experience that works for everyone.
Cash In Extra Fees With The Best WooCommerce Checkout Field Editor
Making sales through WooCommerce is an increasingly easy goal to achieve thanks to its custom features. Attracting conversions doesn’t mean relying on innovative and left-field approaches to online store design. With a reliable WooCommerce checkout field editor, you can experiment with simpler, more organic means of improving your revenue.
A fairly straightforward and effective option is to simply add checkout fields for collecting extra fees. This method banks on your smart budgeting as well as your buyers’ willingness to pay for additional services. While it’s not a novel concept, let’s examine how perfecting it can help your online store thrive.
Adding Fees To WooCommerce Checkout
The addition of fees to checkout is a decision that fulfils a number of goals. Some fees, such as tax and shipping, are sometimes required as they help online stores offset charges, meet legal requirements, or tailor their services.
But as fees are distinct from product pricing, it makes sense to have separate fields for both. Another benefit of having separate fields for collecting fees is that you can make them optional. This works for gift-wrapping or rush-processing fees.
Benefits Of Collecting Fees Through Checkout
The immediate advantage is that checkout fees enable WooCommerce stores to increase average cart totals. Transparent fees are a quick solution for boosting your finances and diversifying your customer service.
A more long-term benefit is that fees incurred from additional services like handling and shipping are, in a way, reflect customer service. By following through on these services, you prove your devotion to your buyers beyond a typical e-commerce transaction. This builds loyalty and helps online stores accomplish more conversions.
Fees Worth Adding To Checkout
Depending on the products, you can add of or more of a few types of fees that are relevant to the purchase or can boost user experience. The following are some common examples of checkout fees in e-commerce.
- Shipping fees can allow buyers to enjoy express or premium delivery options for a fee. These are on top of the usual shipping costs included in the cart total.
- Handling fees ensure safer handling of products like electronics or glassware which might require extra care.
- Processing fees become applicable for users of certain payment gateways or credit cards to cover the charges associated with them.
- Gift wrapping fees offer personalization services for special items like gifts.
These are just a few examples. Stores can collect a range of appropriate charges to facilitate the order and meet various financial requirements.
How To Add Fees To Checkout – Step-By-Step
Unlike your typical, ready-made checkout fields, the ones for collecting fees have a more specialized purpose. So, setting them up in your WooCommerce forms requires a little configuration of the basic steps.
Luckily, you don’t need to access the code to achieve this. A simple woocommerce checkout field editor plugin is all you need to add fees. It offers a more diverse array of options compared to WooCommerce on its own.
So, make sure that the plugin is installed and activated in order to add these fees. Having done that, the following steps should help you implement custom fees in WooCommerce.
- Navigate to the plugin in your WooCommerce admin panel under “WooCommerce”.
- Click on “Add New Field” to reveal a dialogue box, where you can add and configure fees on checkout.
- Through “General Settings”, give your field a distinctive name, as well as a label and optional description that the buyer will see.
- Choose the field type as either a Select or Radio button.
- Check the “Enable” option so that buyers can see and use the fields.
- Check the “Required” option to push users towards a mandatory option.
- Define the price type, taxation status, and tax class of your field.
- Select the options to display the fields in emails and order detail pages if needed.
- Go to “Conditional Rules” in the same dialogue box and set criteria, such as cart total or order weight, for showing or hiding fields if required.
- After finalizing your fields, click on “Save changes”.
- Test to see if the fee section is working correctly on the front end.
Best Practices For Adding Fees To Checkout
Ensure Transparency is Key
Fees that take buyers by surprise can drain conversions rather than fuel them. Communicate any additional charges or offers on the product page and store policy, as well as through clearly labelled fields.
To convince reluctant buyers, use checkout text sections to add descriptions justifying these fees. If you cannot explain these things briefly, share a link to the “fees” section of your store’s pricing policies.
Assess Value For Money
Take value perception into account. Only add fees if they reflect the value of added services and help you make up for costs without inconveniencing buyers. If possible, try your luck with checkout alternatives that reduce the need for fees, like payment gateways or shipping partners that don’t incur high service charges.
Uphold Flexibility
Don’t obligate buyers to have to pay extra fees. Keep them optional and offer as many options as possible to customize their orders. Consider using a “fee-free” threshold, where you can waive fees entirely based on cart totals exceeding a particular rate.
Understand Local Tax Laws
Tax laws and classes may vary for different territories. So, when catering to buyers from a given area, make sure that the tax fields and shipping charges are compliant with local regulations. Make sure to continuously update your fees to meet these needs and regulations.
Conclusion: Woocommerce checkout field editor
WooCommerce is a strategic goldmine for online stores, where the right pricing and e-commerce strategy can help you hit the jackpot. Adding fees to checkout is a useful tactic that shop owners should understand better.
With the right approach to pricing and the effective use of WooCommerce checkout field editor plugins, you can make the most of custom fees.
The Art 0f Hiding And Removing Fields In WooCommerce Checkout Field Editor
Customization is the heart and soul of adaptive, robust e-commerce, and nothing exemplifies that more than the versatility of WooCommerce. The few things this plugin cannot help online stores with can be achievable through a host of quality plugins. Among these is the WooCommerce Checkout Field Editor for simplifying online purchases.
But simplifying checkout itself can be a tricky balance to achieve, especially for beginners. Luckily, some of the most effective methods of optimization are the simplest. And the task of deleting and removing fields is a fairly simple one. Some may even say too simple. Let’s go ahead and discuss the significance of this step.
The Purpose Of Hiding Or Removing Fields
When browsing for a checkout management solution for WooCommerce, you’ll find that many openly advertise the option to hide or delete fields. This might seem redundant for a couple of key reasons.
With most plugins, deleting or hiding fields is, at its core, not that complicated or novel a task to begin with. Besides, why would you need to delete checkout fields rather than use them for collecting valuable customer data?
On one hand, checkout fields drive checkout and gather information that is useful for personalizing user experience. But at the same time, check out fields take up space on the form, and filling them takes time. Checkout isn’t just about substance, but also about speed and convenience.
The following are some reasons underlining the necessity of limiting checkout fields(Woocommerce checkout field editor).
Improving Customer Experience
Streamlining checkout must go hand-in-hand with personalization. To enhance online shopping, you need to checkout quicker and more convenient. A shorter form with fewer fields enables swift navigation and greater satisfaction: a high-converting combo.
Conveying Data Security
Online customers are entitled to their privacy, and too many fields can come off as an infringement. On top of cluttering fields, unnecessary checkout fields asking for data can raise concerns surrounding cybersecurity. Fewer fields mean that only the relevant information is necessary. This fulfils the store’s needs and allows buyers to trust you with sensitive details.
How To Hide Or Remove Fields
- With A Dedicated Checkout Plugin
Quality WooCommerce checkout field editor plugins are an all-in-one solution for improving your online store. With them, the task of hiding or removing checkout fields is fairly simple, and it goes as follows.
Deleting Checkout Fields
- In your WooCommerce admin panel, click on your checkout management plugin.
- In the list of active fields and sections, locate and select the field(s) you need to remove.
- Click on “Remove” in the action bar. The field should fade pink before disappearing.
- Save changes.
Hiding Checkout Fields
This procedure goes pretty much the same way up to the first two steps. From there, go as follows.
- Click on “Hide” in the action bar. The text should turn from black to grey, indicating that the field is now only visible through the back end.
- To restore access to a hidden field, simply select them and click on “Show” in the action bar.
- Save changes.
- Manually, via PHP Snippets
For a more customizable approach, you can remove fields without extensions or add-ons by simply tweaking the code. Here’s what you need to do.
- Access your WooCommerce theme through the theme editor in your admin panel, under “Appearance”.
- Click on the Functions.php file.
- To this file, add the code (detailed below) which will determine the fields that require removal.
- Click on “Update file” and review the changes.
The following is the code that will help you delete all of the fields from your checkout page in WooCommerce.
/**
Remove all possible fields
**/
function wc_remove_checkout_fields( $fields ) {
// Billing fields
unset( $fields['billing']['billing_company'] );
unset( $fields['billing']['billing_email'] );
unset( $fields['billing']['billing_phone'] );
unset( $fields['billing']['billing_state'] );
unset( $fields['billing']['billing_first_name'] );
unset( $fields['billing']['billing_last_name'] );
unset( $fields['billing']['billing_address_1'] );
unset( $fields['billing']['billing_address_2'] );
unset( $fields['billing']['billing_city'] );
unset( $fields['billing']['billing_postcode'] );
// Shipping fields
unset( $fields['shipping']['shipping_company'] );
unset( $fields['shipping']['shipping_phone'] );
unset( $fields['shipping']['shipping_state'] );
unset( $fields['shipping']['shipping_first_name'] );
unset( $fields['shipping']['shipping_last_name'] );
unset( $fields['shipping']['shipping_address_1'] );
unset( $fields['shipping']['shipping_address_2'] );
unset( $fields['shipping']['shipping_city'] );
unset( $fields['shipping']['shipping_postcode'] );
// Order fields
unset( $fields['order']['order_comments'] );
return $fields;
You’ll need to configure this code so that you only discard certain fields from the form. For instance, to maintain the fields asking for the user’s first and last names, remove the following code snippets.
unset( $fields['billing']['billing_first_name'] );
unset( $fields['billing']['billing_last_name'] );
You can also use this method to restore a field that you removed by cutting it from the code.
Detailed Guide
- Access your theme’s files or use a custom plugin.
- Locate the functions.php file.
- Insert the provided PHP snippet.
- Save changes, and the specified fields will vanish.
Precautions and Best Practices
Exercise caution when editing PHP directly. Always create a backup, and be mindful of potential conflicts with theme updates.
A Quick Comparison Of Both Methods
Choosing between a dedicated plugin and manual PHP editing depends on your comfort level and specific needs. While plugins offer simplicity, manual editing provides unparalleled control.
Best Practices For Effectively Removing Checkout Fields
Test Your Checkout
A/B testing is one of the best practices for determining the best version of your checkout page. With split testing, you can determine which fields actively contribute to increased conversions, and which don’t. This can make deletion and removal more informed and laser-focused.
Strike A Balance
Expediting checkout and collecting necessary data are not mutually exclusive goals. To accomplish both, you need to strike a balance. Understanding your customers needs and preferences can help you devise a compact checkout form that asks the right questions.
A Case-by-Case Consideration
A great way to tailor any aspect of checkout is to take the business or the products into account. For instance, if you’re selling digital products, your checkout (woocommerce checkout field editor) doesn’t need the default shipping-related fields.
Ongoing, Adaptive Checkout Practices
E-commerce trends rarely stay the same, and customer-defined trends are always changing. To stay ahead of the competition, stay in the loop when it comes to shipping behaviours and adjust checkout fields accordingly. This flexible approach to checkout management yields more lasting results.
Conclusion : Woocommerce checkout field editor
Shedding the burden of extra fields from your checkout page doesn’t constitute the most revolutionary transformation of your optimization. However, e-commerce success is often the product of many small changes in the right direction.
So, why not use your WooCommerce checkout field editor of choice to lighten the load on your sales funnel?
How T0 Leverage Price Fields In WooCommerce Checkout
In the struggle to win over customers, transparency is one of the things that can make or break online businesses. Normally, a lack of transparency is most evident when setting up billing fields. It’s worth remembering that the next time you’re optimising your checkout page with a reliable WooCommerce checkout manager.
To address this issue, it’s worth focusing on a key section of checkout, i.e. the price fields. These fields allow you to set up product rates and custom pricing rules. That might seem like a fairly straightforward step for setting up a retail business, digital or otherwise. But the truth is that price fields can be a more strategically influential part of checkout than many realize.
What Sets Price Fields Apart In Checkout
Price fields have a straightforward role in checkout: to institute product prices and determine the total cost of an online purchase. This includes the wholesale or retail price of a given item, plus eligible taxes and shipping charges.
Aside from the standard price field, you can also choose the “price type” for each product. WooCommerce users have a few options, including
- Fixed prices
- Percentage of cart contents total
- Percentage of subtotal
- Custom
A cart total refers to the complete overall charge of a purchase. Meanwhile, a subtotal is just part of that, usually the total price of the cart contents minus tax and shipping. “Custom” price fields allow buyers to pay a bespoke figure. This is for unique cases like bidding, donations, or tips.
However, it’s not just the simple setting of prices that makes price fields necessary. When used correctly, their benefits extend beyond that, as we’ll examine.
Common Pricing Fields Applications And Benefits
Data Collection And Transparency
At their core, price fields have the same important role in checkout as other fields. The data that pricing fields provide useful analytics and insights into custom behaviour and preferences. Plus, they ensure transparency in terms of billing, taxes, and shipping costs. This makes them valuable for personalization purposes and combating cart abandonment.
Dynamic Pricing
With dynamic pricing, businesses can keep prices up-to-date with market conditions and customer demand, while maintaining competitive rates. The resulting flexibility helps businesses compete more effectively while maintaining profitability.
Creating Bundles
Like upselling or cross-selling, bundles offer businesses a simple way to increase average cart totals and order values. Plus, by providing buyers to pay for multiple items in a single transaction, price fields contribute to user experience.
Price Comparisons
Straightforward pricing information can help buyers compare prices across products. Comparison shopping helps buyers make more informed choices when shopping online, lowering the chances of cart abandonment.
Promotions and Discounts
Rewarding long-time or returning customers with financial perks or FOMO is always a winning e-commerce strategy. By effectively leveraging price fields, you can integrate discounts and promotional pricing into your checkout page. By marketing the urgency of these deals, you can increase customer satisfaction and strengthen conversions.
How To Set Up Price Fields In WooCommerce Checkout
If you have installed and activated the Checkout Field Editor for WooCommerce, setting up pricing fields is a cinch.
- Through your WooCommerce Admin Panel, locate the checkout plugin.
- If you’re adding a new price field, click on “Add New Field”. To adjust an existing field, simply click on “Edit” on the far right of the corresponding field.
- Set up price details like value, type, taxable status, and tax class.
- Click on “Save changes”.
Best Practices For Setting Up Price Fields
As easy as they are to implement in WooCommerce, strategically placed price fields can be a valuable asset to your checkout page. The following are some useful tactics to achieve maximum benefit from them.
Stick To Necessary Fields
To preserve user experience and the simplicity of your form, only stick to the essential fields and keep optional add-ons to a minimum. Fewer fields make for a quicker and more straightforward checkout process, which many buyers prefer.
Avoid Opaque Charges
Hidden charges are known to fuel higher rates of cart abandonment in WooCommerce. Utilize pricing fields to explicitly and categorically display the complete costs, from wholesale rates to shipping and tax. Use conditional or drop-down fields to do so without crowding your forms.
Use Translation And Currency Changing
Catering to overseas buyers in their own language and currency is a proven way boost conversions and sales. Quality WooCommerce checkout manager plugins should offer compatibility with multilanguage and currency conversion tools like WPML. Use this feature to interpret crucial price fields for non-English speaking buyers.
Highlight Key Pricing Details
Use prominent text and colour features to help key pricing details and vital store policies stand out. Drawing attention to crucial fields or those promoting discounts or special offers make the woocommerce checkout experience more dynamic and conducive to a better customer lifetime value.
Conclusion: Woocommerce checkout
Price fields are the dark horse of the WooCommerce checkout experience. They may seem like a blanket necessity for ensuring payment, but they can provide so much more. They’re your ticket to superior personalization and higher conversions. So, elevate your customer service by understanding their core purpose and how to make the most of them.
How T0 Create A Multilingual WooCommerce Checkout Page
Selling goods and services online has its benefits and downsides. You can reach out to all manner of audiences through the Internet. But still, e-commerce requires you to make some effort to match the service of face-to-face retail. Optimizing your woocommerce checkout page with a reliable WooCommerce checkout manager is a great start.
But as far as taking advantage of the internet is concerned, there is one area where businesses stumble in an attempt to grow their audience. That involves investing the bulk of their resources in a single group of customers. English speakers, for instance, seem to be high on the list of priorities for many entrepreneurs.
But when you’re fine-tuning your woocommerce checkout page and WooCommerce interface, you have an opportunity to take other groups of buyers into account. It’s important to understand how, and why, you should go about that approach, so let’s do that.
Why Market To Non-English Speakers?
As you’ll know by now, cart abandonment is rife in e-commerce, often due to reasons beyond an online shop owner’s control. The good news is that there are some simple solutions to address the various factors that lead to abandoned carts, like poor UX, a lack of transparency, or crowded checkout forms.
One thing that you need to consider is whether your store can accommodate buyers who don’t speak or use English, either at all or as a first language. But why, some of you may ask? It does seem that monolingual WooCommerce stores catering to American or Commonwealth audiences seem to do quite well in terms of conversions and sales.
The simple fact is that, in e-commerce, every potential audience is fair game. And non-English speakers are quite an abundant demographic, both on and offline. They make up billions of possible buyers throughout the world, particularly the EU, Latin America, and a significant chunk of Asia.
The Simple Rationale For Multilingual E-Commerce
If a foreign user is using your online store to order something, they might face issues if checkout is not optimized. The more your business takes the intricacies of other languages into account, the better things will be for them. That chance to shop in their native tongue is a testament to customer service that buyers will undoubtedly stick around for.
And that’s not just a fair guess. Studies reportedly support that multilingual e-commerce sites cater to anywhere between 60 to 70% more traffic and conversions. They also experience greater searches, sales, and competitive advantage. This isn’t surprising given the sheer volume of these native speakers using the internet.
The Basics Of Multilingual Checkout
A woocommerce checkout page is, in many ways, a lot like most other areas of an online business or blogging site. But in several crucial ways, it is also unique as it needs to process payments and shipping information while simplifying checkout for buyers.
So, it’s not just essential to simply overhaul your checkout for multilingual e-commerce. You need to optimize every inch of it for a uniform and inclusive WooCommerce shopping experience.
Clearly, this is not a job for a superficial solution like Google Translate. You need tools like WordPress Multilingual, or WPML, and not just because it offers over 60 preconfigured languages for translation. They offer a comprehensive multilingual solution for your online store.
- Detailed Translation
When translating an online store or WooCommerce checkout, it’s not just the text labels and calls to action that need interpretation. Everything from images and URLs to strings, slugs, and payment gateways requires translation
- DeepL-Powered Conversion
Going about translating figures of speech or references in the literal sense can lead to things being lost in translation. That’s how the Argentinian marketing for the 1978 musical Grease understandably, but unfortunately, came up with the title “Vaseline”. When you’re competing for clicks online, you need to avoid missteps like this.
This is where DeepL Translator comes into play. This service uses neural technology to flawlessly convey the underlying meaning of text between languages. That way, buyers will know exactly what a custom checkout field or CTA button is for.
- Currency Changing
While currency and language are two vastly different things, they sometimes go hand-in-hand when solving e-commerce woes for foreign buyers. So, it’s worth investing in a tool that caters to audiences in a given locale through translation as well as tailored currency settings.
So, WPML is a valuable tool to have when revamping your multilingual online shop. And for managing your checkout forms, you need a quality WooCommerce checkout field editor that’s compatible with tools like WPML.
Implementing Multilingual Checkout Experience
If you have your WooCommerce checkout fields plugin and WPML installed and activated, the process of WooCommerce translation is fairly simple. We’ll be focusing on checkout and making it easier for non-English customers to complete their purchases. Let’s begin.
Translating The Checkout Page
Typically, as you activate WPML, the standard protocols should help translate everything, including the woocommerce checkout page. This includes the custom fields and sections customized through your WooCommerce checkout manager plugin.
If that doesn’t work, you might be left with some untranslated sections on checkout. Luckily, you can manually convert these strings on your own, and here’s how.
- With WPML installed, locate it in your WooCommerce admin panel on the left.
- Go to String translations.
- Select the domain of the plugin providing the string.
- Look for the text that needs translating through the Search for field.
- Confirm your choice with the plus icon and save changes.
Multicurrency Settings
- Go to WooCommerce Multilingual in your WooCommerce admin panel.
- Click on the Multicurrency tab.
- Select the currencies you wish to add and format.
- Set the exchange rate, symbol, and position.
- Enable the currency switcher.
- Save your changes.
Conclusion: Woocommerce checkout page
Conquering language barriers proves lucrative in the world of e-commerce. When navigating your checkout features, maintain multilingual and multi currency features high on the list of priorities. Your overseas audience will thoroughly appreciate the care and attention reflected through your woocommerce checkout page.
Is Your WooCommerce Checkout Page Slow? Strategies F0R Better Speed
Bracing for the e-commerce revolution means you have to do more than simply move your normal retail activities online. For online stores, designing a customer dashboard and investing in a quality checkout manager for WooCommerce shopping isn’t enough if you don’t know how to make the most of them.
There’s no denying the value of a robust woocommerce checkout page in driving sales and conversions. But cart abandonment isn’t just the result of shipping-related concerns or poor checkout personalization. On a slightly more technical note, how well your checkout page is performing can also be crucial in determining e-commerce success. Let’s examine.
Website Speed And UX
In marketing and commercial web design, having potential customers reach your business is an excellent start. But in the long term, it’s just the beginning. A lot of things can affect customer retention, chief among them being the speed and performance of your website.
Online customers generally lack the patience and attention of those flocking to brick-and-mortar establishments. The checkout process is a crucial stage where your buyers expect nothing less than flawless and sublime customer service and responsiveness. Sometimes, however, checkout pages will experience hiccups in performance, which proves problematic.
Poor Speed Derails The Customer Experience
It doesn’t matter whether you’re a digital corporation at its peak or a promising startup that’s currently finding its virtual footing. If the performance of your web pages experiences any resistance, you risk losing everything, from your sales to your site ranking.
For WooCommerce businesses, slow checkout pages are especially detrimental. In the case of new customers in particular, checkout is the step that cements their loyalty to a brand or a business. Delays in checkout can be the result of many things. However, poor performance and speed are uniquely frustrating and can cause shoppers to abandon their carts more readily.
What’s Causing Your Checkout Page to Lag?
Checkout pages tend to slow down due to the same key factors as other areas on an e-commerce website. However, a checkout page does have some unique elements and requirements that either contribute to slow speeds or are affected by it.
The following are some major culprits that may lead your checkout page to load or respond more slowly.
Crowded Checkout Forms and Functions
Adding more checkout fields means that the store has more steps to process before the purchase can finish. While some custom fields are necessary, too many of them can cause the page to load slower than usual.
Hosting Troubles
The web host provides the basic online architecture for accommodating your website. Choosing the wrong host can cause checkout to load more slowly, including during peak times of web traffic.
Poor Caching and Optimization
Caching and optimizing your website’s elements are necessary actions for elevating performance. If they aren’t up to task, your WooCommerce store lag from the burden of unoptimized code and images, as well as subpar caching.
Third-Party Integrations
When using a plugin like a WooCommerce checkout field editor, integrating other compatible plugins can seriously improve your site’s personalization and UX. However, some third-party tools and extensions can slow down your server without adding anything useful to counterbalance this loss of functionality.
Unoptimized Scripts
Scripts, such as JavaScript and CSS, play a huge role in giving your checkout page structure and functionality. If you don’t optimize them for speed, their performance will suffer greatly.
Improving WooCommerce Checkout Speed: 7 Best Practices
- Downscale Unnecessary Plugins
Plugins to a WooCommerce store are like apps for a smartphone. They certainly serve a purpose, but too many of them can cause overload. Thus, performance will suffer. So, only stick to reliable plugins and lose the ones that aren’t essential to checkout management.
The same applies to third-party checkout tools. Plugins like WPML are undeniably vital to your online store. But some, like third-party payment gateways, can negatively affect the functionality of your store. So be wary of those and select your compatible tools carefully.
- Use Checkout Fields Sparingly
Use a reliable checkout manager for WooCommerce to hide or delete fields that your checkout page does not need. A simpler checkout process is easier to navigate, but also a breeze to process in time.
- Lessen External Scripts
External scripts are more likely to lead to slower load times for woocommerce checkout pages. So, favour internal CSS or HTML and only use their external counterparts where you can’t substitute them.
- Cache and Optimize Checkout Elements
Speed up your checkout page by caching them, and optimize product images for faster speed with lazy loading or compression formats.
- Fine-Tune Real-Time Checkout Functions
Consider streamlining inventory checks and shipping rates for greater efficiency. That way, you can preserve UX and customer service while improving your checkout performance.
- Perform Database Cleanups
Redundant data from database queries can lead to slower loading times across your website. Routine cleanups can avert this issue and enhance the performance of your online store. Consider automating these cleanups for ease and efficiency.
- Opt for Mobile-First Design
The bulk of your online traffic already comes from phone users. With mobile-friendly design, you can design a more responsive and user-friendly woocommerce checkout page for users of all devices.
Conclusion: Woocommerce checkout page
The simple fact is that slow website speeds are a deal-breaker for users. In the realm of e-commerce, it can prove even worse for online stores in the form of slow checkout pages. Luckily, it’s not too late to solve this problem effectively and for good.
Thanks to caching, hosting, and other performance-enhancing solutions, improving the speed of your WooCommerce checkout page is not that different from any other part of your website. For everything else, a quality WooCommerce checkout field editor can prove even more useful.
5 Pitfalls In WooCommerce Checkout And How To Avoid Them
Perfecting your online store is a meticulous and lasting process. The battle to design the perfect user experience demands professionalism, attention to detail, and, for good measure, a reliable checkout manager for WooCommerce (woocommerce checkout). And yet, for many online businesses, the experience ends up with users unsatisfied.
The checkout process isn’t just a single distinct step in e-commerce, but a key touchpoint that several factors influence at once. If your checkout page isn’t living up to your expectations, it’s worth addressing the core problem to identify a solution. To do that, you must recognize what makes a functional checkout flow in WooCommerce.
The Anatomy Of WooCommerce Checkout
A checkout page consists of multiple elements which work in tandem to help buyers complete their online purchases. Some elements are fairly obvious and straightforward, while others are less conspicuous or operate discreetly.
A typical checkout form might be a landing page, dialogue box, or pop-up that the store should redirect you to when you click Buy. They will consist a series of fields which allow the buyer to enter their information and confirm the specifics of their purchase.
There are different sections of a checkout form which are laid out either on a single page or across a multi-step checkout process. These include
- User information
- Billing and shipping
- Payment details
- Contacts
- Order Summary
Other crucial aspects include the template, user interface, help desk, and cybersecurity details. All of these combine to ensure that your buyers experience no issue when buying from your online store.
However, if one or more of these areas either need more optimization or experience hiccups, they can derail the experience. This contributes to poor impressions, abandoned carts, and plummeting conversion rates and sales.
5 Major Checkout Issues That You Need To Avoid
Checkout management is a lot more than adding new fields and features to your forms when it is convenient. It encompasses the long-term maintenance of a uniform and engaging checkout process front and back, for each user, across possibly thousands of e-commerce interactions.
To reach that goal, you’ll have to navigate a gauntlet of hurdles. The following are some key problems that can frustrate or disillusion buyers.
- A Lack Of Transparency
As e-commerce lacks the reassurance of face-to-face retail, shops must endeavour to convince buyers to trust them. In the context of checkout, this means stating your billing, shipping, and return policies clearly and explicitly.
Often, buyers are met with hidden charges or other surprises during or after their transactions. This leads customers to lose trust in a store and abandon their purchase.
- Poor Forms And Flow
Online customers are not fond of e-commerce actions that take too much of their precious time. Providing them with a long and scattered checkout process makes it difficult to complete checkout. Things like excessive fields or a flow that makes no sense are too risky to leave unaddressed, as they can cause conversions to haemorrhage.
- Subpar Accessibility
A single business might cater to a wide range of buyers, some of whom often face neglect from e-commerce shops. These include
- Non-English speaking customers
- Unregistered buyers
- Mobile phone users
- Users of various payment gateways
WooCommerce stores often fail to consider the needs of these audiences when designing a responsive checkout page, which costs them dearly.
- Performance And Responsiveness Issues
Speaking of responsiveness, monitoring the performance and reliability of your checkout page is essential. A page affected by slow speeds or errors can also lead customers to turn to your competitors in search of better service.
- Gaps In Security
Online shopping works best in an atmosphere of trust and reliability, where your shoppers are at little risk of cyber attacks. Any lapses in online security can threaten the personal and financial safety of your buyers. This can damage the image of your store and also expose you to serious legal setbacks.
Best Practices And Tips For WooCommerce Checkout Management
Online stores of any size can benefit from a holistic approach to WooCommerce checkout management. That way, rather than focusing on just one issue, you can better understand the big picture of winning e-commerce strategy.
The following are some useful tactics for robust checkout optimization that would benefit your store.
Personalized Checkout
Use popular e-commerce trends as well as the information gathered from checkout fields to tailor the checkout experience. Use a checkout field editor that helps you customize the arrangement and aesthetic of your form and lets you experiment with custom CSS classes.
Opt for a customer-centric approach to personalization with product recommendations and unique offers. Use upselling or cross-selling to offer complementary or superior items. This improves your checkout page as well as your average cart totals.
Abandoned Cart Recovery
There are several ways to help buyers complete their purchases more frequently. Stop cart abandonment with email reminders and concise checkout pages which enable a more seamless shopping experience. Implement wishlists and be transparent with your store policies and charges.
Optimize Loading Times
Slow page speeds can be the result of various issues, either acting individually or all at once. Heavy themes, crowded checkout pages, and poor optimization can all lead to lagging or buffering checkout pages. Use caching and image optimization to lessen the load, and only stick to plugins that you need.
Make Checkout More Accessible
When investing in a checkout manager for WooCommerce, favour one that offers
- Multilingual and currency-switching tool compatibility, like WPML
- The ability to integrate multiple gateways
- Quick and easy activation of guest checkout for account-less buyers
- Mobile-friendly checkout page design
Conclusion: Woocommerce Checkout
For WooCommerce stores, a winning checkout page design isn’t always guaranteed from the beginning. Even with thorough competitor research, it’s normal for a checkout page to leave something to be desired. The secret is to understand what that something is so that your attempts to improve things aren’t wasted.
This guide underlies the most egregious and widespread shortcomings in the area of WooCommerce checkout. We have also understood how to pre-emptively take care of these issues through informed and inclusive checkout page design. So, use a quality checkout field editor and make your virtual register one to envy.
How T0 Boost Store Revenue With best Checkout Field Editor For WooCommerce
WooCommerce has made it easier than ever for small online businesses to find their audience and succeed in the market. It’s an increasingly popular e-commerce plugin thanks to its ease of use and adaptability. With a top-tier checkout field editor for WooCommerce or other plugins, users can further enhance their stores.
And speaking of checkout, few other aspects of your online store have such an impact on your sales and conversions. Smoother purchases make great impressions on buyers, which can be beneficial for your online store.
But how do you use this to make your WooCommerce website a more lucrative online storefront? The answer lies in checkout optimization.
Why You Should Optimize Your Checkout Page
To inexperienced businesses, checkout is nothing more than just the final step in making and confirming a purchase, be it online or in person. But, seasoned store owners recognize the importance of a well-kept checkout process and flow. Here are some key reasons why your checkout page needs particular attention.
Ensuring Smooth Transactions
Buyers dislike a checkout experience that is slow, confusing, or restrictive. Thorough optimization helps prevent these issues. This results in a largely frictionless checkout experience that leads to more smooth transactions.
Enhanced User Experience
Your checkout page needs all the necessary features to cater to the needs of your buyers. From the interface to offering choice and freedom, focusing on UX is imperative when designing a checkout page.
Common Checkout Page Challenges
The default WooCommerce checkout is a useful tool. But a one-size-fits-all layout isn’t always the answer. Without a streamlined and personalized checkout experience, your store experiences more than its fair share of hiccups. It’s worth understanding these issues and how they can impact sales.
Cart Abandonment
Poor checkout design and experience are some of the many factors that can cause buyers to leave in the middle of a purchase. These abandoned carts are the leading causes of lost e-commerce revenues.
Security Concerns
Cybersecurity is no joke, especially when it comes to financial information. Buyers find it difficult to rely on stores that don’t properly account for their safety. So, when adding a billing gateway, make sure to choose the ones with a proven track record of security.
Lack of Transparency
Even hasty online customers prefer to be aware of things like overall e-commerce charges, shipping details, and return policies. Being opaque with these details erodes trust and revenue over time.
Strategies to Improve Checkout Pages in WooCommerce
Clearly, the road to e-commerce success is riddled with hurdles associated with checkout. Luckily, with an eye for optimization and a good checkout manager for woocommerce, you can address checkout issues and enhance the overall process. The following are some proven strategies that can help you preserve the value of your business.
Uncomplicate The Checkout Process
Speedier checkout keeps your customers engaged. If your checkout page is long or crowded, a checkout field editor for WooCommerce can help you delete, rearrange, or hide extra fields.
Consider using single-page checkout to help expedite the process while ensuring that you get the information you need to personalize your store. Alternatively, if you prefer multi-step checkout, minimal forms and progress indicators make the process more efficient.
Make Checkout More Inclusive
You need to make sure that your buyers can use your checkout without being hampered. For overseas buyers, implement a multilanguage and multicurrency system to help them make easy payments past language barriers.
And while we’re on the subject of payments, add multiple payment options like digital wallets, bank cards, and more. This caters to more diverse audiences and enhances your revenue.
Furthermore, mobile-first optimization offers responsive checkout to users of all devices. Guest checkout is another valuable feature that helps give non-registered shoppers some priority. It gives them the freedom to make their purchases without making an account and the option to register at a later time if they wish.
Security and Trust
Your buyers have to entrust you with their sensitive financial and personal data. You can reassure them with SSL certification and checkout badges. As a result of these measures, more buyers can purchase from you with their peace of mind intact.
Using Exit Intent Popups
Exit intent popups present a potentially innovative means to reach out to visitors leaving your WooCommerce store. You can use these for abandoned cart reminders, product recommendations, discounts, and other incentives that can help increase purchases.
Upselling and Cross-Selling With Checkout
Implement upselling and cross-selling at checkout to boost earnings. Upselling is where you provide buyers with superior alternatives to their desired products, while cross-selling helps highlight related products that can elevate their purchases.
The purpose of both checkout strategies is to increase average cart totals and order values at the end of each purchase. There are a few methods of leveraging cross and upselling in WooCommerce.
- Provide Related Products: These are products that complement what your buyers choose at first. For example, if someone is buying a phone case, you can offer accessories like screen protectors or a high-speed USB cable.
- Bundle Offers: This follows a similar path, but rather than recommending related products separately, you can combine them into a single, attractive deal.
- Recommendations: Use specialised algorithms to suggest goods based on the customer’s past shopping history.
Conclusion: Checkout Field Editor for Woocommerce
If you suspect that your WooCommerce store isn’t doing especially well, a checkout solution is always the way to go. A premium checkout field editor for woocommerce plugin can help you seriously overhaul and fine-tune your checkout strategy to make it more efficient, safe, and inclusive.
Paired with robust upselling and cross-selling, this optimization approach can guarantee greater sales just by revamping your checkout page.
How T0 Set Up And Optimize WooCommerce Guest Checkout
Inclusivity is a growing concern in all walks of modern life, including e-commerce. For WooCommere stores, this often means investing in a reliable checkout manager to simplify the process with currency switching, diverse payment portals, and concise, mobile-optimized checkout forms.
But that’s not all there is to it. Online stores can take a number of varying approaches to design the perfect checkout process. Some prefer single-page checkout over multi-step, or vice versa. In other cases, there seem to be some universally accepted approaches.
Among the latter, guest checkout is an increasingly preferable option for online stores. The question revolves around just how useful it really is, and how can you improve upon it. Let’s dive straight in.
What Is Guest Checkout?
Guest checkout is a feature through which buyers can make purchases from online stores without registering. In WooCommerce, guest checkout is often quite common, and most checkout field editors for WooCommerce help stores manage checkout with this feature in mind.
This approach is meant to be more inclusive, as most online shoppers are less likely to commit to making an account. Plus, you don’t need any special tools to enable this feature, either. If you’re already using WooCommerce, activating guest checkout is simple, and it goes as follows:
- In your WooCommerce admin board, head over to WooCommerce.
- Next, find the Settings tab and click Cashier.
- Enable Buy Now if it isn’t already, then click Configure.
- Navigate to Add to Cart and Checkout setup.
- Once there, click on Replace “Add to cart” with “Buy Now” for all products for guest checkout.
- To summon the checkout pop-up, head over to Checkout in a popup and click on ‘Show checkout form in a popup on the same page for quicker checkout’.
- Save your changes.
What Makes Guest Checkout So Appealing?
With guest checkout, it seems that buyers don’t have to commit to your store to make purchases. So, what possible incentive could there be in favour of it?
If you’re running an online store, you’ll probably need to impress first-time buyers. That can be difficult if they cannot make purchases without an account. Even if registration is free, it’s time-consuming, and many online shoppers lack the patience to engage in this action.
Guest checkout helps you realize a more obligation-free setup where buyers can make their purchases. That way, they don’t have to waste time verifying each login or remembering passwords. The result is a more frictionless checkout experience, which is always a plus in the arena of WooCommerce.
Key Advantages Of Guest Checkout
- Faster Transactions
Guest checkout can help expedite online shopping by eliminating account creation. This heightens conversions and lowers cart abandonment rates.
- Offers Peace Of Mind
Part of account creation is handing over your sensitive financial and personal information to a total stranger. Obviously, not everyone might accept that, and guest checkout offers some sense of reassurance.
- Fosters Trust
First-time shoppers tend to demand commitment rather than reciprocate it out the gate. With guest checkout, they have the choice and freedom to register on their own terms. Down the line, they’ll register if the goods are worth it and the checkout process is sublime.
Concerns About Guest Checkout
Clearly, guest checkout should be a shoo-in for small businesses hoping to make it online. But this approach isn’t perfect, and acknowledging its shortcomings is important if you want to benefit from it.
With guest checkout, you lose access to some crucial information about your shoppers. This can cause stores to struggle to understand their user’s preferences. Personalization becomes more difficult, and the overall shopping experience risks becoming less intuitive.
Additionally, some experts stress favour marketing to returning customers over prioritizing first-time buyers to uphold customer lifetime values. That can be difficult if guest buyers form your main source of income.
Best Practices For WooCommerce Guest Checkout
Fortunately, WooCommerce stores can strike a balance between catering to registered and non-registered users. A quality checkout field editor for WooCommerce can help you streamline your checkout process. Here’s how you can improve upon the value that gust checkout brings to your store.
Leverage Your Checkout Forms
Implementing guest checkout doesn’t have to fully throw data out the window. You can still learn a lot about your users through the necessary checkout fields, like order details, shipping information, and choice of payment.
You just need to simplify the process. Use a premium checkout manager plugin to overhaul your form.
Implement Smart Analytics
Analytics tools can help track your unregistered users while maintaining their anonymity. That way, you can learn more about your traffic and checkout trends without forcing users to log in before they can check out.
Offer Incentives
Discount rules and perks for registered shoppers are not essential for all online shoppers. So, you can entice buyers to register accounts through exclusive goods and services without the obligation of account creation for basic online shopping.
Facilitate All Your Buyers
Your checkout page serves as the perfect avenue to market to all your buyers, registered or not. Make sure to prioritize both returning customers and new, unregistered shoppers so that you can keep business booming.
Conclusion: Guest checkout
Guest checkout for WooCommerce stores is a game-changer for online businesses competing for buyer attention. But a winning low-commitment shopping experience demands a smarter strategy. So, with this guide and a quality checkout field editor, you can streamline your WooCommerce store for all manner of customers.
How T0 Set Up One-Page Checkout With Checkout Manager For WooCommerce
Online stores are often at odds when balancing their need for data and facilitating buyers at the same time. On the one hand, you need a quality WooCommerce checkout manager to customise checkout fields and shipping. But then there is the need to shorten the overall process.
If this seems like a tricky tightrope act to you, you’re not alone. Nonetheless, online stores must find ways to make their checkout forms robust while prioritising speed and efficiency. Increasingly, more and more WooCommerce stores show preference for one-page checkout has. If you’re just finding out about it, let’s understand why this approach has such appeal.
Understanding One-Page Checkout
As the name makes it clear, one-page checkout packs the complete checkout flow to a single page. When a customer makes a purchase, one-page checkout lets them select goods, enter their data, confirm shipping, and finalize the payment on that same page. No multiple steps and page after page of filling in details.
Single-page checkout was developed to streamline online shopping. While multi-step checkout is another way to go about designing your checkout page, more and more WooCommerce stores are lining up to take the single-page route.
Why Create A More Condensed Checkout?
Studies repeatedly show that complicated checkout processes lead to fewer completed purchases. The reason is simple. Checkout pages that contain too many steps can be frustrating to buyers. No one wants to navigate a maze of forms and fields.
The more you strive for simplicity in your checkout process, the less frustration your buyers will experience. The easiest way to achieve this is by making the checkout process more brief. This results in a more streamlined flow that consumes less of the buyer’s time.
Three Crucial Advantages Of One-Page Checkout
- Reduced Cart Abandonment
Cart abandonment is a widespread problem in e-commerce, and often occurs due to a poorly optimized checkout page. With single-page checkout, you don’t have to make much effort in customizing the layout.
Instead, you just need the essentials to eliminate hassle from your checkout flow. This leads to easier shopping, which in turn curtails abandoned carts in WooCommerce.
- Improved Conversion Rates
Simplifying purchases makes it easier for buyers to take their time when shopping without losing patience or experiencing too many errors. The result is higher conversions, which boosts traffic and revenue.
- Enhanced User Experience
Proper UX is critical for online businesses. By presenting a thorough checkout all in one place, the one-page approach makes checkout more convenient and rewarding for customers. Plus, with the right checkout field editor for WooCommerce, stores can set up field customization, validation, discount rules, and more!
Common Concerns
In e-commerce, no approach is singularly the best of its kind. And while one-page checkout has its defenders, it’s worth addressing some key complaints that are commonly associated with it. Without that, online stores cannot really benefit from putting all their eggs in one basket, so to speak.
Security Concerns
The reason why one-page checkout works is that many online stores know how to implement it perfectly. But those who don’t would pack in all the sensitive data-collection fields on a single page. This can lead to concerns surrounding the safety of the checkout process.
Poor Design
Another way in which condensed checkout pages can prove less than helpful is by making things confusing. Store owners need to decide which fields are necessary for their checkout forms. But if there are too many of them, going with a one-page checkout page design can backfire.
Strategies For Improving WooCommerce One-Page Checkout
Despite the challenges, there is no need to be put off by the concept of one-page checkout. Instead, you can embrace this approach by optimizing your checkout with the right features. That way, you can simplify checkout whilst being able to gather user data for personalization and maintaining conversions. Let’s take a look.
- Clear and Concise Design
Take a moment to weigh which checkout fields are crucial and which aren’t. Use a quality checkout manager plugin to hide or delete fields. Alternatively, you can use dropdown menus and conditional logic to make the layout more focused and minimalist. (checkout manager)
This ensures the overall checkout flow is labelled, clear, and easy to navigate. For longer pages, a progress indicator helps buyers keep track of their purchase in real-time.
- Mobile Optimization
More and more online customers are switching to mobile phones to make their purchases and bookings. So, make sure that you checkout page follows “mobile-first” design. This ensures that the online register is equally responsive for mobile and Desktop user. This is effective at preventing cart abandonment and maintaining your SEO.
- Methods For Payment
Integrate several payment gateways that your customers can choose from. This flexible checkout design can increase confidence in your business without infringing on the simplicity of a one-page checkout design.
- Safety Checks
Addressing cybersecurity concerns will help your store solve one of the main problems with single-page checkout design. With SSL certification and proper encryption, your buyers have the peace of mind that their personal and financial data is in safe hands.
Conclusion: Checkout manager
Ease of use is paramount in online shopping, and WooCommerce stores are in a constant struggle to design the perfect checkout flow. Luckily, with an eye for strategic design and a quality checkout manager for WooCommerce, one-page checkout can be easy to implement. Before you know it, your online store is the talk of the town.
Best WooCommerce Checkout Field Editor Plugins: A Review
If you’re a small business, you’ll find that a lot of your success will be riding on that all-important first impression, specifically the checkout page. The great news is that investing in a quality WooCommerce checkout field editor plugin can help you optimize your checkout page for maximum conversion.
However, WordPress users seem to be rather spoiled for choice when it comes to checkout plugins. With so many on the market, a small business owner like yourself might struggle to make an informed pick. To help solve that, this piece delves into some choice WooCommerce plugins aimed at improving checkout.
But before you go ahead and examine your options, it’s worth addressing why that matters.
Why You Need The Best Checkout Management Plugin For WooCommerce
Online shoppers tend to be a fickle bunch, and the slightest inconvenience can cause them to flee. Already, most online stores experience high cart abandonment rates, especially among mobile users. To help maintain conversions and sales, you need to introduce efficiency into your checkout.
That is precisely why you need premium-quality WooCommerce plugins for custom checkout pages. Here are some features that they can help ensure on your online stores.
- Superior User Experience
WooCommerce Checkout field editors for help stores implement auto-fill, single-page checkout, and other features that contribute to a more streamlined shopping experience. This increases customer satisfaction and lowers the likelihood of abandoned carts.
- Customization
These plugins enable online stores to revamp every aspect of their checkout page to something more unique, from individual fields to the overall process and flow. So, you can align your checkout to your brand goals and facilitate your audience at the same time.
- Data Collection
Strategically positioned and validated fields are difficult to achieve without a dedicated WooCommerce plugin. They make it easier to collect data that helps you elevate personalization, build on customer lifetime values, and make the most of loyalty programs
The Best WooCommerce Plugins For Managing Checkout
Rather than run the gamut of checkout tools that are available online, we’ll be focusing on a selection of top-rated WooCommerce checkout field editors for .
The Checkout Manager by Jcodex is a highly versatile plugin that is built with user experience in mind. Not only do you gain access to more field types, but with it, you can customize checkout forms to your heart’s content. With immense personalization and a stunning interface, it has everything you need to really elevate your online register.
Top Features
- Conditional Logic: Declutter your checkout by displaying or fields based on particular criteria.
- Field Validation: Eliminate errors and security risks from your checkout forms.
- Rearrange Fields: Simply drag and drop fields to achieve the checkout flow you desire.
- Custom CSS: Allow the design of your fields to match that of your store.
- WPML Compatibility: Make sure that your checkout experience caters to non-English speakers.
- Checkout Field Editor for WooCommerce
If you want full control over your checkout page, the ThemeHigh Checkout Field Editor is another useful tool. It does a lot more than simplify the ability to edit, remove, and rearrange fields. More than that, it offers better personalization compared to the default settings, while helping you make more informed checkout design choices.
Top Features
- Drag-and-Drop Builder: This lets you reposition fields in a quicker and easier manner.
- Field Cloning: Promptly make duplicates of existing fields without having to re-enter crucial details.
- Custom Labels: Rename fields to overcome the limitations of default labels.
- Zapier Support: Let’s you integrate a wide range of e-commerce tools and automate tasks.
- Checkout Field Manager for WooCommerce
The Quadlayers Checkout Field Manager allows you to streamline your checkout forms to boost customer satisfaction. Some key selling points for this plugin are its focus towards personalization and a simpler design for field filtration.
Top Features
- Custom Fields: You can not only create, but also filter, custom fields to highlight specific data.
- Email notifications: Add custom fields to post-checkout emails, with filtration capabilities.
- Field Cloning: Quickly duplicate fields for quicker and more robustcustomization.
- File Uploads: Pro users can upload images and other files for a more bespoke layout.
- Flexible Checkout for WooCommerce
As the name suggests, this WooCommerce checkout manager specializes in creating a more fluid and accessible checkout experience. With its basic and pro features, you can build a more intuitive and sequential process that makes completing purchases much easier for your buyers.
Top Features
- Section Management: Group and manage fields collectively for clearer management.
- Single and Multi-Step Checkout: Choose the style that works best for you.
- Compatible design: Supports any WordPress theme and payment gateway
- Mobile-Friendly: Prioritizes responsiveness for phone users.
- Checkout Editor By Acowebs

The Checkout Editor by Acowebs is a robust WooCommerce plugin that promises a checkout design built for your customers’ ease and your store’s best interests. It helps simplify field and form editing for a checkout that satisfies your business while also helping minimize cart abandonment.
Top Features
- Drag-and-Drop Interface: Build a bespoke flow by simple rearrangement of fields.
- WPML and PolyLang Support: Cater to non-English speaking buyers during checkout.
- Validation Rules: Make data entry more accurate and reliable.
Conclusion : WooCommerce Checkout Field Editor
E-commerce is a game of first impressions, and checkout is a touchpoint that you cannot affort to take for granted. It is crucial that you invest in first-class WooCommerce checkout field editor plugins if you hope to optimize your page for better conversions and sustainable customer trust and loyalty.
In the end, a stunning and competent checkout page is more than properly arranged fields and a wide range of payment gateways. It is a process that needs to tick each box pertaining to customer experience. It should convey professionalism and dedication to your buyers. Fortunately, with quality checkout editing tools like these, that becomes an easier goal to realize.
How To Optimize Your WooCommerce Store For Mobile Devices?
Facilitating and prioritizing your customers above all else should be your number one goal as a store owner, be it in-person or on WooCommerce. For instance, as handheld devices emerge as the online shopping hub of everyone’s choice, there is a need for stores to adapt to this change.
Of course, it’s not really a new trend, as online shoppers have relied on mobile phones as soon as the first one is successfully connected to the internet. Still, let’s try to understand why meaningful mobile optimization is so important, and what it includes.
What Is “Mobile-First Design” And Why Does It Matter?
“Mobile-first” Design is an inclusive, ground-up trend in web building that takes the needs of all internet users into account, starting with the high-priority ones. Specifically, a website that is built on a mobile-first foundation must consider the needs of smaller screens and devices, i.e. mobile phones, and work its way upwards.
For instance, let’s say you’re using a WooCommerce checkout field editor to customize and enhance your checkout page. A mobile-first approach will enable you to build checkout forms that work perfectly on mobile phones and PCs alike. This will prove useful for online shoppers and help you build a more convenient and scalable interface.
The Mobile Commerce Explosion
M-commerce, or mobile commerce, started as an offshoot of commercial web browsing and has since dominated the scene. Today, the vast majority of online shoppers rely on their tablets and smartphones to order goods, make bookings, and connect with service providers.
Key Principles Of Mobile-First Design
There are some crucial aesthetic and functional aspects that distinguish mobile-friendly websites from the rest. These partly include the key features of mobile phones and similar devices, which include:
- Smaller Screens: With less space to work with, WooCommerce or WordPress stores need to adjust their landing pages and key assets, like images and checkout fields, to smaller screens. Without mobile-first design, the pages might end up being glitchy, inconsistent, and unresponsive.
- Less Power: Mobile phones have less power than computers, which means they can’t run heavy-duty applications or graphics-rich websites. To address this limitation, designers should use lightweight fonts and images that aren’t too large in file size. This way, mobile users can still access the site without experiencing any loading issues or crashing their device.
- Touch-Powered Interfaces: Interfaces that use tactile operating systems must respond swiftly and accurately to all manner of tapping, swiping, and pinching to help buyers navigate. So, rather than using long scrolling pages or dropdown menus, there’s a need to break content into smaller, more digestible chunks.
Besides the distinct or limited capabilities of phones, however, you must also contend with the unique behaviours of phone users, which may include:
- Hasty Purchases: Buyers that have the patience to physically open and power on a laptop to order shoes or book movie tickets tend to be in a hurry. So, you need to optimize your mobile site for speed and responsiveness.
- Shorter Attention Spans: Online shoppers in general tend to be more easily distracted even before you account for the device they’re using. But if they’re buying on the move or in bed, they likely won’t be paying attention to long pieces of text when shopping. So, minimalism is the name of the game.
Costs Of Poor Mobile Optimization
Poor User Experience
An online store that isn’t built with mobiles or its users in mind will experience more lagging, poor navigation, and layout-related issues. This will lead to more frustration among buyers, which they might express through poor ratings and reviews, and that is if you’re lucky.
Reduced Conversion Rates
If you’re unlucky, however, your buyers might take their business elsewhere. Poor mobile optimization tends to correlate with higher cart abandonment rates and loss of traffic.
Lower Search Engine Rankings
And with the low traffic, your SERP rankings are highly affected. Plus, since the late-2010s, mobile-first design has been an essential SEO criterion for Google’s ranking algorithm. And those who fail to meet it might as well bid their visibility farewell.
Basics Of A Mobile-Friendly WooCommerce Store
With so much at stake, you’ll be glad to know that the essentials of mobile-first design are no rocket science. To illustrate that, let’s go through the essentials of mobile-friendly store design.
- Choose The Right Theme
For WordPress sites, there is no shortage of themes that can adapt well to all manner of screen resolutions. Templates and themes that use a “hamburger” style layout or minimal text are a great choice for your store.
- Optimize Website Speed
Poor site speeds can corrode your conversions and SEO, so you’ll need to improve its performance. As usual, the best solutions include browser caching, optimized images and code, and using only the essential plugins.
- Simplify Navigation
Every aspect of your website, from your hierarchy to the checkout flow, must be streamlined and responsive. Make your menus concise and your content organized, so that users can promptly find what they’re looking for.
- Simplify The Checkout Process
Speaking of checkout, this is a pivotal touchpoint where you’ll need to win over your customers. Use a quality checkout manager for WooCommerce to iron out your checkout page. Optimize your custom fields, guest checkout, and payment gateways for smartphones and tablets.
- Declutter Your Store
The best solution for a smaller and less powerful device is limiting your WooCommerce or WordPress store to the essentials. Keep text to a minimum and choose minimalist and cohesive layouts that don’t overwhelm your server or your buyers.
Conclusion : Woocommerce
For a WooCommerce store, mobile optimization is a top priority and a no-brainer. Luckily, mobile-first design is a fairly straightforward, and perhaps even innovative, approach in online shopping. So, take the steps to ensure that every element of your page, from the checkout flow to the “About Us” section, is fully designed with phone users in mind.
How To Design And Set Up A Great Streamlined WooCommerce Checkout Flow
E-commerce is a game of last-minute decisions, and the speed at which a customer can be won over or disappointed by your service can be a breakneck. And it’s not enough to craft a responsive site with cool-looking product pages and discounts. Online stores need to step up their WooCommerce checkout experience if they have any hope of being able to compete.
Checkout is meant to be a fairly simple process, and in physical retailers, it mostly is. But if your store is on WordPress, each second counts and your checkout must be as straightforward and rewarding as possible for your buyers. But what does it involve beyond setting up the requisite fields and calling it a day? Let’s examine.
The Basics Of A Checkout Flow
The flow of any woocommerce checkout process consists of all the necessary steps that allow a customer to pick a product, pay for it, review billing and shipping, and everything in between. A robust checkout experience must sequentially guide buyers and should feel like a breeze to follow through, and it tends to go as some version of the following.
- Choose your product(s)
- Add to cart
- Billing and shipping
- Review your order
- Pay your bill
- Confirm your order
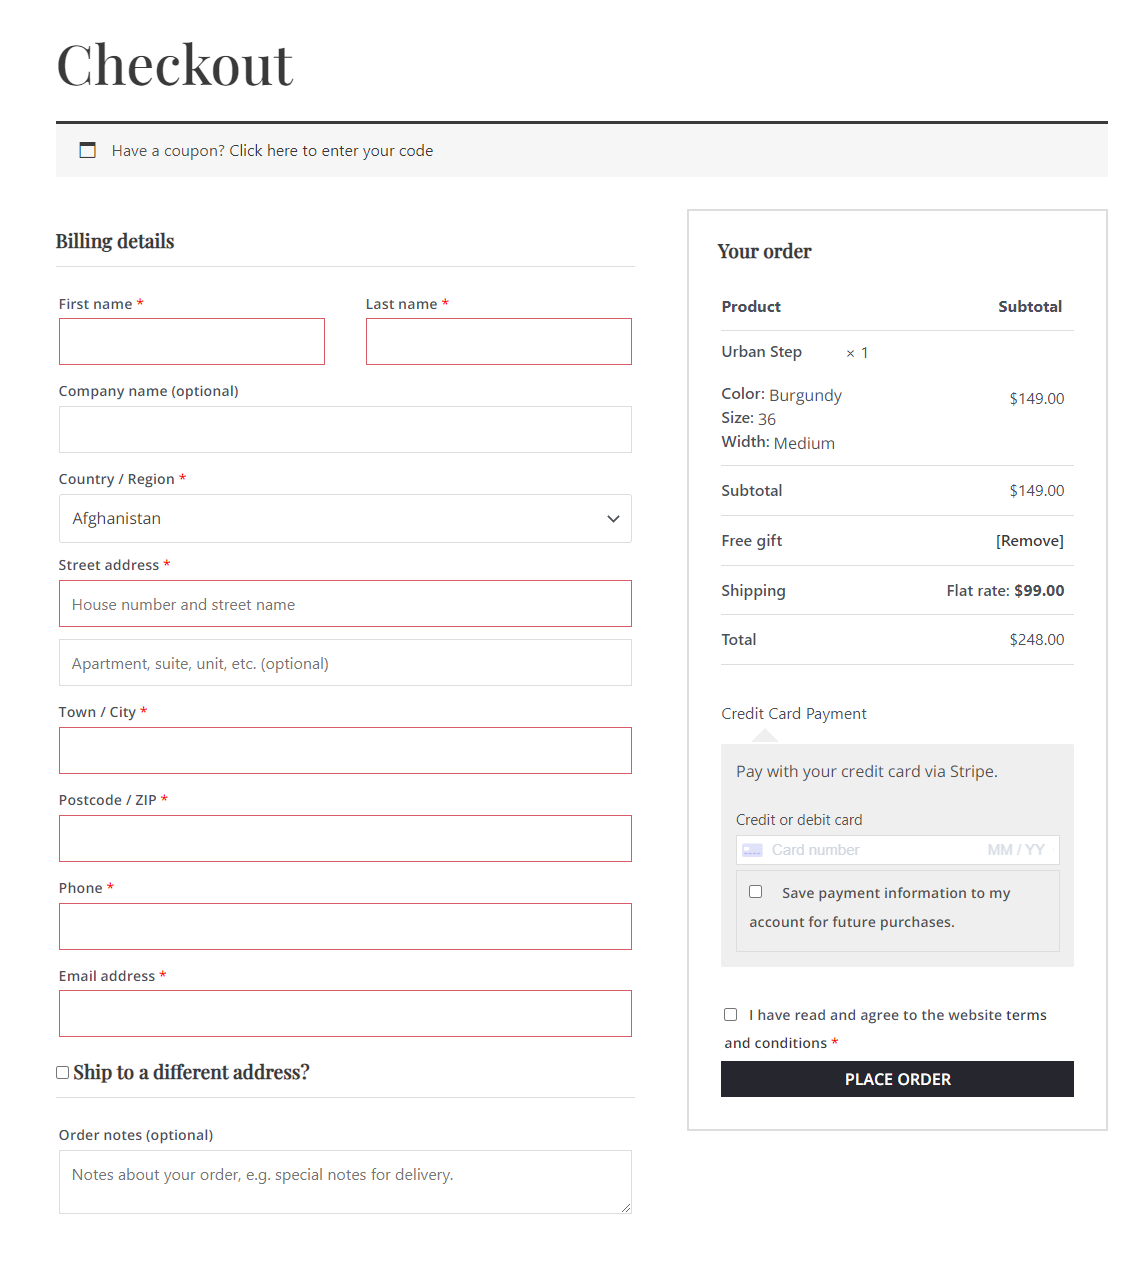
This is a largely generic flow which can vary from store to store. Things like discounts and validation for passwords and customer details can also find their place in their flow. Normally, a quality checkout manager plugin can help you customize this process.
Checkout Missteps That End Up Costing Online Stores
On the other hand, a checkout flow that is a little too frustrating can deter buyers and leave a bad impression. So, don’t be surprised if your store experiences higher cart abandonment and bounce rates as a result.
Given what’s at stake, it’s important to know the potential causes of poor checkout, such as
- An Overly Elaborate Layout
A checkout page that is all over the place isn’t a good look if a buyer is trying to make a purchase or a booking in time. Distractions and having to jump through unnecessary hoops might lead them to leave in the middle of their transaction, and perhaps never return.
- Poor or Glitchy Performance
Similarly, lagging speeds and display errors are among the quickest ways to drive up bounce rates and lose the trust of your buyers.
- Opaque Charges and Shipping
Many buyers don’t mind added charges that slightly raise your cart totals, provided that you explicitly disclose them beforehand. But costs that are hidden and take buyers by surprise can be an instant deal breaker.
- Inconvenient or Restrictive Policies
Making your registration, shipping, and return policies complicated or non-inclusive is not a decision in your favour. If your checkout has any of these gaps, the buyers will likely take their business elsewhere.
- High-Commitment Experiences
In the same vein, demanding that your customers go through the bother of account registration might come off heavy-handed.
The Essentials of a Smooth Checkout Process
Single-Page vs Multi-Step Checkout
These are the two main layouts that checkout pages typically exhibit. Since we’re discussing the importance of an efficient and time-saving checkout, this consideration is essential.
For the sake of efficiency, going the one-page route allows your buyers to really shed their time when buying online. However, you might rob them of some checkout essentials that would normally help reassure them, like validation or an order summary. If you choose multi-step checkout, keep each step simple and limit the number of fields per page.
Mobile Optimization
Responsiveness on small screens is the need of the hour in modern e-commerce. Mobile users now lead the charge among online shoppers, and facilitating them online is good for your sales and SEO.
Guest Checkout
To really seal the deal with non-registered shoppers, make the step of account creation optional. Implement guest checkout to help them make their purchases without the hassle of registration.
Transparency
If you’re charging extra for shipping or for tax purposes, make the information clear. Display the all details related to the purchase so that the customers know from the start what they’re getting into.
Creating A Smooth Checkout Flow – Best Practices
Uncomplicate The Data Entry Process
With checkout fields, options like autofill, rearrangement, and even deleting fields, are your friends. With them, you can essentially gather as much information as necessary without inconveniencing or delaying your buyers needlessly..
Add Progress Bars
To be fair, they don’t have to be bars. Any clearly visible indicators that specify how your buyers are advancing along checkout are essential. Even a clear “page X of Y” message helps manage expectations and offers a sense of control to buyers.
Use Security Seals
Trust badges and other security authenticators are also a must. Gaining trust and loyalty requires that you guarantee cybersecurity to your buyers.
Enable Cart Modifications
Allow buyers to easily make changes to their cart without ruining the checkout flow. They might change their minds or find a better deal, in which case they should be able to, for instance, add or remove items from their cart mid-checkout.
Ensure Dedicated Support
Issues or confusion during checkout aren’t always avoidable, but they don’t have to be dealbreakers. With an FAQ section, chatbots, and contact details, offer ways with which customers can have their queries quickly answered and problems problems solved.
Finding Tools That Can Help You
Needless to say, there is nothing fundamentally difficult about designing a super checkout flow on WooCommerce. But having the right tools can make your job a lot easier. Consider investing in a premium-grade, professionally-developed WooCommerce checkout field editor for optimizing your store.
Conclusion: Woocommerce checkout
Effective WooCommerce checkout management requires that you take the flow of making a simple purchase seriously. The more seamless of an experience you’re able to guarantee, the more complete purchases your buyers can enjoy. This fosters trust and loyalty, which in turn amplifies your conversions and profits.
Best WooCommerce Checkout Page: What Is It And Why You Need It?
The checklist for your WooCommerce store doesn’t have to be an extensive one, especially with the basics largely covered. One such box that needs ticking is a dedicated checkout manager (woocommerce checkout page) for your shop. Without it, you risk leaving what is a key part of your customers’ online shopping experience to chance.
To facilitate your buyers, a decent checkout system is the absolute bare minimum for your store. So, let’s start by revisiting the fundamentals.
What Is A Checkout Page?
When you’re shopping for anything, the checkout process is what will allow you to complete your purchase. For online stores, that particular touchpoint exists in the form of a virtual register. There, you’ll confirm your order, pay for it, and get further details for your delivery.
A woocommerce checkout page, in the realm of e-commerce, is the digital gateway through which customers complete their purchases. It’s the final step in their shopping journey, where they provide payment information and shipping details before finalizing the transaction.

Essential Checkout Page Elements
A checkout page for an online store consists of a few key steps and elements. Stores can manage these manually or through tools like checkout field editors for WooCommerce.
Together, these units act collectively to help process and confirm your online purchase. These elements mainly include:
- The Order Summary
This would be the main detail of your order, like the product’s name, amount, total costs, shipping, and others. On top of helping buyers verify what they wish to purchase, this summary offers them some much-needed transparency.
- Payment Options
One of the key mistakes that online stores and service providers make is to offer just one or a few payment gateways. While a payment option is obviously a must, it’s worth noticing that different customers might rely on one of a number of platforms.
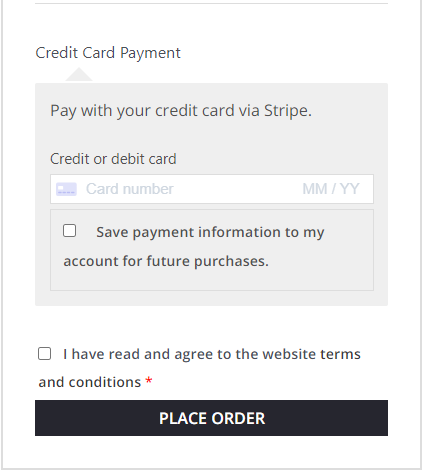
So, your checkout page must extend the option to pay via bank card, digital wallets, or gateways like Stripe. In fact, if you’re selling locally and accept cash on delivery, that option should distinctly be on the checkout page!
- Shipping Details
It’s important to display your delivery-related information to your customers. These include shipping packages, windows of availability, location, delivery service partners, and fees.

- Customer Info
Collect necessary customer information, including billing address and contact details. Ensure that the process is smooth and straightforward.
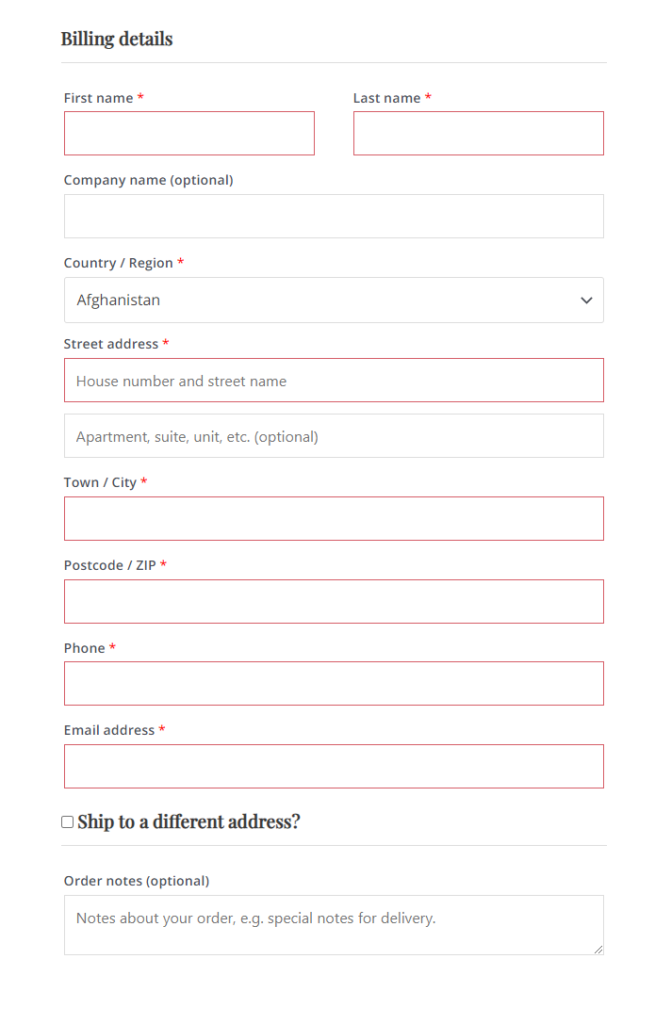
How An Effective Checkout Supports Your Sales
Being an important part of any e-commerce interaction, your checkout page needs to be absolutely smooth and well-managed. Studies show that a lot of online stores fail to sell because, while everything else seems fine, the checkout process is riddled with issues.
By optimizing your woocommerce checkout page, you can minimize bounce rates and cart abandonment and maintain your sales, on-site traffic, and SEO. Other rewards include stunning store reviews and access to customer data that will help you tailor and improve your goods and services to perfection.
Checkout Options in WooCommerce
WooCommerce offers handy features like guest checkout that enable buyers to make one-time purchases without having to register an account. That said, if you do want the registration option, WooCommerce enables sellers to personalize shopping experiences for long-term shoppers and subscribers.
Plus, to make data collection more straightforward, it also allows social logins for customers to subscribe via their Facebook, Instagram, Amazon, and other accounts.
Optimizing Your Checkout Page – Best Practices
Of course, while WooCommerce has a few built-in checkout features, they’re not the most robust solution without the intervention of a quality, professionally developed checkout manager plugin.
Here are a few steps that you’ll need to consider.
- Leverage Custom Fields
Beyond the default WooCommerce offerings, using custom checkout fields and add-ons lets you collect more data from shoppers. Plus, you can offer them more options for shipping, billing, and more, which helps boost satisfaction.
- Simplify Your Forms
Clunky and cluttered checkout forms don’t make the best first impression. Keep your interface clear, user-friendly, and somewhat interactive. If needed, you can reposition checkout fields ina a more strategic layout, or simply delete the ones that aren’t needed.
- Use Validators Correctly
To make sure that the data entry process in your checkout page is accurate and secure, use validators for your fields. They’ll help buyers confirm the information they provide and keep errors at a minimum.
- Go Multilingual
Allowing non-English speaking audiences access to your store touchpoints is always a good idea. So, invest in WooCommerce checkout managers that are compatible with translation and DeepL-powered tools, like WPML.
- Mobile-Friendly Checkout
For boosting sales and SEO, a mobile-first online shop is a no-brainer in this day and age. So, make it a priority to optimize and test your checkout process for responsiveness on smaller screens.
- Addressing Security and Trust
Use secure payment gateways, SSL certificates, and proper encryption in your checkout page. To prevent user fraud, employ validators to help buyers confirm their e-mails and passwords while purchasing from you.
- Streamlining the Checkout Flow
A concise and distraction-free checkout experience is essential if you want to keep conversions high and cart abandonment low. So, invest in features like single-page checkout, autofill, and saved information for payment, address, and other info for later.
Monitoring Checkout Performance
Keeping tabs on the performance of your checkout page is essential if you want to preserve your sales. Use A/B testing and key performance indicators like cart abandonment rates, conversions, and average order values to make sure everything going as it should.
In Closing: Woocommerce checkout page
For entrepreneurs using WooCommerce, it’s the little things that can make a world of difference as far as maintaining sales is concerned. By realizing the power of a competent woocommerce checkout page, and how a good checkout field editor for WooCommerce can improve upon it, you can keep yourself informed, your buyers happy, and your revenue in peak condition.
Add Custom Validators With Best Checkout Manager For WooCommerce
If you’re in the process of optimizing your online stores, you’d be surprised by what a simple checkout manager can help you accomplish. For beginners who are putting together their first WooCommerce store on their own, achieving sales goals requires that they facilitate buyers. To do that, you need to design the perfect virtual storefront.
Of course, there are a few things that you’ll need to cover, which can seem overwhelming at first. So, it helps to break down your responsibilities and prioritize. And in e-commerce, setting up a checkout page is particularly critical. Luckily, with the right tools, you’ll find that this process isn’t exactly rocket science.
But for those who are slightly aware of what checkout entails, it’s worth remembering that there’s more to it than adding, removing, or rearranging fields. The task of validating your fields is particularly essential. So, let’s get into why it (checkout manager) matters and what it involves.

What Are Checkout Validators?
In the realm of data entry, validation is the function that ensures the accuracy and usefulness of any input. When we’re discussing online stores, the fields on checkout pages are the key data entry points. So, to validate them is to basically implement functions and rules, or validators, that keep inaccurate or partial data at bay.
If, for instance, a customer adds an inappropriate value to a validated field, it may prevent them from advancing along the form while offering an error message. In WooCommerce, default checkout fields tend to have their own set of validators. With most checkout manager, you’ll probably need to refer to the Advanced settings for managing fields.
Of course, the trend of personalizing checkout fields is a growing one for WordPress stores everywhere. And with custom fields, you’ll need validators of the same ilk.
“Custom” Validation And Its Benefits
With custom validators, you can effectively tailor your checkout page in a way that suits you as well as your buyers. As we’ll discuss shortly, this process is fairly simple. But it’s worth understanding why it matters in the first place before investing time and effort into implementing your own tailor-made field rules.

It Ensures Accurate Data
To reiterate, data entry at the checkout needs to be cohesive and factual. If you, as an online business, ask buyers to disclose their addresses and contact info, the need for accuracy is pretty much self-explanatory. For custom fields, validation is primarily what ensures that.
It Works Wonders For UX
A user-friendly checkout experience is the only one of its kind that your online store can afford to offer. And with custom validation, you promise smooth sailing for buyers, which offers the added benefit of curtailing cart abandonment.
It’s A Legally Sound Practice
Many online businesses have to comply with certain regulations regarding data collection. Data entry not only ensures its accuracy but can do so in a largely secure manner. This way, you can fulfil your own needs, satisfy your clients, and not inadvertently implicate your business in the process.
How Checkout Plugins Make Your Job Easier
The good thing about WooCommerce is that, with the right hooks, there are few things you cannot customize. And like that, manually validating custom fields is very much possible. However, that approach requires more time and a bit of attention to detail. And if you’re a WordPress beginner with little knowledge of coding, you’re likely short on both.
Luckily, there exists a quick and highly accessible solution in the form of checkout field editors for WooCommerce. These are versatile plugins that make streamlining your checkout page much easier.
As far as adding custom validators is concerned, these tools like the Checkout Manager for WooCommerce offer a range of advantages, like ease-of-use, comprehensive customization, and access to over 20 new field types.
How To Set Up Your Custom Validators
To start, make sure your plugin of choice is installed and active. From there, follow the instructions below to kickstart your custom validation journey.
Adding Custom Validators
- Locate your plugin in WooCommerce, then head over to Checkout Form > Advanced Customization.
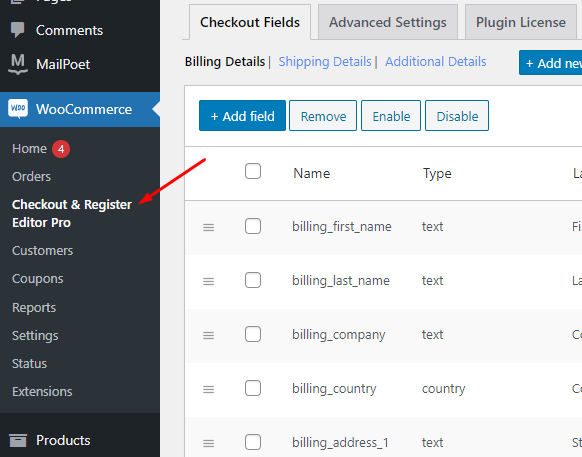
- Click on “Add New Validator” and find “Custom Validators”. This is where you’ll find options for setting up validator names, labels, and error messages.
- Once you’ve made the changes of your choice, click on “Save Settings” to finalize them.
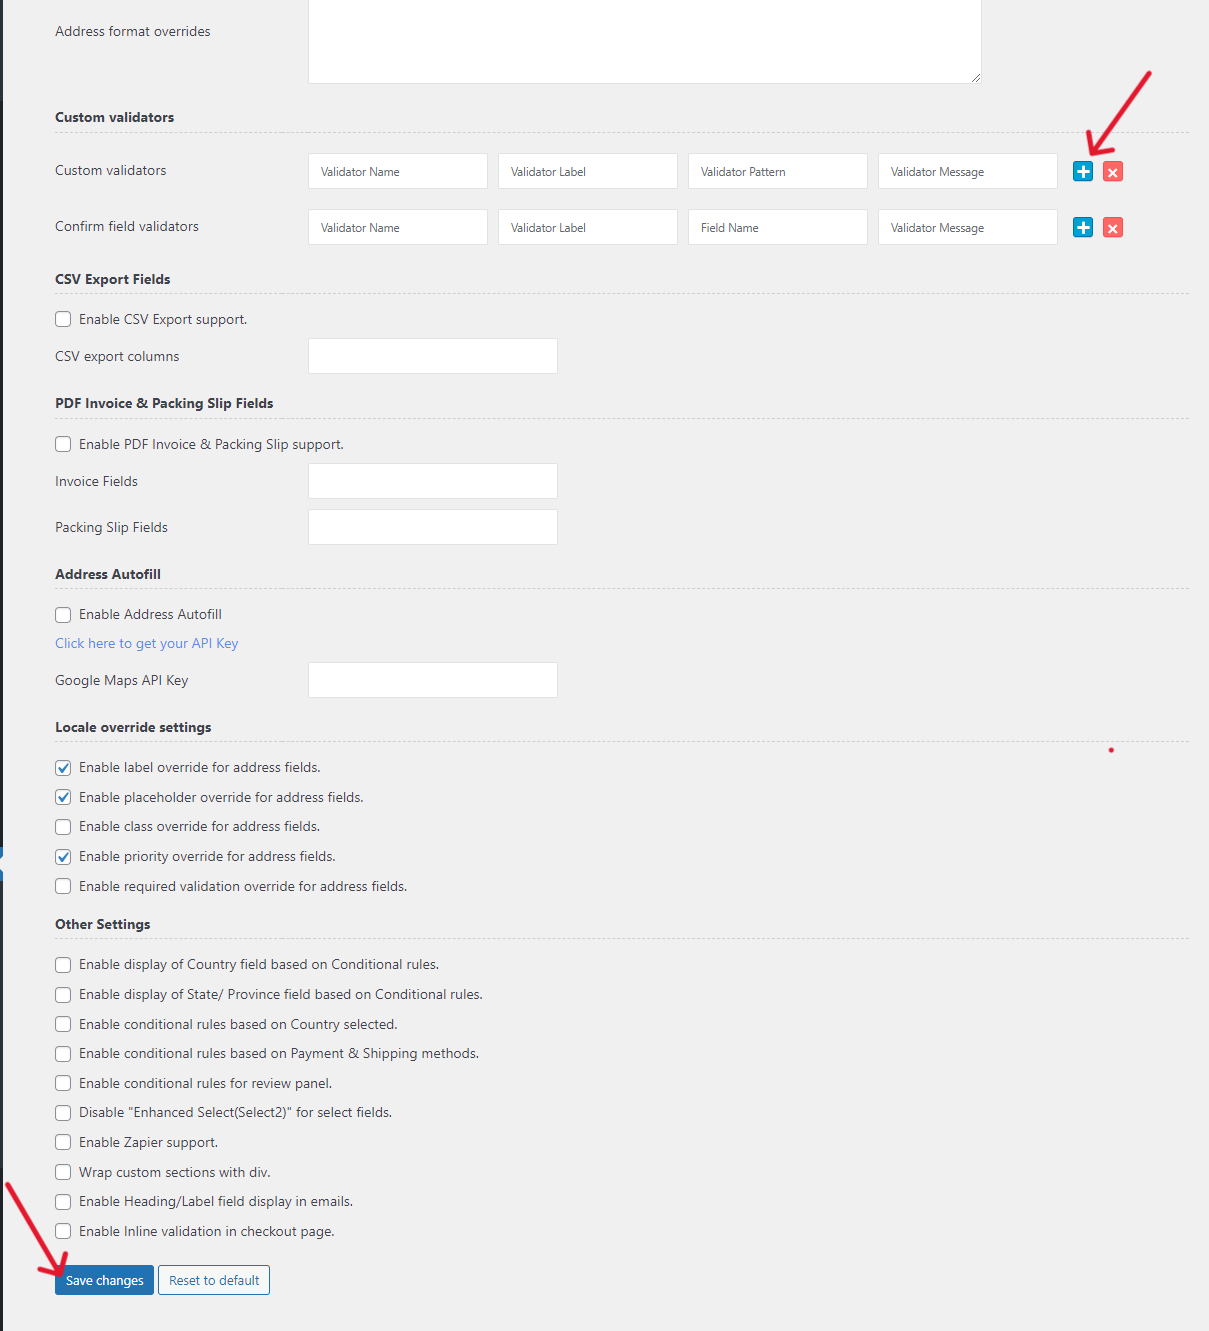
“Confirm” Field Validators
Some validators, like those for email or password fields, will need additional validators that help double-check data accuracy.
You’ll also find this option in the “Advanced Customization”. Locate the “confirm validators” section and add the function, label, and error message pertaining to each confirmation field the same way you did earlier.

Test Your Settings
Testing that your custom settings are working as intended is absolutely vital once you have done the main validation task. That way, you can be aware of any awkward errors that can hamper your checkout settings in any way.
Conclusion – Checkout Manager
Clearly, making sure that your checkout page is dedicated to data accuracy requires some attention to the finer details. Each field that you add to your checkout register will require proper validation. It’s a simple task, and one that ultimately benefits everyone.
Luckily, with a premium-quality, professionally developed checkout manager, you can tick that particular box effectively and with time to spare. In the end, your efforts to ensure a user-friendly WooCommerce checkout will not go unrewarded.
Easy Ways to Customize WooCommerce Checkout Page
If you have gone through a smooth and hassle-free eCommerce shopping experience, it almost ends your buying job. Customize woocommerce checkout page. However, the last step is to undergo a checkout page that includes details of a buyer whether to complete the purchase or not. In this step, a buyer has to add payment and address details to complete the purchase. It’s a final decision from a buyer’s side that allows him to make a decision regarding the purchase.
Have you ever edit WooCommerce checkout page? It comes with no complications, and buyers feel comfortable while customizing checkout pages. The only problem that buyers face is the time they have to spend managing the checkout page, and frequent users do it with ease. On the other hand, new users always look for guidance.
Why Do You Need to Customize WooCommerce Checkout Page?
WooCommerce is a wonderful platform for shopping lovers, especially for those who wish to add or remove fields to enjoy shopping. The ultimate target is to increase the conversion rate and that’s the reason the WooCommerce checkout page comes into action. Despite its amazing launch, it varies from business to business and the purpose is to ensure a shopping experience with some options. Usually, it covers adding or removing page forms and collecting data from users to speed up the purchasing process and boost sales.
Additionally, it can be done through plugins as well, but using the WooCommerce checkout editor is the best solution. For those, who are new to online shopping and want to ease the checkout process, we’ve got you covered with some easy steps to make it happen. Regardless of age, our guidance is for everyone interested in using WooCommerce features. Let’s take a look at the guidance to customize the page!
Customize Your Checkout Page Using Code Snippets
If you’re looking for some unique ideas to modify the checkout pages without getting in touch with plugins, you need to know the art of using code snippets in WooCommerce. Here are some hooks:
Woocommerce default address fields
If you make any change to this field, it will surely affect the billing process on the checkout pages. So, you have to be careful while making changes and be well-informed.
Woocommerce shipping fields
If you make changes to this field, it will only affect the shipping fields and that’s not worrisome.
Woocommerce billing fields
In WooCommerce billing fields, minor editing leads to changes in billing fields.
Woocommerce checkout fields
Editing in this checkout field always affects the checkout page fields.
Despite looking at the changes in the WooCommerce fields, using the default address needs more clarity for checkout pages. Let’s look at how to add new fields!
Add New Fields
If you want to add new fields to the page, you need to focus on the type, label, placeholder, class, required, label_class, and priority to handle the checkout pages. Type identifies the fields that require email, password, and text. Furthermore, you need class and label to manage custom fields, and don’t forget to add “required” to complete the fields requirement step. Above all, positioning is the best field to edit checkout pages and you do it by adding priority.
Let’s take a look at adding new fields using snippets!
add_filter( ‘woocommerce_default_address_fields’, add_field_jcodex);

function add_field_jcodex( $fields ) {

$fields[ ‘flat_number’ ]   = array(

‘label’        => ‘Flat number’,

‘required’     => true,

‘class’        => array( ‘form-row-wide’, ‘my-custom-class’ ),

‘priority’     => 35,

‘placeholder’  => ‘Enter your flat number’,

);

return $fields;

}
Edit fields
After you have added fields, the job isn’t over yet. You need to edit fields to better use code snippets. It assists a user in customizing the WooCommerce checkout page with different options, whereas placeholder name and label are the parameters to consider for two fields. You need to edit the placeholder and label to manage field editing and it comes after you add new fields.
Let’s take a look at the code snippet!
add_filter( 'woocommerce_default_address_fields', 'jcodex_add_field' );

function jcodex_add_field( $fields ) {

$fields[ 'land_mark' ]   = array(

'label'        => 'flat no.',

'required'     => true,

'class'        => array( 'form-row-wide', 'my-custom-class' ),

'priority'     => 65,

'placeholder'  => 'Enter flat no.',

);

return $fields;

}
Aligning fields
Edit fields work great, but you also need to align fields for example the width of the field, etc. For this, you may add strings to the class to align fields to keep the first and last rows wide. If we overview the default WooCommerce checkout page, we always come across first and last names side by side. So, there is always an option to align the fields using snippet codes.
Let’s take a look at the code snippet!
add_filter( 'woocommerce_default_address_fields', 'jcodex_add_field' );

function jcodex_add_field( $fields ) {

$fields[ 'land_mark' ]   = array(

'label'        => 'Flat Number',

'required'     => true,

'class'        => array( 'form-row-first', 'my-custom-class' ),

'priority'     => 65,

'placeholder'  => 'Enter your flat number',

);

return $fields;

}
Repositioning fields
If you want to know more about the WooCommerce checkout page using snippets, you may also reposition the fields from the top and bottom. Make sure, you are aware of the priority of existing default fields before repositioning the new fields. It is all about changing the values while using the code.
Let’s take a look at the code snippet!
add_filter( 'woocommerce_default_address_fields', 'jcodex_add_field' );

function jcodex_add_field( $fields ) {

$fields[ 'flat_number' ]   = array(

'label'        => 'Flat number',

'required'     => true,

'class'        => array( 'form-row-wide', 'my-custom-class' ),

'priority'     => 35,

'placeholder'  => 'Enter your flat number',

);

return $fields;

}
Remove Fields
Removing fields also plays a vital role in code management, especially when we talk about WooCommerce stores. However, it’s easy to remove fields using code snippets, but you have to keep in mind the mandatory fields that you can’t remove at all e,g. Country fields, name, and address fields from a checkout page, as these are a must to complete the purchase. So, there is no option of removing such fields, but you can remove options fields to customize the WooCommerce checkout page.
Let’s take a look at the code snippet!
add_filter( 'woocommerce_default_address_fields', 'jcodex_remove_fields' );

function jcodex_remove_fields( $fields ) {

unset( $fields[ 'address_2' ] );

unset( $fields[ 'state' ] );

return $fields;

}
Customize Your WooCommerce Checkout Page With JCODEX Custom Checkout Field Editor
If you aren’t a tech-friendly user or code lover, JCODEX has got you covered with bespoke custom solutions for your WooCommerce checkout page. We support users with a WooCommerce checkout manager and plugin that allows users to add, delete, edit, and modify the fields with ease even without seeking the help of experts. Using this wonderful plugin, you can make easy and smooth customizations to your checkout form. For sure, WooCommerce custom checkout field editor always facilitates users.
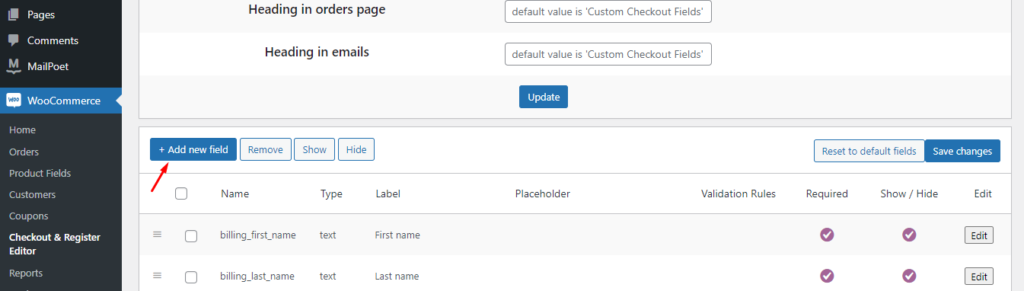
JCODEX has created easy-to-understand custom checkout steps to edit the WooCommerce checkout page. The choice is yours whether you select free and paid plugins to test checkout pages. You’ll come across differences between freemium and premium fields.
Free version fields include the option of adding text, number, password, email, phone, checkbox, and radio features. On the other hand, premium version fields offer time picker, date picker, file upload, custom text, checkbox group, etc.
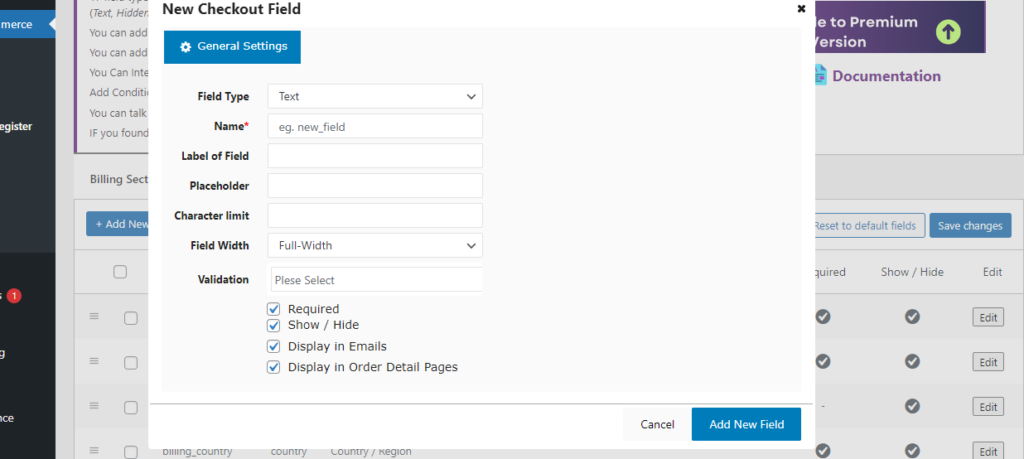
Final Thoughts:
Conclusively, WooCommerce checkout field editors can be handled in several ways. The first is to use the code snippets and it works in several ways to add, remove, and edit fields. On the contrary, the WooCommerce checkout editor plugin seems to be the smartest option compared to all hooks and techniques. It is easier to manage, even beginners can customize WooCommerce checkout page.
Best Free WooCommerce Discount Rules Plugins to Boost Sales
Have you ever wondered why big brands frequently run promotional campaigns? It’s because their customers love and respond enthusiastically to their program.
Discount programs offer multiple benefits for brands, including boosting sales, and increased customer attraction and retention. The discount strategy is also a smart marketing tactic that can increase revenue, expand market share, and attract new customers for businesses.
So, as the owner of an online store, it’s important to stay proactive by learning and implementing appropriate WooCommerce discount rules.
However, you may still be struggling to find a good plugin that can assist you in creating discount rules for your WooCommerce store.
In this post, JCodex will show you a list of the best free WooCommerce discount rules plugins. Let’s dive into this article carefully and select the option that best suits your store’s requirements.
What are WooCommerce Discounts?
Let’s start by getting a firm grasp on the power of WooCommerce discounts and how they can take your sales and customer loyalty to the next level.
A WooCommerce discount plugin is an essential tool for creating dynamic promotional campaigns like gift cards, coupons, and personalized discounts.
For example, if your online store wants to offer customers a 20% discount on all products, these plugins will be the tool to assist the store in creating that discount rule.
With the plethora of optional plugins available on the market, you can effortlessly establish customized discounts and coupons that perfectly align with your business objectives.
We have compiled a selection of exceptional free plugins that are ideal for enhancing your WooCommerce store.
YayPricing – WooCommerce Dynamic Pricing & Discounts
Ready to boost your online sales? YayPricing is one of the best plugins to help you achieve that!
YayPricing is considered a dynamic, powerful, and flexible plugin. It is designed to help you tailor prices to your customers’ needs, making it a game-changer for your WooCommerce business. With YayPricing’s dynamic pricing features, you can maximize your profit margin and simplify your pricing strategy all at once.
The YayPricing -WooCommerce Dynamic Pricing and Discounts plugin offers automatic pricing and discounts to create a fantastic promotion campaign for your WooCommerce store. The plugin lets you create bulk pricing, percentages, fixed amounts, buy X get Y discounts and more. This feature gives you the ability to create personalized pricing rules for your e-commerce website.
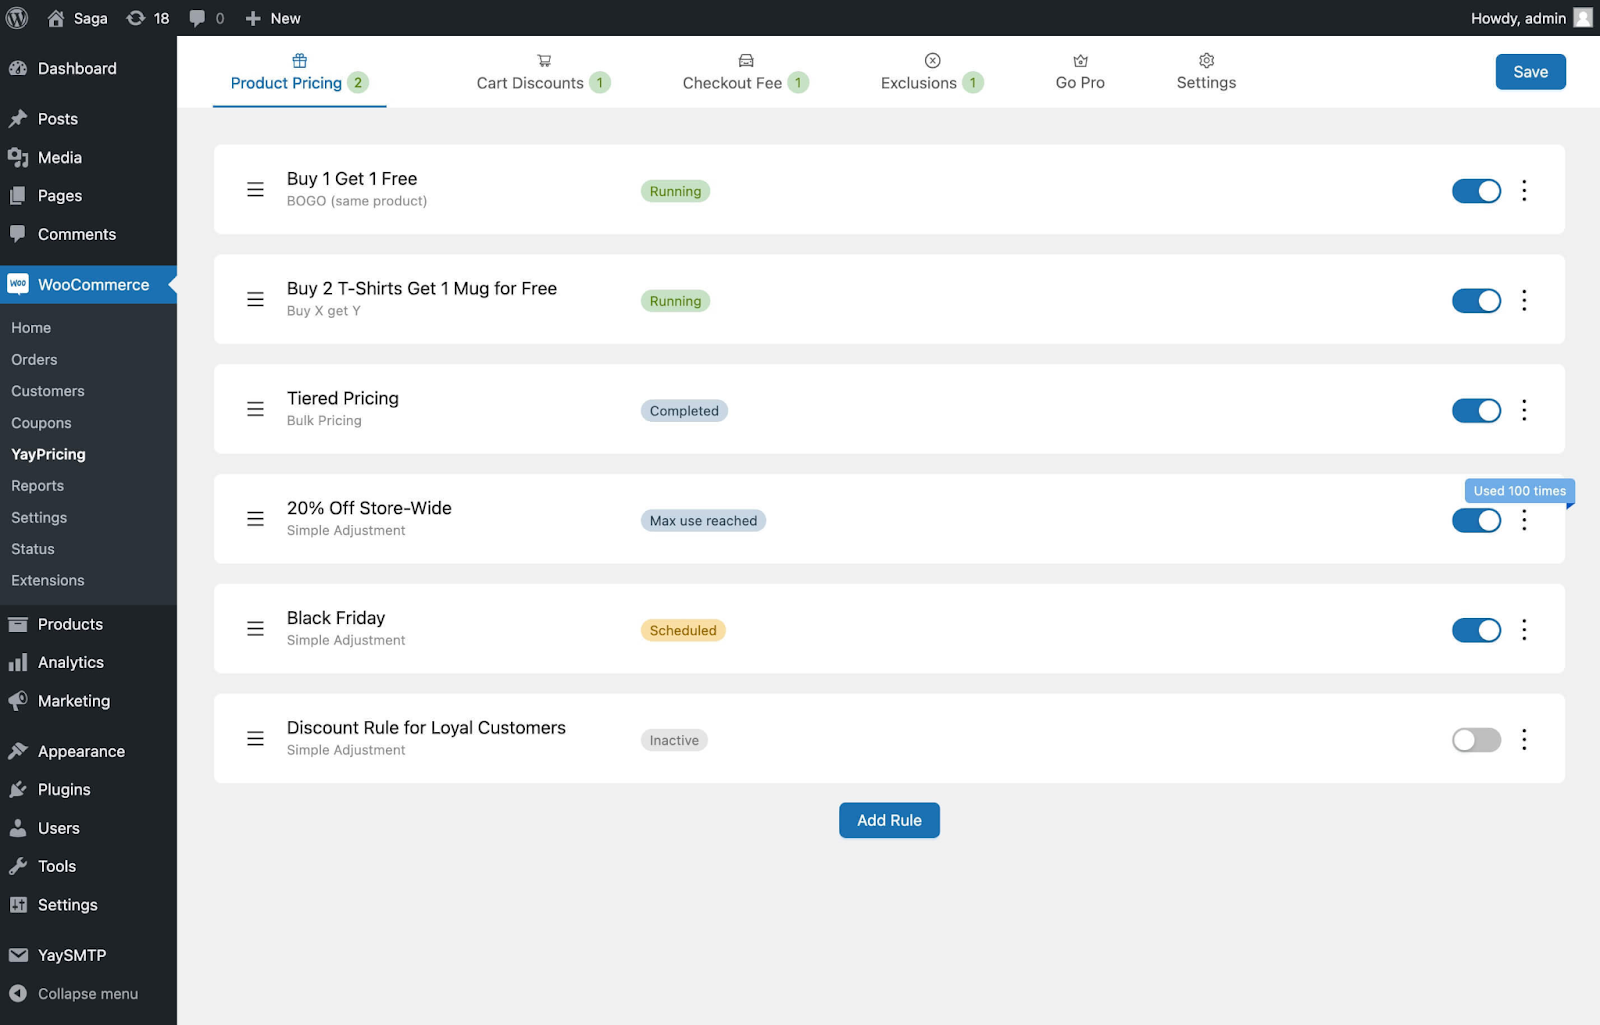
With YayPricing, you can easily create custom discounts that are specifically designed to match your unique business requirements with its user-friendly interface. Their one-click pricing templates make the process simple and hassle-free, ensuring that you can set up your pricing structure with confidence based on different conditions.

One of the significant features of YayPricing is its drag-and-drop user interface, which allows store owners to easily organize pricing rules.
In addition, YayPricing allows you to display offer descriptions on product pages, making it easy for customers to understand the discounts they are receiving. This feature enhances the shopping experience for customers and encourages them to buy more.
Even between different websites, you might transfer pricing rules. When you need to apply the same pricing configurations across all of your stores, YayPricing is the best choice.
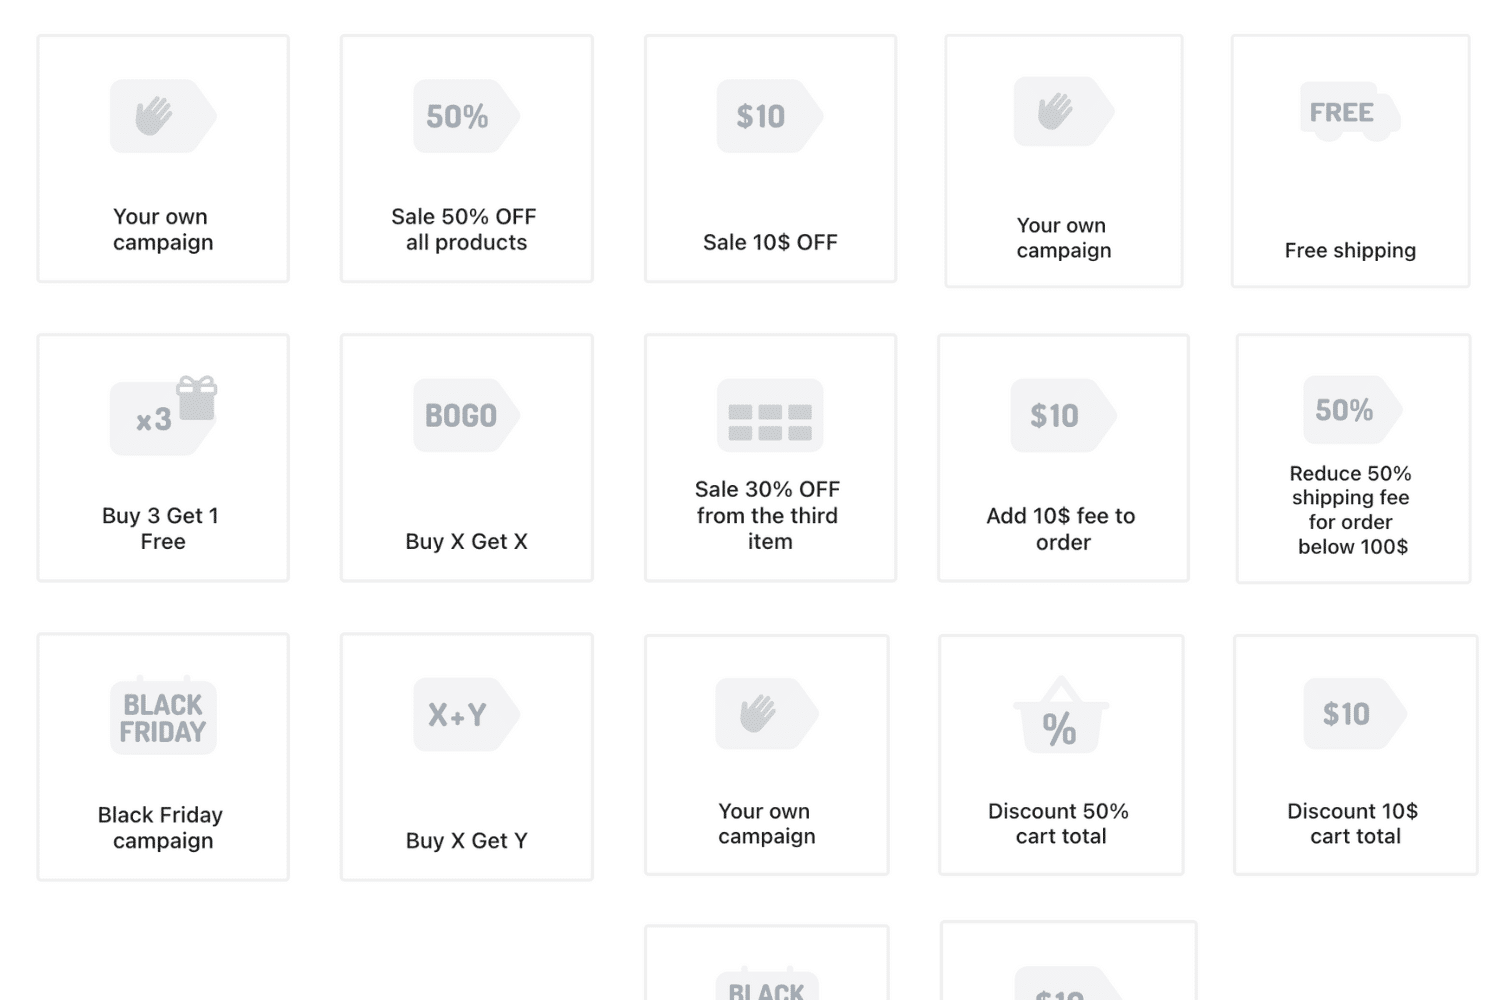
Features:
- Scheduled Pricing and Discounts.
- Customize discount messages.
- Drag and drop to organize pricing rules.
- Multiple conditions (based on the cart, customer role, payment method, history purchase, product category, etc.)
- Display all products assigned to discounts on any page/post.
- Discount based on Regular price or Sale price.
- Show the offer description on the product page.
- SALE Badge for discounted products.
Try YayPricing today and start seeing the results you’ve been looking for!
For more details about YayPricing, please see the guide on How to Create First Order Discounts.
Discount Rules and Dynamic Pricing for WooCommerce
Creating discounts on your e-commerce site has never been easier with Discount Rules and Dynamic Pricing for WooCommerce. This plugin offers the perfect solution that you’ve been looking for. It’s a must-have tool that will help you boost your sales and attract more customers.
This plugin provides a comprehensive range of pricing rules based on various criteria, such as product quantity, smart coupons, percentage discounts, fixed discounts, and bulk discounts for carts.
More specifically, it enables you to configure different shipping methods, including weight-based shipping or shipping based on location, time, or products in the customer’s shopping cart, in other words, it assists your discount rules in the checkout method. By delivering a more personalized and efficient shipping experience, you can increase customer satisfaction and foster their loyalty.
With the help of this very useful plugin, you can create different prices based on conditions like cart and product quantity. This marketing strategy can also be called an offer for your wholesale customers, you can set a minimum order to pay and create tiered prices so that when buying more units, customers will receive bulk discounts.
The interface of this plugin is both user-friendly and suitable for individuals with all users, from beginners to experts.
Features:
- Display bulk table or quantity table on the product page
- Shipping method based on cart total amount, number of cart items, date or date period, cart weight, and cart total amount
- Configure different types of discounts.
- Create promotional offers with specific start and end dates.
- Exclude selected products from rules (product price-based rules).
Category Discount WooCommerce
Category Discount WooCommerce is an impressive plugin that can assist you in establishing discounts for your WooCommerce store.
With the amazing features this plugin brings, you can apply discounts on products based on WooCommerce product categories with just a few clicks.
When you want to set up similar discounts for product categories, this plugin is perfect for you. It allows you to create discount categories in the fastest way, you just need to set up a discount rule based on your existing catalog without spending time creating your category to reduce prices.
Once you install this plugin, you will schedule specific promotions starting or ending dates and times. Helping your store promote the customer’s sentiment and your store can increase sales significantly.
Take the hassle out of building your online store with this user-friendly plugin. Its intuitive interface makes it a breeze to use, so you can get started right away.
Features:
- Apply discount to products, based on your existing categories.
- Apply / Remove discounts to products with a single click, even to thousands of products.
- Schedule hourly discounts for future dates.
- Exclude specific products from Category, Brand, or Attribute discounts.
- Works with WooCommerce custom checkout fields.
ELEX WooCommerce Dynamic Pricing and Discounts
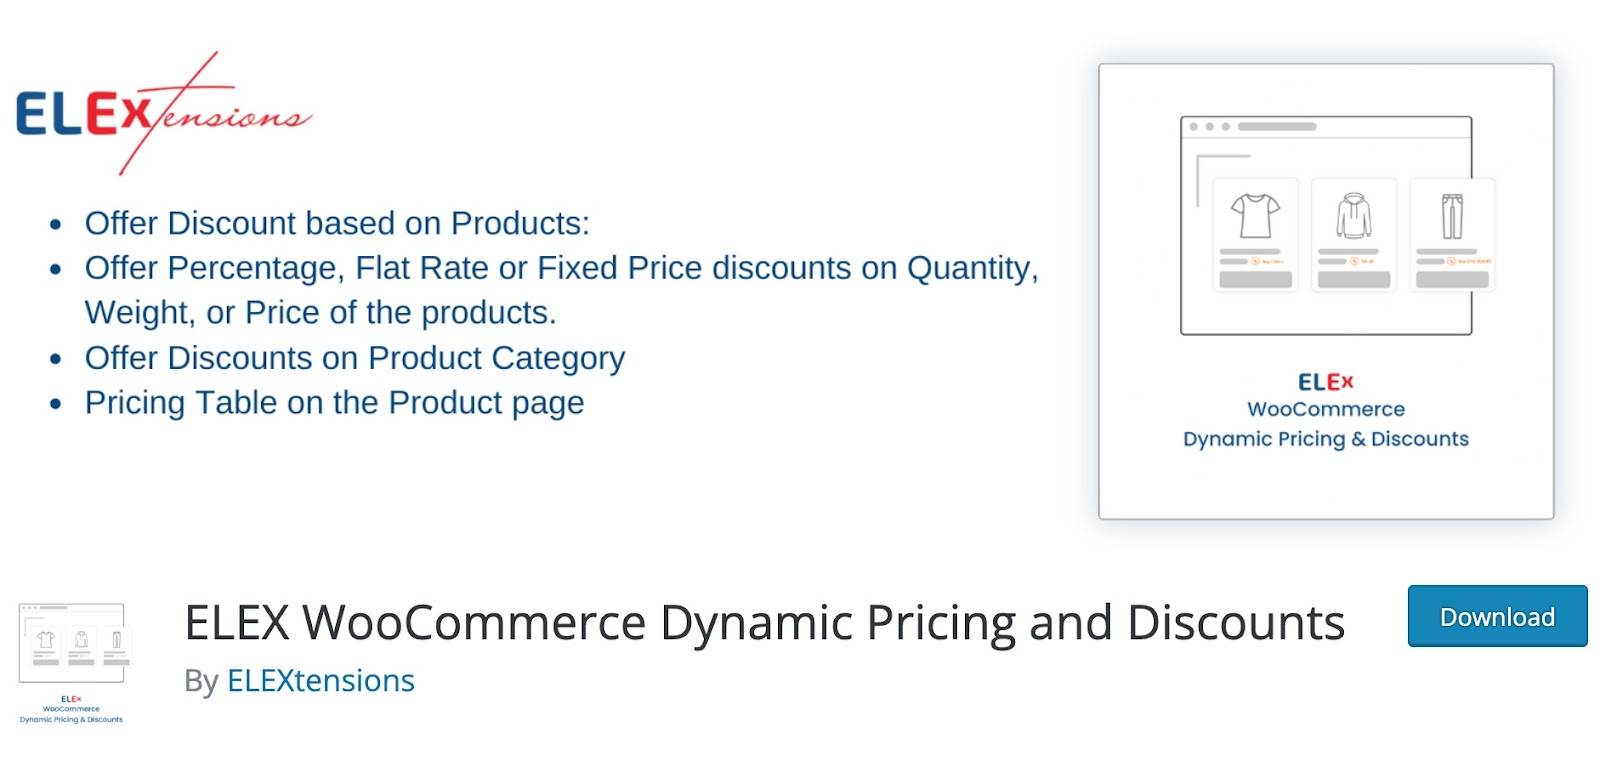
We’ve come across a fantastic plugin that many WooCommerce store owners are utilizing to implement dynamic pricing and discounts. It’s called ELEX WooCommerce Dynamic Pricing and Discounts, and it allows you to set up discounts and pricing at various levels throughout your store, from product, category to cart.
With its easy-to-use interface, this plugin has a price list feature that is particularly noteworthy when setting up quantity-based discounts. It ensures that the discounts don’t eat into your margins, and you can quickly create complex rules using percentages and fixed discount options. It’s easy to define a fixed ratio and apply it to product rules.
Another great feature is that you can display a price list on the product page, which lists any discounts that apply to a specific product or quantity that needs to be purchased to take advantage of the offer. This keeps customers informed of available offers before they make a purchase.
Finally, to give you even more control over your store’s pricing, you can set discount restrictions based on customer email, maximum orders, or total customer spending.
All in all, this plugin is a must-have tool for any WooCommerce store owner looking to improve their pricing strategy.
Features:
- Offer Discounts based on Products.
- Offer Discounts on Product Categories.
- Pricing Table on the Product page.
- Multiple discount types are available (Flat discount, Percentage discount, fixed price for each unit).
- Compatible with WPML.
- Cart rule discount based on Attribute, Shipping Method, and Payment Method.
Final Thoughts: WooCommerce Discount Rules
In order to stay competitive in the online retail industry, it is crucial for businesses to implement dynamic pricing strategies, such as providing discounts on their products. This widely used approach has proven to be highly effective and should not be overlooked.
So, effectively combining and configuring pricing and promotional campaigns is an absolute must for any WooCommerce business owner looking to maximize their revenue potential.
The best plugin we want to suggest for your WooCommerce store is YayPricing. This plugin has a reasonable price and has powerful functions. You will be satisfied with the good customer support of YayPricing. The next is ELEX, this plugin is also the best option for your choice because of its amazing features, especially its easy-to-use interface.
In short, all the WooCommerce discount rules plugins that we mentioned above are helpful tools for achieving this.
Don’t wait, take your store to the next level with these plugins!
Kickstart Your WooCommerce Profits With Subscriptions And Recurring Payments
For WooCommerce stores, success means finding and conquering every aspect of the online shopping experience. One trend that online businesses cannot seem to ignore is the significance of a robust subscription product. If you’re in the market for better revenue and profits, this is something you cannot possibly ignore.
It’s hard enough for e-commerce contenders these days to even break out into the market. But to stay relevant, they need to strive even harder to keep their trust and loyalty to the brand. However, it’s worth knowing how you as a brand or store owner can get the most out of a robust subscription and recurring payment mechanism.
But to do that, understanding what you’re dealing with here is important. So, before understanding how to optimize your business model or configure your checkout field editor, let’s start with the basics.
Why Subscriptions and Recurring Payments Are An E-Commerce Game-Changer?
Even in the realm of brick-and-mortar, established brands can use customer service and a dynamic inventory to keep business booming. But even then, you’ll need to address the inevitable competitors that are selling the same product as you.
In the virtual playing field, where competing businesses are not only face-to-face, but have to share screen space, this rivalry can be even more cutthroat. So, they have to whip out more innovative tactics if they expect to remain profitable. This is where the almighty subscription product emerges as a weapon.
With it, not only can you keep in touch with your customers, but you can enjoy better control of your revenue stream. We’ll get into why that matters so much shortly.
How Subscription-Based Business Models Thrive
At its core, the subscription-based business model is fairly simple. Rather than paying for something at once, your customers will make recurring payments over a set period of time. For them, this usually means access to a substantial product and amazing deals. However, this also offers businesses some key advantages.
- Control Over Revenue
As mentioned earlier, recurring expenses on the buyer’s end mean that your store enjoys consistent and more predictable profits. This makes budgeting considerably easier.
- Customer Loyalty
If you keep up your end of the deal per your subscription model, your audience will be more likely to stick by you.
- Reduced Acquisition Costs
Rather than constantly having to drain finances to attract new buyers, you can slash those costs with a long-term plan that retains buyers and profits.
Considerations for WooCommerce
Whatever online store you’re running, WooCommerce continues to redefine online shopping with its flexibility and customization options. But even though it provides a robust e-commerce foundation, its default capabilities aren’t all that when it comes to subscription management. This is a job for third-party plugins.
Choosing the Right Plugins
For the most part, any dedicated subscription plugin will prove extremely useful in setting up your virtual shop. If you can find one that offers flexible pricing and trials, perhaps you may find your decision easier.
However, those are secondary priorities. Make sure, your chief focus is to tick all the relevant boxes as far as your recurring payment model is concerned. These may include
- Billing info
- Setting up renewal dates
- Modifying and customizing subscriptions
One important approach to perfecting your subscription management is to leverage checkout field editor plugins for WooCommerce. These tools allow you to play with custom and conditional fields for the subscription checkout page. Their capabilities are certainly more interesting than what WooCommerce is capable of on its own.
Setting Up Your Subscription Products
Once you have made up your mind in terms of your choice of subscription plugin, it’s time to get started. To get your product up and running, simply
- Download or install your plugin and activate it per the developer’s instructions.
- Once you can confirm that it’s active, head over to “Products” on your WooCommerce dashboard. From there, the “Add New” option will let you choose billing models, cycles, and renewal settings.
- Once everything is good to go at the back end, showcase your subscription product with high-quality images.
Managing Subscribers and Renewals
Implementing the subscription model is just the beginning. To keep it working its magic, you need to oversee your subscriptions and renewals to keep your revenue nice and predictable. You can accomplish this ultimately simple task by:
- Prioritizing payment gateways that have settings for processing each transaction
- Offer subscribers a suitable amount of options with which they can personalize their plans. This includes scaling options, moving to new plans, cancellations, etc.
- Since customer loyalty and trust make up a large portion of your goal, keep everything straightforward and transparent. Maintain a helpline where subscribers can reach you in case of any issues.
Enhancing the Subscriber Experience
A little extra effort in making your subscription setup more appealing can work wonders in keeping your subscribers satisfied and their payments recurring.
Don’t forget to reward your store followers with check-ins, reminders, and perks like discounts, exclusive content, or early access to establish a win-win situation.
For this, you may set up a newsletter with an option to follow if they want, or link up blog posts that are relevant to their customer experience.
Final Thoughts: WooCommerce Subscriptions
Looking at the shopping experience and trends, one must consider WooCommerce subscriptions and recurring payments for online store. It is the time to avail of this opportunity to create a win-win situation for your audience and lucky audiences. It has a positive impact on your main selling point that ties strong connection with subscription-based model. In these competitive times, that is surely all you need to thrive as a trustworthy business with hoards of loyal customers.
How to Make the Best Customer Experience Product Page in WooCommerce
Introduction:
If you’re running an online store and looking forward to improving conversion rates and boosting sales of your store, the best thing is to have a user-friendly WordPress site/product page and good command over WooCommerce plugins. Today, every digital owner has the desire to improve the online presence of a store, whereas an eye-catching design and smart user interface can help owners.
Product pages also play a vital role in improving the layout and appearance of a WordPress site, but you have no chance to ignore the plugins, especially if you’re looking for ways to make the best custom experience page in WooCommerce. You must have a decent knowledge of how to play with WooCommerce plugins.
In this article, you’ll find helpful information about the customization of WooCommerce product pages. Product display is the top factor that owners have to consider important. Further, if you can’t showcase your products, you have no right to customize them. The appearance is the basic step to follow before customizing product pages.
Reasons for Customizing WooCommerce Product Pages
There are so many reasons to customize WooCommerce pages, but the leading concern is to enhance the shopping experience. The more you facilitate your customers, the more you get an opportunity to increase sales. It’s a way to increase the online visibility of your brand and ultimately gain the trust of loyal customers. Let’s take a look at some of the top reasons to customize WooCommerce product pages!
Create Needs for Customers
The first and foremost thing is to create needs for customers when it comes to customizing pages. Why do your customers need to choose your store? Make sure, you create needs for customers and make them understand the importance of product page customization. Don’t let your customers leave your eCommerce store page! Make them stay with your friendly features and user interface.
Better User Experience
Once you have created needs for customers and offered them reasons to visit your store, the job isn’t over yet. User experience is the critical factor in targeting potential visitors who spend a good time at your store. With a better user experience, you tend to improve customer satisfaction and that’s the key to enhancing engagement. With this, you may come across quality leads with the passage of time.
Target Conversions
If you have successfully provided a better user experience and started improving engagement, it is time to target conversions. You can make it happen by setting up optimized product pages to facilitate your customers. It’s an opportunity to increase conversions especially when you add catch images and descriptions for customers to reduce the bounce rate.
Importantly, your target is to customize WooCommerce product pages to improve the online presence of your store and target potential leads. Therefore, you plan to make a long-term eCommerce strategy and find top reasons to customize product pages.
Guide to Customize Your WooCommerce Product Pages
If you are ready to experience custom product pages in WooCommerce, you need to be clear about the template of your store, as you can’t proceed without displaying your products. Of course, the template has to be unique and cool, as visitors like to open the product pages with a stunning display. It is the reason, that showcasing your products can make a difference and leave a lasting impression on visitors.
However, using a default template can save you time if you are not a frequent editor. You don’t have to be a professional web developer to customize product pages. Your little understanding can help you customize WooCommerce pages with ease. Credit also goes to the extensions and WooCommerce plugins, making this job easier.
Product Add-Ons
For a better custom experience for product pages, you need to have an excellent command over the product add-on extensions to improve your shopping and purchasing. If you are eager to utilize your skills and want to add eCommerce products to your store, you may do this by adding checkboxes, text boxes, and dropdowns to play with the catalog.
There is no harm in trying additional options for making your store the best, facilitating your visitors, and enhancing your grip over the add-ons. For example, if you deal in T-shirts and want to allow your customers to include text before they leave, you provide them an opportunity to include custom text using an add-on feature before completing the purchase.
With this product add-on feature, you make your customers feel happy when they choose custom text on their t-shirts and leave happily. In short, product add-ons play a highly influential role in the customization of product pages.
Focus on Colors and Patterns
After you change text and add checkboxes to make your customers take quick action, you also have to focus on color, patterns, styles, and sizes at the same time. No doubt, colors play the most essential role in improving the design of the product and boosting the purchase.
No matter if you sell t-shirts or you sell gift items, you need to include vibrant colors to change the mindset of your customers before they leave. With display color options, you allow your customers to spend quality time on your product pages full of attractive colors and patterns to manage customization.
Create WooCommerce 360º Imagery
Do you ever think that image rotation can make a difference for your eCommerce store? Of course, custom 360º imagery always impresses visitors who come across dynamic angles of products. Image gallery rotation can double up your sales, as customers love to see image variation when it rotates back and forth. Indeed, it’s a responsive feature that can help customers take a closer look at the product and enjoy zoom features before they close the web page.
Add Product Video for WooCommerce
If you want to enhance your WooCommerce customization to speed up your sales, you may add product videos for WooCommerce to attract potential customers to enjoy hassle-free shopping after viewing the product videos. For this, you may use third-party tools such as YouTube to leave a lasting impression on visitors. Your buyers would love to watch videos before leaving the site.
Include Product Recommendations
To grab the attention of visitors, you can’t ignore the display of your products. To make this feature work fine, you may include product recommendations to save the research time of your customers. If your customers want to buy coats, you may recommend ties and shirts to make a perfect dress combination and contrast.
Adding a Buy Now Button
After you have included product pages, you still have something to finish to attract potential customers by adding a ‘Buy Now’ button. To enhance the customer experience for product pages in WooCommerce, you can’t skip call-to-action buttons.
Final Thoughts: Product Page
WooCommerce is the best platform that allows customization for product pages. It’s a flexible platform that provides a good chance to add, edit and remove features. Conclusively, you admit that the WooCommerce facilitates visitors to customize products, and it helps in several ways to boost sales. Moreover, you may also target more leads and increase conversions using this customization option for product pages.
As you have customized your product pages if you want to modify your WooCommerce checkout page you can use this popular checkout field editor plugin
How To Create a WooCommerce Product Image Gallery
In a world full of e-commerce entrepreneurs, presentation always matters for converting potential audiences. Of course, running an online e-commerce store is incomplete without adding catchy and relevant images. Everyone loves to display a spectacular image gallery, especially on e-commerce platforms, to inspire visitors. To make this process easier, creating a WooCommerce product image gallery certainly helps.
To be an active online business owner, you need to create a WooCommerce product image gallery to drive results. No matter if you have everything that a buyer wants from your store, you may affect your business reputation without properly showcasing your products. Thankfully, to overcome problems like this, WooCommerce truly shines as a business owner’s best tool.
Why Your WordPress Store Needs A Product Gallery
Since online customers can’t physically examine products before buying, a WooCommerce gallery offers the next best thing to that experience. Besides examining gallery products, you can explore more about e-commerce online products, especially if you want to customize WooCommerce checkout. For this, you need to know how to add an extra field in the WooCommerce checkout form. Learn more about the plugins. Furthermore, by showcasing each product through multiple media, you allow buyers to
- Check the product from different angles.
- Zoom in to authentic details like package descriptions, product designs, best-before dates, usage guides, and more.
- View different sizes, colors, or models of each product.
- Enjoy video tutorials on how to safely operate or use what you’re selling
These capabilities can seriously improve your chances of not just making a sale but also getting your buyers to come back because of the wonderful image display. So, there is no way to ignore this golden opportunity to showcase your business through captivating images. Remember, the images make great sense.
Adding Your WooCommerce Product Gallery
When you’re about to prepare your product gallery, you’ll probably come across several options. For a truly responsive WordPress gallery, your best option has to be Envira. The overall process is easy. Let’s take a look at a few steps!
Install and Then Activate The Plugin: Go to the “Plugins” section on your WordPress dashboard. When you are there, install and activate the Envira Gallery plugin.

Create a New Gallery: Locate “Envira Gallery” in the menu of your WordPress dashboard. After clicking on “All Galleries”, and then on the “Add New” button, You’ll get the option to name your gallery, so choose one that is unique but descriptive.
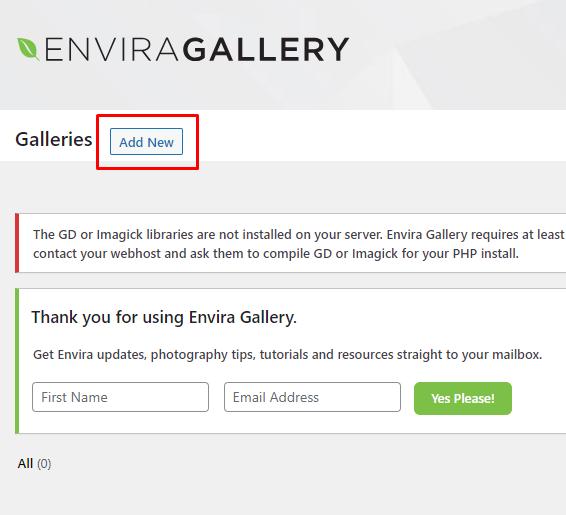
Choose Layout: Envira offers options to customize your gallery’s layout. You can either pick a prepared template or customize things like font size, color, orientation, and navigation.
Start Uploading Your Assets: Click on the “Add Files” button to upload the images you have on your computer. You can simultaneously add multiple images to a single product.
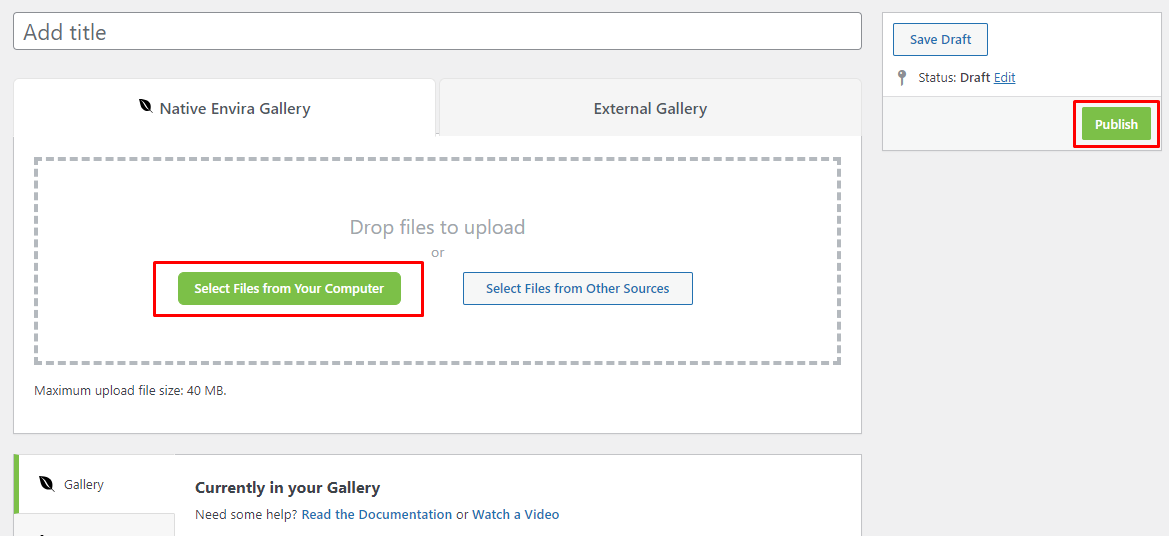
Organize Your Files: After uploading them, choose which images your viewers will see first and last with the drag-and-drop feature.
Configure Gallery Settings: Use the “Config” option to fine-tune things like the columns, image size, or how quickly everything loads
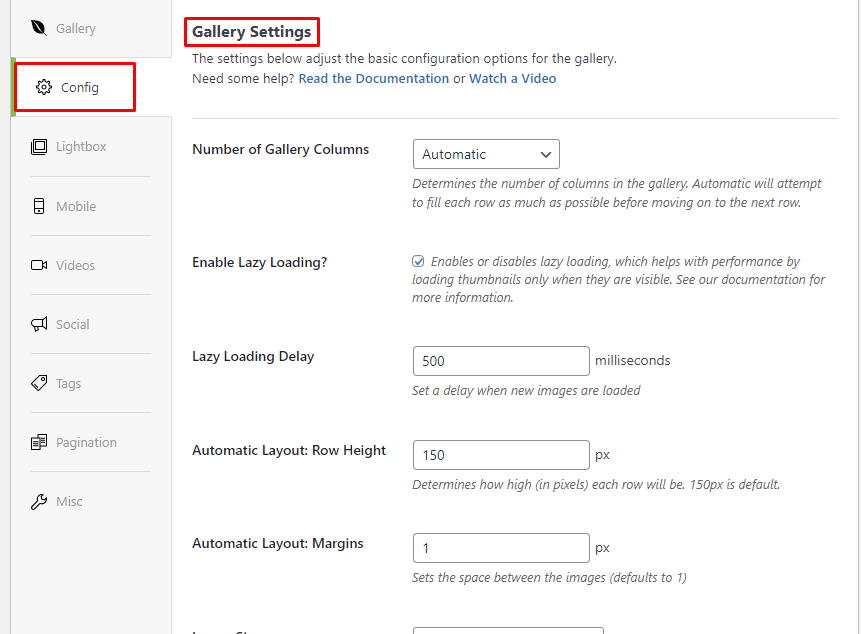
Adjust Other Options: Besides configuration, you’ll see that there are options like Lightbox settings, mobile-friendly design, and whether you want to add videos. Go through those as well.
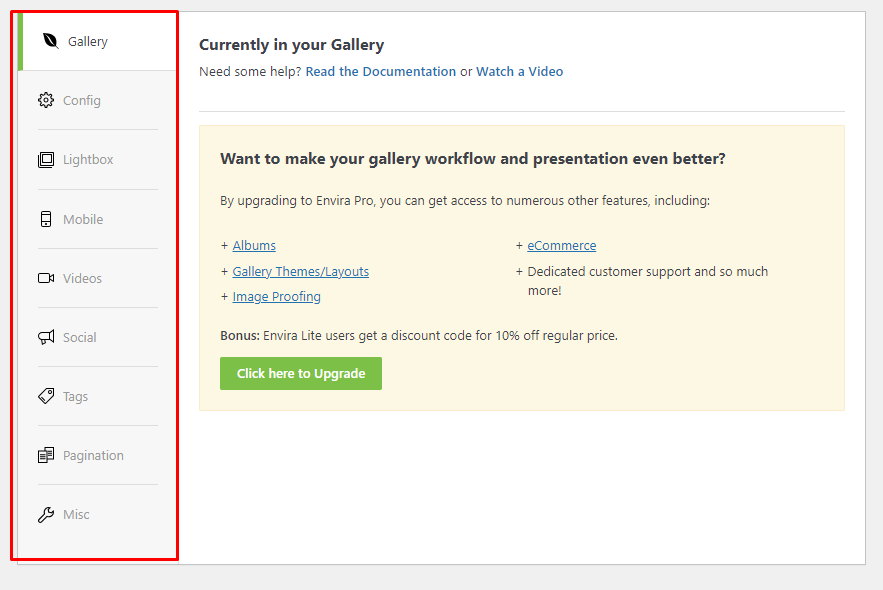
Save Your Work: After setting up the gallery, click on “Publish” to save what you’ve done.
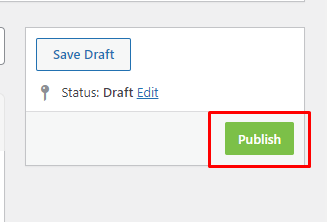
Secure The Shortcode: After publishing, you will receive a shortcode for the gallery. Copy it before you do anything else.
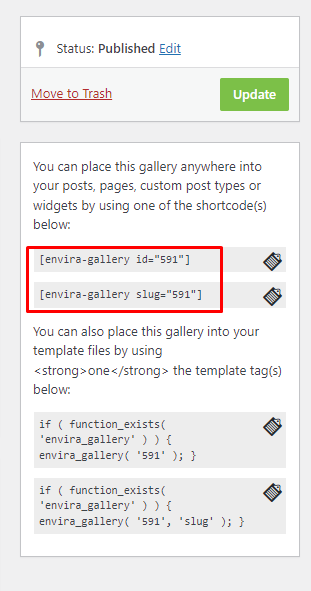
Locate the Product Edit Page in WooCommerce: Go to your WooCommerce dashboard and find the product you want to add the gallery to. Clicking on “Edit Product” will allow you to access the editing page.
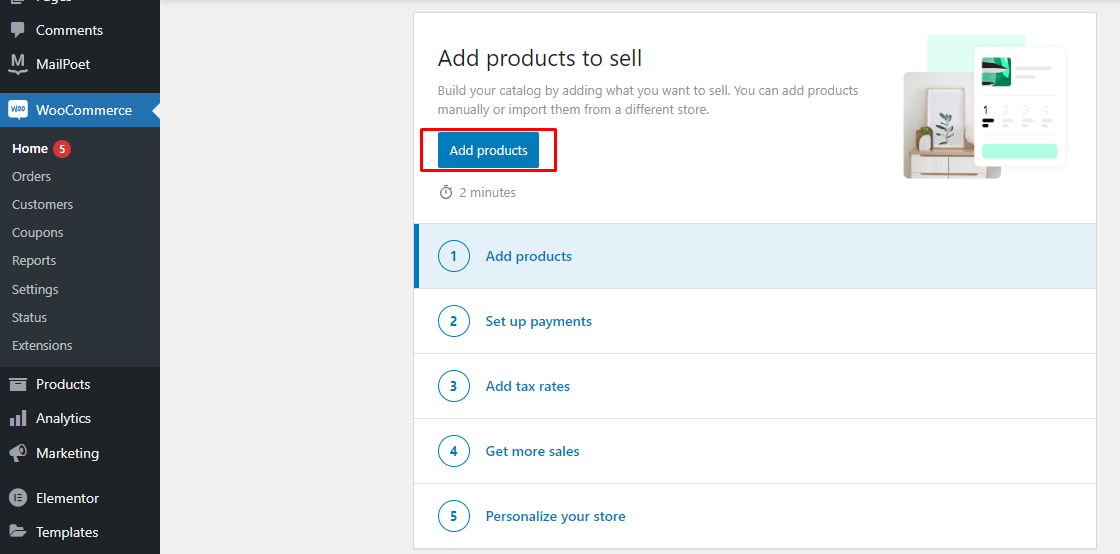
Insert the Gallery Shortcode: Scroll down to the “Product Image Gallery” section on the product edit page. There should be a field to paste the gallery shortcode you copied earlier. Insert the shortcode into this field.
Save Changes: Now save the changes to the product gallery by clicking on the “Update” button.
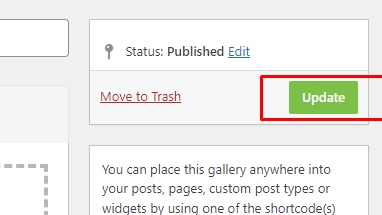
Double-Check the Gallery: See how the gallery displays on the front end of your online store by clicking on “View Product” or “Preview”. You need to do this for your Desktop and mobile sites.
Final Thoughts: WooCommerce Product Image Gallery
Looking at the entire discussion, we conclude that creating a WooCommerce product image gallery for your online store is nothing to be overwhelmed by. Even if you are new to this, the steps underlined above will let you nail your product page on the first try.
With the customization options, there’s nothing that can stop you from fashioning your gallery in your own, unique way. But most importantly, it’s a guaranteed step forward for keeping your customers’ attention. Let’s install this product image gallery plugin and decorate your website’s gallery section today!