In a world full of e-commerce entrepreneurs, presentation always matters for converting potential audiences. Of course, running an online e-commerce store is incomplete without adding catchy and relevant images. Everyone loves to display a spectacular image gallery, especially on e-commerce platforms, to inspire visitors. To make this process easier, creating a WooCommerce product image gallery certainly helps.
To be an active online business owner, you need to create a WooCommerce product image gallery to drive results. No matter if you have everything that a buyer wants from your store, you may affect your business reputation without properly showcasing your products. Thankfully, to overcome problems like this, WooCommerce truly shines as a business owner’s best tool.
Why Your WordPress Store Needs A Product Gallery
Since online customers can’t physically examine products before buying, a WooCommerce gallery offers the next best thing to that experience. Besides examining gallery products, you can explore more about e-commerce online products, especially if you want to customize WooCommerce checkout. For this, you need to know how to add an extra field in the WooCommerce checkout form. Learn more about the plugins. Furthermore, by showcasing each product through multiple media, you allow buyers to
- Check the product from different angles.
- Zoom in to authentic details like package descriptions, product designs, best-before dates, usage guides, and more.
- View different sizes, colors, or models of each product.
- Enjoy video tutorials on how to safely operate or use what you’re selling
These capabilities can seriously improve your chances of not just making a sale but also getting your buyers to come back because of the wonderful image display. So, there is no way to ignore this golden opportunity to showcase your business through captivating images. Remember, the images make great sense.
Adding Your WooCommerce Product Gallery
When you’re about to prepare your product gallery, you’ll probably come across several options. For a truly responsive WordPress gallery, your best option has to be Envira. The overall process is easy. Let’s take a look at a few steps!
Install and Then Activate The Plugin: Go to the “Plugins” section on your WordPress dashboard. When you are there, install and activate the Envira Gallery plugin.

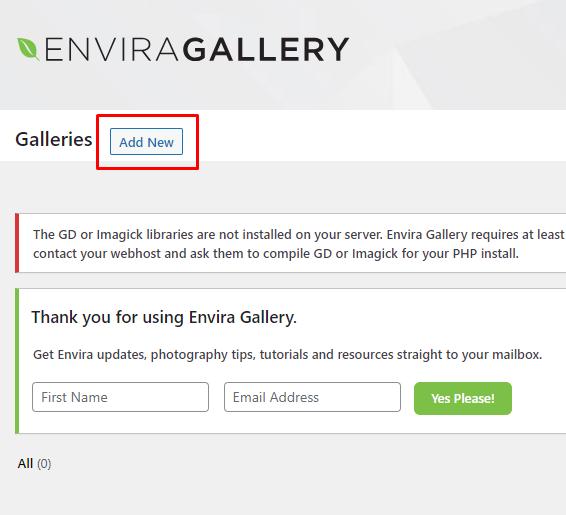
Create a New Gallery: Locate “Envira Gallery” in the menu of your WordPress dashboard. After clicking on “All Galleries”, and then on the “Add New” button, You’ll get the option to name your gallery, so choose one that is unique but descriptive.
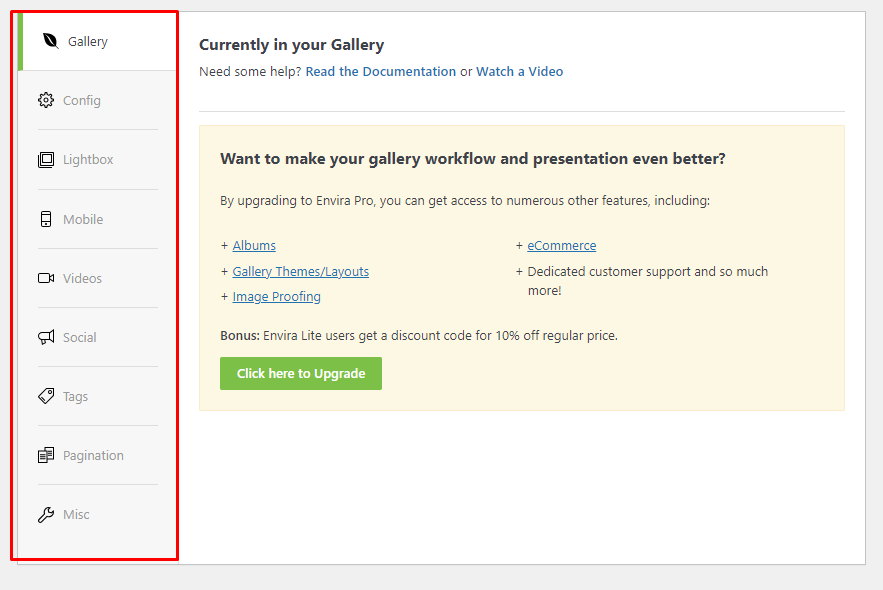
Choose Layout: Envira offers options to customize your gallery’s layout. You can either pick a prepared template or customize things like font size, color, orientation, and navigation.
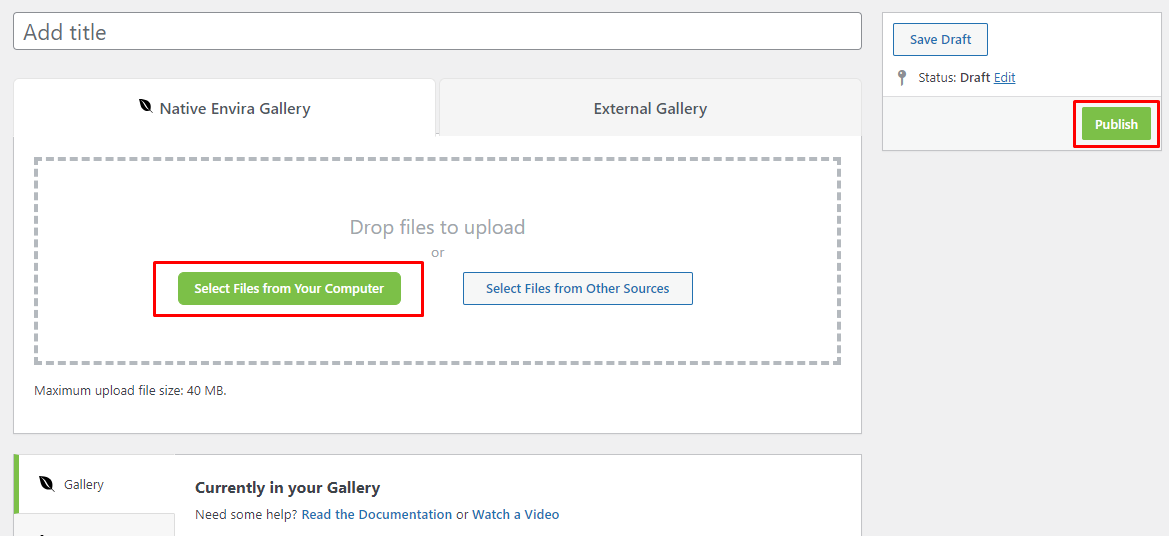
Start Uploading Your Assets: Click on the “Add Files” button to upload the images you have on your computer. You can simultaneously add multiple images to a single product.
Organize Your Files: After uploading them, choose which images your viewers will see first and last with the drag-and-drop feature.
Configure Gallery Settings: Use the “Config” option to fine-tune things like the columns, image size, or how quickly everything loads
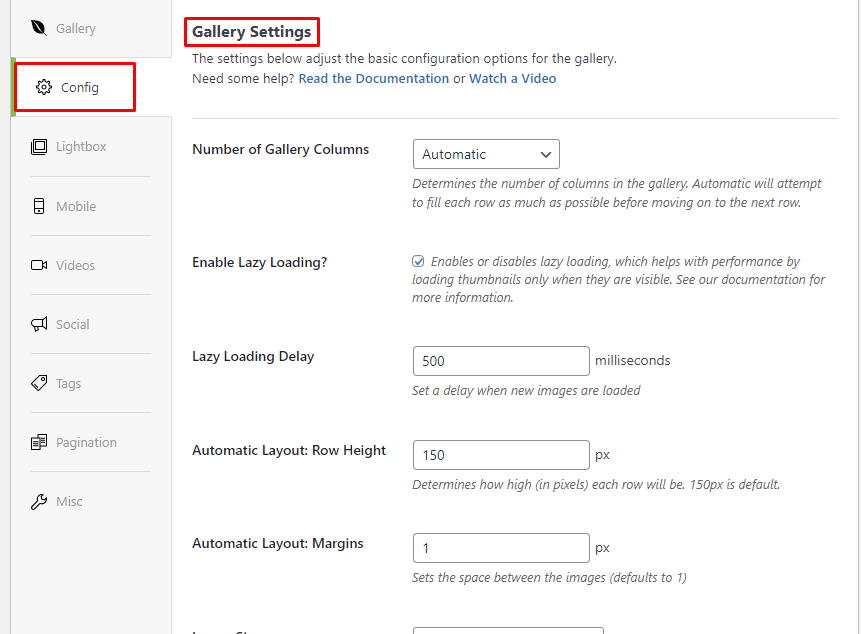
Adjust Other Options: Besides configuration, you’ll see that there are options like Lightbox settings, mobile-friendly design, and whether you want to add videos. Go through those as well.
Save Your Work: After setting up the gallery, click on “Publish” to save what you’ve done.
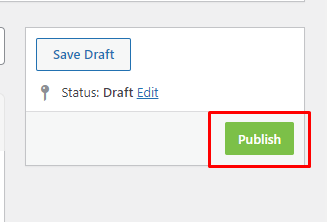
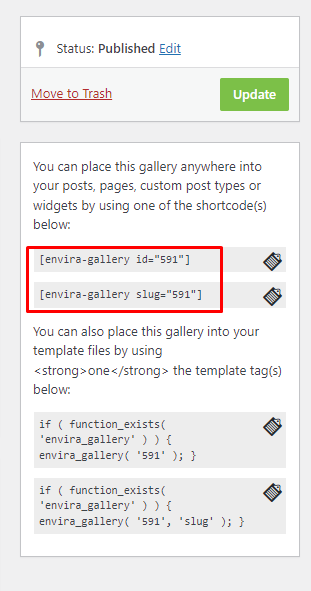
Secure The Shortcode: After publishing, you will receive a shortcode for the gallery. Copy it before you do anything else.
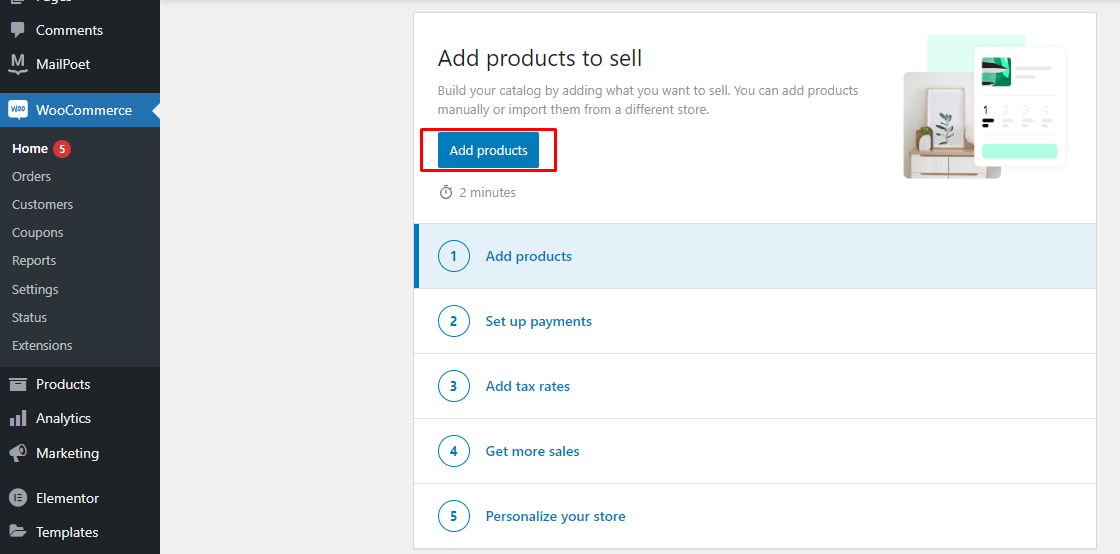
Locate the Product Edit Page in WooCommerce: Go to your WooCommerce dashboard and find the product you want to add the gallery to. Clicking on “Edit Product” will allow you to access the editing page.
Insert the Gallery Shortcode: Scroll down to the “Product Image Gallery” section on the product edit page. There should be a field to paste the gallery shortcode you copied earlier. Insert the shortcode into this field.
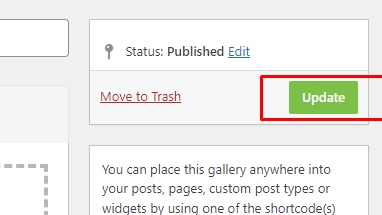
Save Changes: Now save the changes to the product gallery by clicking on the “Update” button.
Double-Check the Gallery: See how the gallery displays on the front end of your online store by clicking on “View Product” or “Preview”. You need to do this for your Desktop and mobile sites.
Final Thoughts: WooCommerce Product Image Gallery
Looking at the entire discussion, we conclude that creating a WooCommerce product image gallery for your online store is nothing to be overwhelmed by. Even if you are new to this, the steps underlined above will let you nail your product page on the first try.
With the customization options, there’s nothing that can stop you from fashioning your gallery in your own, unique way. But most importantly, it’s a guaranteed step forward for keeping your customers’ attention. Let’s install this product image gallery plugin and decorate your website’s gallery section today!