If you’re in the process of optimizing your online stores, you’d be surprised by what a simple checkout manager can help you accomplish. For beginners who are putting together their first WooCommerce store on their own, achieving sales goals requires that they facilitate buyers. To do that, you need to design the perfect virtual storefront.
Of course, there are a few things that you’ll need to cover, which can seem overwhelming at first. So, it helps to break down your responsibilities and prioritize. And in e-commerce, setting up a checkout page is particularly critical. Luckily, with the right tools, you’ll find that this process isn’t exactly rocket science.
But for those who are slightly aware of what checkout entails, it’s worth remembering that there’s more to it than adding, removing, or rearranging fields. The task of validating your fields is particularly essential. So, let’s get into why it (checkout manager) matters and what it involves.

What Are Checkout Validators?
In the realm of data entry, validation is the function that ensures the accuracy and usefulness of any input. When we’re discussing online stores, the fields on checkout pages are the key data entry points. So, to validate them is to basically implement functions and rules, or validators, that keep inaccurate or partial data at bay.
If, for instance, a customer adds an inappropriate value to a validated field, it may prevent them from advancing along the form while offering an error message. In WooCommerce, default checkout fields tend to have their own set of validators. With most checkout manager, you’ll probably need to refer to the Advanced settings for managing fields.
Of course, the trend of personalizing checkout fields is a growing one for WordPress stores everywhere. And with custom fields, you’ll need validators of the same ilk.
“Custom” Validation And Its Benefits
With custom validators, you can effectively tailor your checkout page in a way that suits you as well as your buyers. As we’ll discuss shortly, this process is fairly simple. But it’s worth understanding why it matters in the first place before investing time and effort into implementing your own tailor-made field rules.

It Ensures Accurate Data
To reiterate, data entry at the checkout needs to be cohesive and factual. If you, as an online business, ask buyers to disclose their addresses and contact info, the need for accuracy is pretty much self-explanatory. For custom fields, validation is primarily what ensures that.
It Works Wonders For UX
A user-friendly checkout experience is the only one of its kind that your online store can afford to offer. And with custom validation, you promise smooth sailing for buyers, which offers the added benefit of curtailing cart abandonment.
It’s A Legally Sound Practice
Many online businesses have to comply with certain regulations regarding data collection. Data entry not only ensures its accuracy but can do so in a largely secure manner. This way, you can fulfil your own needs, satisfy your clients, and not inadvertently implicate your business in the process.
How Checkout Plugins Make Your Job Easier
The good thing about WooCommerce is that, with the right hooks, there are few things you cannot customize. And like that, manually validating custom fields is very much possible. However, that approach requires more time and a bit of attention to detail. And if you’re a WordPress beginner with little knowledge of coding, you’re likely short on both.
Luckily, there exists a quick and highly accessible solution in the form of checkout field editors for WooCommerce. These are versatile plugins that make streamlining your checkout page much easier.
As far as adding custom validators is concerned, these tools like the Checkout Manager for WooCommerce offer a range of advantages, like ease-of-use, comprehensive customization, and access to over 20 new field types.
How To Set Up Your Custom Validators
To start, make sure your plugin of choice is installed and active. From there, follow the instructions below to kickstart your custom validation journey.
Adding Custom Validators
- Locate your plugin in WooCommerce, then head over to Checkout Form > Advanced Customization.
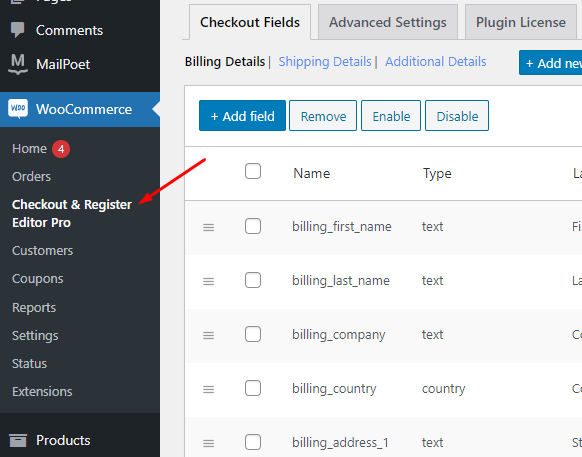
- Click on “Add New Validator” and find “Custom Validators”. This is where you’ll find options for setting up validator names, labels, and error messages.
- Once you’ve made the changes of your choice, click on “Save Settings” to finalize them.
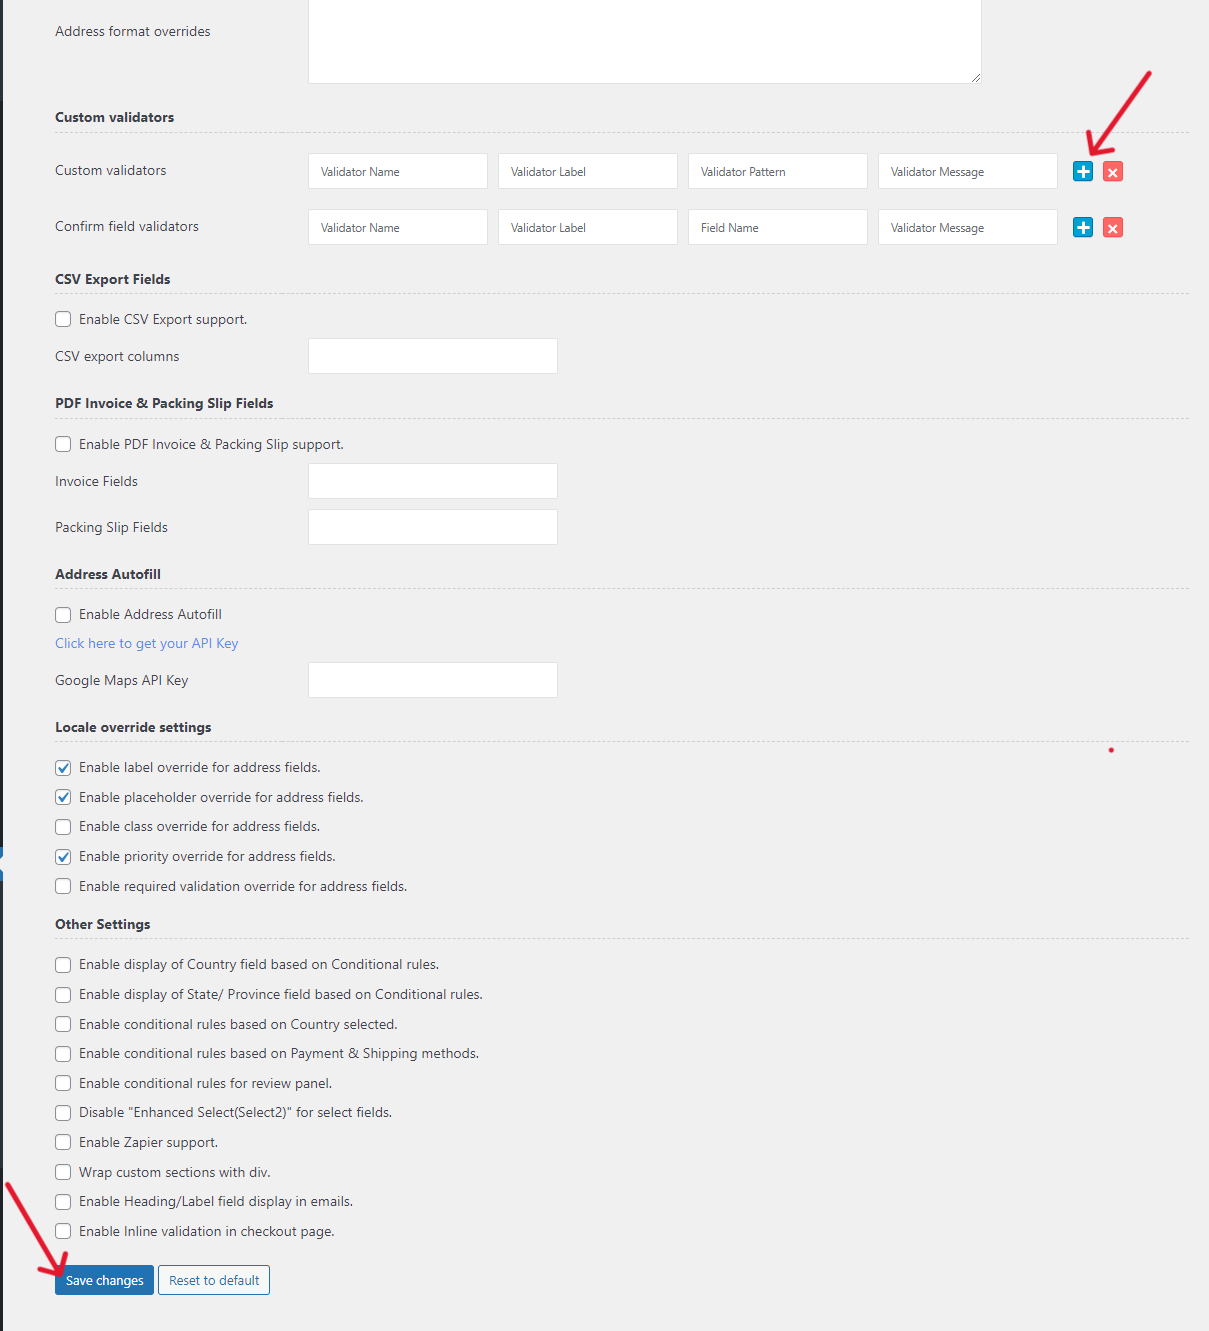
“Confirm” Field Validators
Some validators, like those for email or password fields, will need additional validators that help double-check data accuracy.
You’ll also find this option in the “Advanced Customization”. Locate the “confirm validators” section and add the function, label, and error message pertaining to each confirmation field the same way you did earlier.

Test Your Settings
Testing that your custom settings are working as intended is absolutely vital once you have done the main validation task. That way, you can be aware of any awkward errors that can hamper your checkout settings in any way.
Conclusion – Checkout Manager
Clearly, making sure that your checkout page is dedicated to data accuracy requires some attention to the finer details. Each field that you add to your checkout register will require proper validation. It’s a simple task, and one that ultimately benefits everyone.
Luckily, with a premium-quality, professionally developed checkout manager, you can tick that particular box effectively and with time to spare. In the end, your efforts to ensure a user-friendly WooCommerce checkout will not go unrewarded.