
How To Easily Add/Edit Custom Fields in WooCommerce Checkout Form
When putting together the perfect single-page Checkout form for your WooCommerce store, you might wonder if you need to learn coding from scratch. That’s certainly one way, but using a quality WooCommerce Checkout Field Editor is an equally effective yet quicker alternative. As you’ll see, the process of adding custom checkout fields can be ridiculously simple.
If you’re new to this, however, it might help you to understand why this makeover is necessary for your online store. Let’s do that, starting by addressing the main point.
Why WooCommerce Checkout Needs Custom Fields
It is essential for WooCommerce stores to facilitate buyers through a more robust checkout form. There are certainly some very useful default fields, but they’re not always enough. By adding checkout fields, you can tailor your form to gather more information and provide more options to your buyers.
Examples Of Custom Checkout Fields
Many checkout-based plugins enable stores to add more types of fields to their forms. With the WooCommerce Checkout Field Editor, free users can integrate the following ten field types to their virtual register
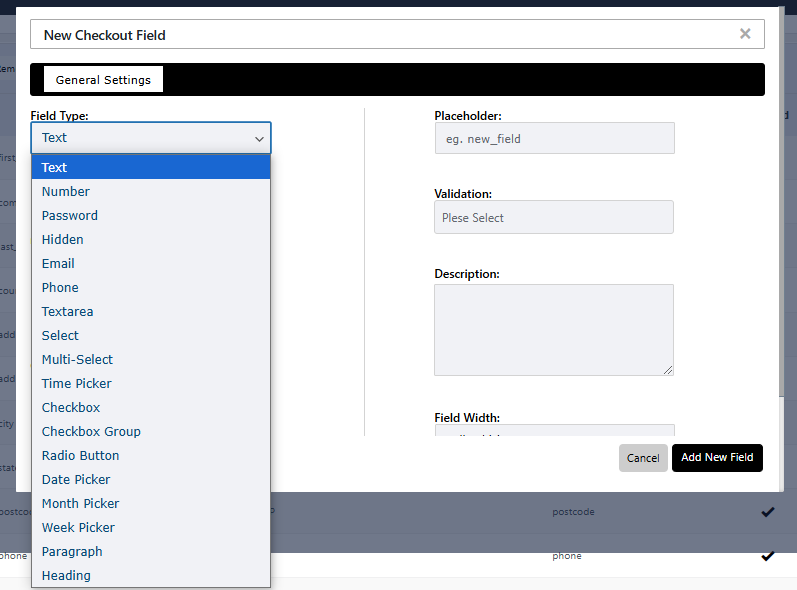
- text: For short text-based inputs.
- number: For numerical inputs only.
- password: For concealed password input with an option to reveal.
- hidden: For hidden inputs not visible to users.
- email: For entering valid email addresses.
- phone: For entering phone numbers.
- textarea: For multi-line text inputs.
- select: For selecting one option from a dropdown.
- multi-select: For selecting multiple options from a dropdown.
- time picker: For selecting specific times.
- checkbox: For single-option selection.
- checkboxgroup: For multiple-option selections.
- radio button: For selecting one option from a group.
- date picker: For selecting specific dates.
- month picker: For selecting specific months.
- week picker: For selecting specific weeks.
- paragraph: For displaying a block of text.
- heading: For displaying a title or header text.
Even without a premium subscription, this level of options offers a more versatile and efficient checkout architecture for maximum customer satisfaction.
Adding Custom Fields To WooCommerce – Step-By-Step
To start, you need to know how to add new custom checkout fields. Make sure that you have the Checkout Field Editor plugin installed and activated.
- Primary Steps
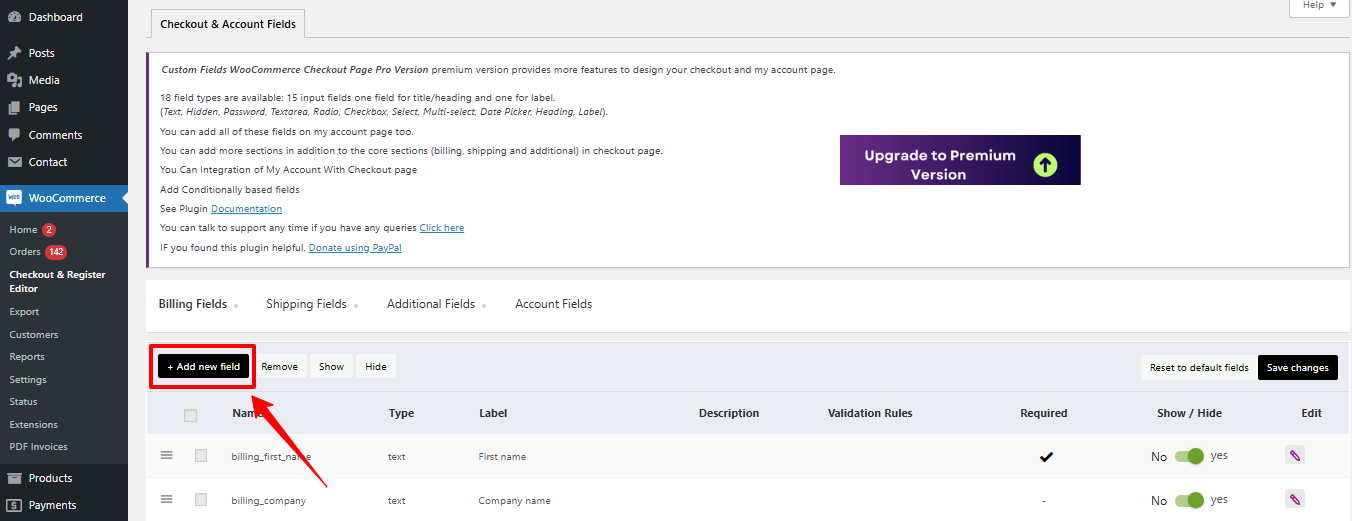
- On your WooCommerce dashboard, head over to the side menu on the left.
- Under WooCommerce, locate and click on Checkout & Register Editor.
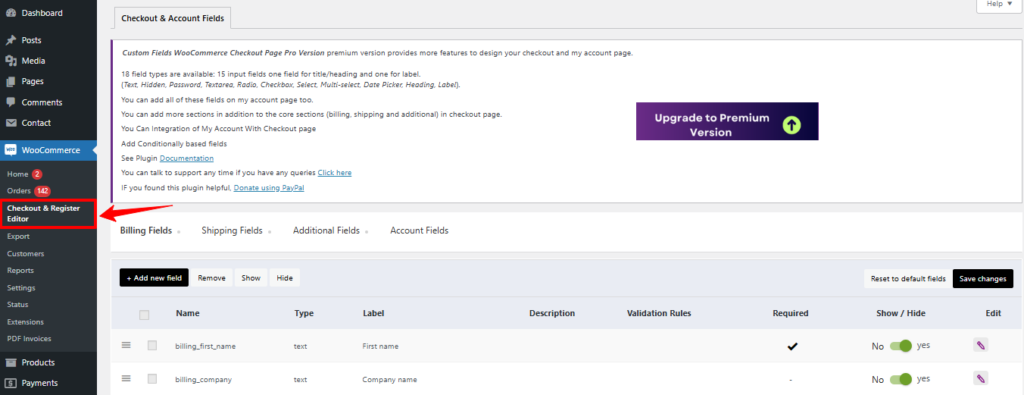
- Find and click on the button that says Add New Field
- General Settings
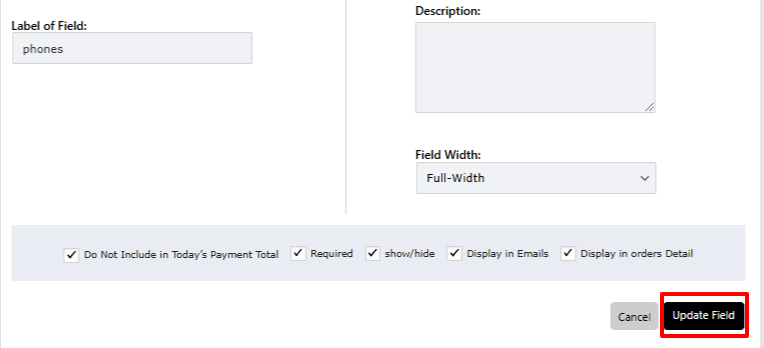
You’ll find a dialogue box from where you can customize each new field. From there, make the desired changes through the General Settings.
- Start by specifying the field type, the choices of which are detailed here.
- Give your field a unique name.
- Choose a label and an optional placeholder.
- Set a character limit or field width to determine how much input will be required in each field.
- Add the desired number of option(s), each with its own value and name.
- Choose whether to set the field as required, hidden, or visible in emails and order detail pages. These are your “display” rules.
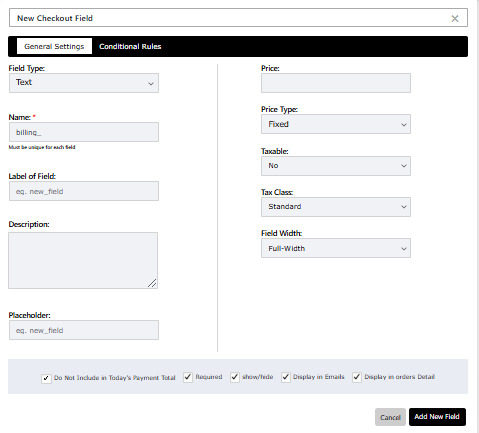
Aside from the General Settings, you can optionally add conditional logic to your fields through the same dialogue box.
- Final Steps
- Once you’ve customized your field, click on Add New Field at the bottom right of the dialogue box
- Confirm that your new field is visible in the fields section.
Other Actions For Managing Custom Checkout Fields
Clearly, adding new fields to WooCommerce isn’t too technical a task. But that’s not all. The beauty of a checkout manager plugin is that you can do much more than simply add more custom field types.Here are some more actions with which you can manage your WooCommerce checkout form. For simplicity, the following actions will all begin with the same initial steps, as follows.
- On your WooCommerce dashboard, head over to the side menu on the left.
- Under WooCommerce, locate and click on Checkout & Register Editor.
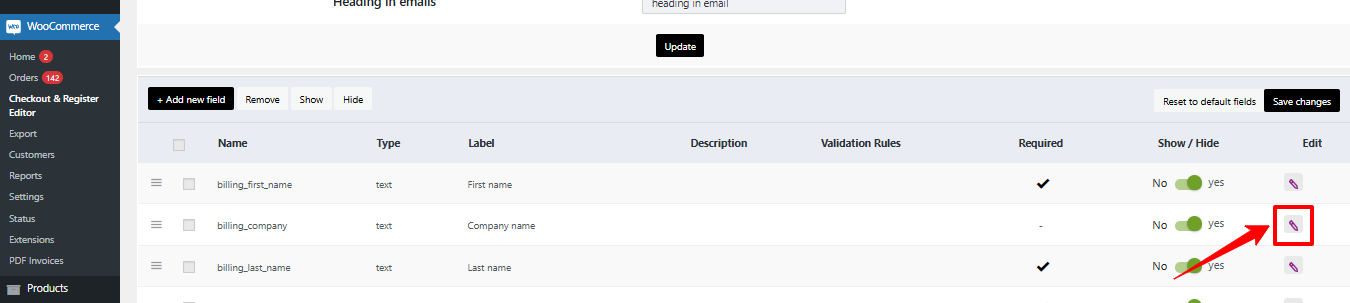
- Editing Fields
This lets you make some desired changes to each checkout field. So, if your existing field isn’t quite well set, you can change labels or adjust the display rules.
- Locate the field that you wish to edit.
- Click on Edit at the far right of the field.

- You’ll find a dialogue box, where you can make your desired changes under General Settings.
- Once you’re satisfied with the new changes, click on Update Field.

- Click on Save Changes.
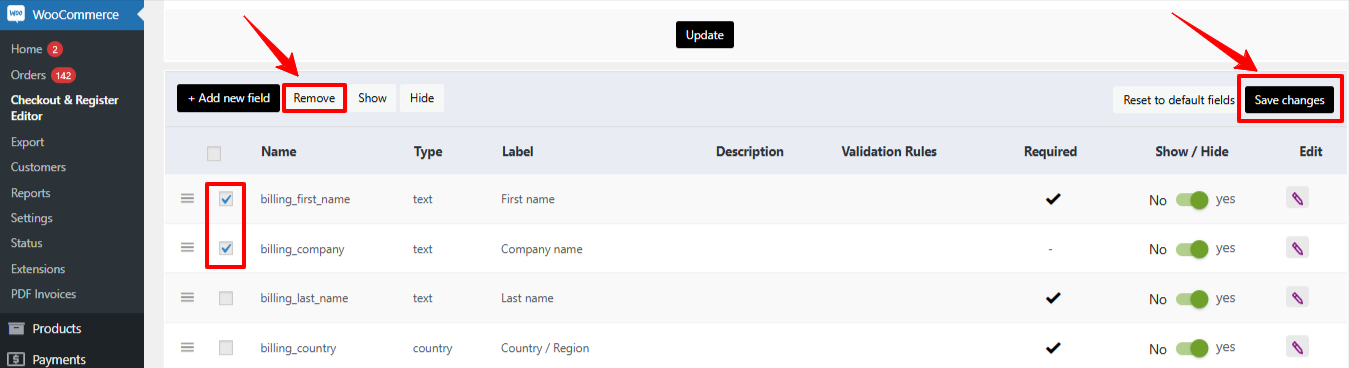
- Removing Fields
- Locate and select the field(s) that you want removed.
- Click on Remove button above the list of fields. Your selections will appear with a pink highlight before disappearing.

- Click on Save Changes.
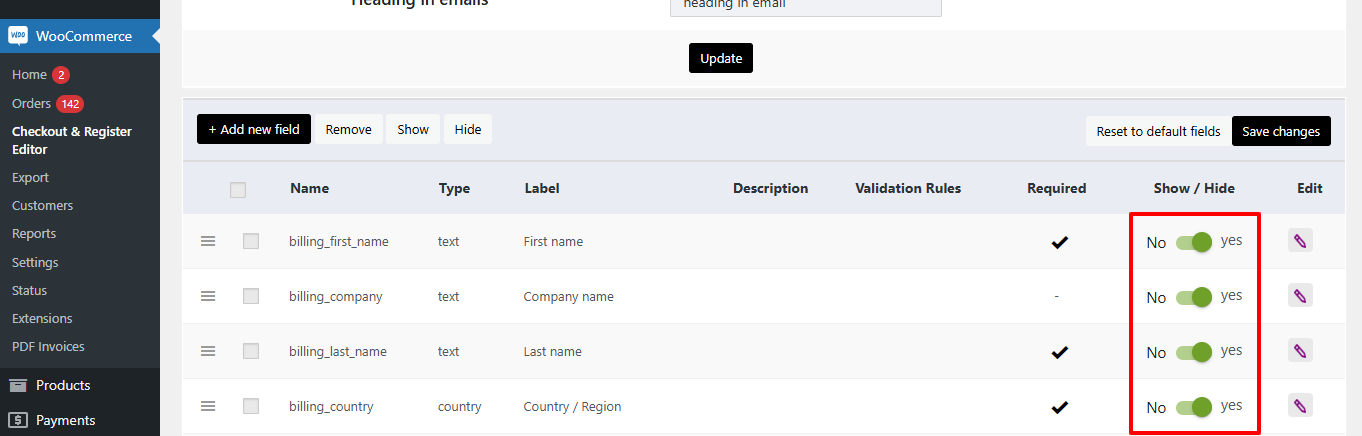
- Hiding Or Reveal Fields
- Pinpoint the field(s) that needs to be hidden
- Select your choice by ticking the checkbox at the left of each lift item.
- Click on the Hide button above the list of fields. Your selections will appear with a grey background, indicating that they’re not available to front-end users.
- To restore hidden fields, select them and click Show.You can also show and hide field by clicking on the button ‘Hide’ or ‘Show’ buttons.

- Click on Save Changes.
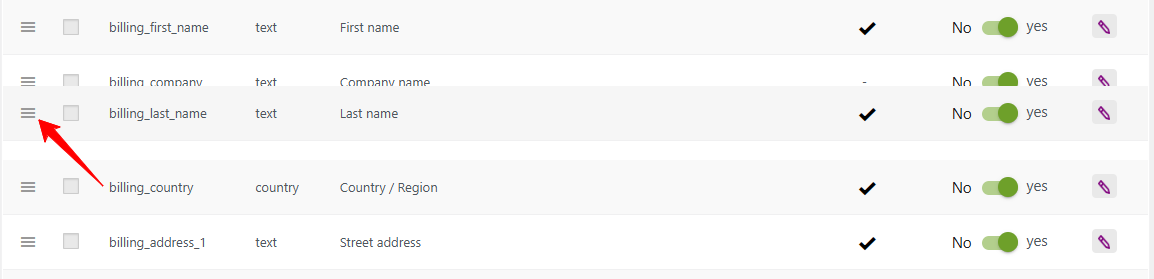
- Adjusting Field Position
- Pinpoint the field whose position you want to rearrange.
- Use the drag-and-drop icon at the far right of each field to move it up or down the list, till you’re satisfied with your pick.

- Click on Save Changes.
Wrapping Up
Making simple changes to your WooCommerce checkout is essential if you want your online store to stand out. And while adding and editing custom checkout fields is a highly influential tactic, it’s surprisingly simple. So, follow this guide to give your store’s checkout a much-needed makeover.