
WooCommerce will give you the standard fields by default:
That may be sufficient for a small shop, but most businesses require more. Offering custom checkout fields allows you to gather extra, valuable information and it gives customers a greater sense of confidence when making their purchase.
Customizing your checkout form is important for the following reasons:
Customers complete checkout faster and with fewer frustrations when they see only the fields that apply to them.
Include fields for delivery instructions, company tax IDs, or preferred communication styles. This simplifies order management.
Requesting relevant, optional information (such as “How did you hear about us?” or “Gift message”) adds a personal touch and professionalism to the experience.
A simple, user-friendly checkout eliminates doubt and confusion directly increasing conversion rates.
As a heads-up before inserting or editing anything, it’s helpful to know how WooCommerce structures checkout fields.
There are generally three primary groups:
You can also add custom checkout fields and extra sections that are displayed before, after, or between standard fields.
All fields have a type (text, number, select, date, checkbox, etc.), a label, and validation rules.
Although developers can alter these through PHP hooks, even more store owners prefer visual aids which enable drag-and-drop modification.
Rather than editing theme files or coding PHP functions, you can utilize a checkout field editor for WooCommerce.
This sort of plugin provides you with complete control of your checkout form from within your WordPress dashboard, no coding necessary.
A good WooCommerce checkout customization plugin should provide you with the ability to:
Some tools even allow for exporting checkout information or connecting it with CRMs and email marketing platforms.
Let’s go through the very same process of adding a custom field with the help of a WooCommerce checkout field editor.
Go to your WordPress dashboard and navigate to:
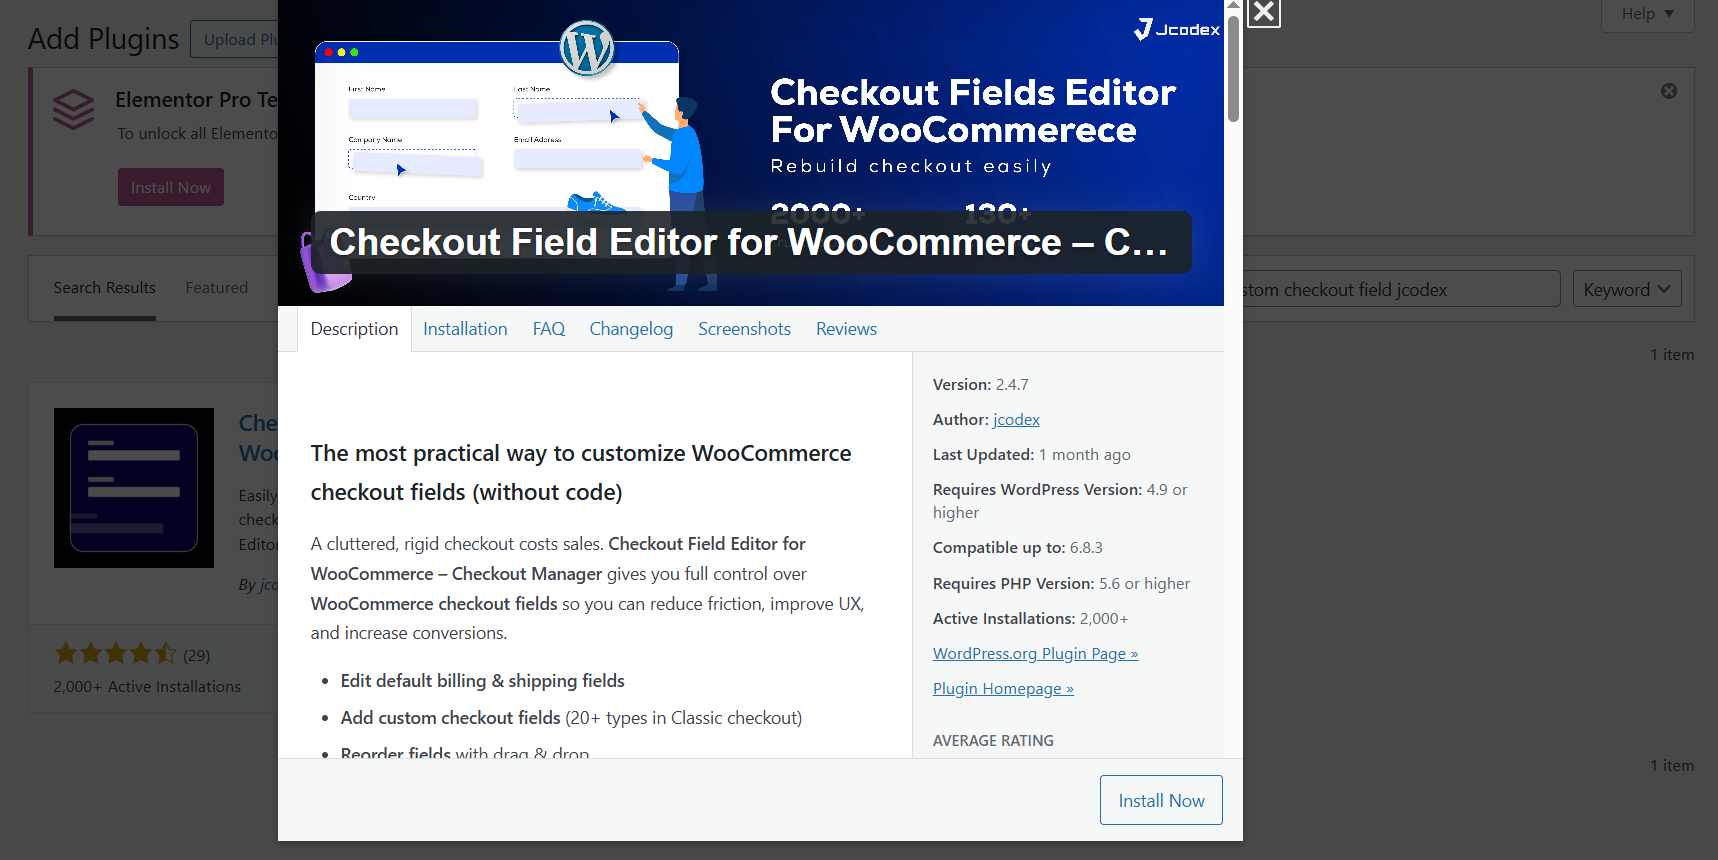
Plugins → Add New → Search “Checkout Field Editor for WooCommerce.”
You’ll see multiple plugins with slightly different names such as:
All of these allow you to manage and customize checkout fields easily.
Choose one that’s regularly updated and well-rated. Click Install Now, then Activate.
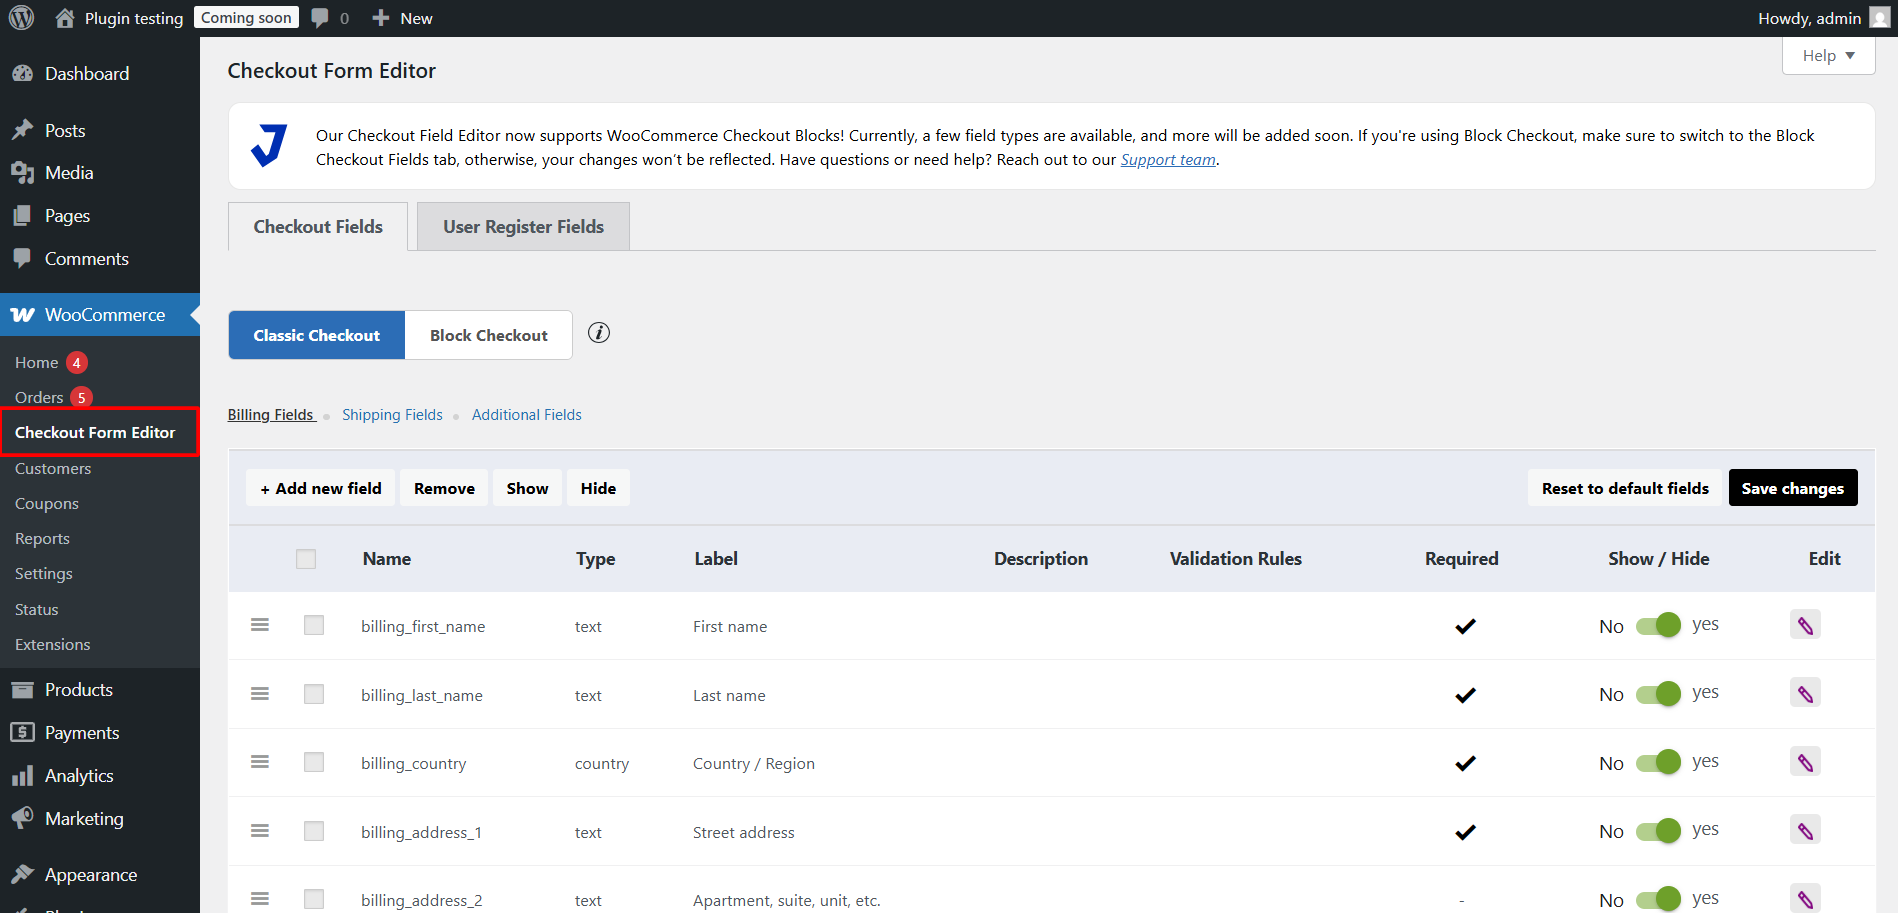
Once activated, go to:
WooCommerce → Checkout Fields (the path might be slightly different).
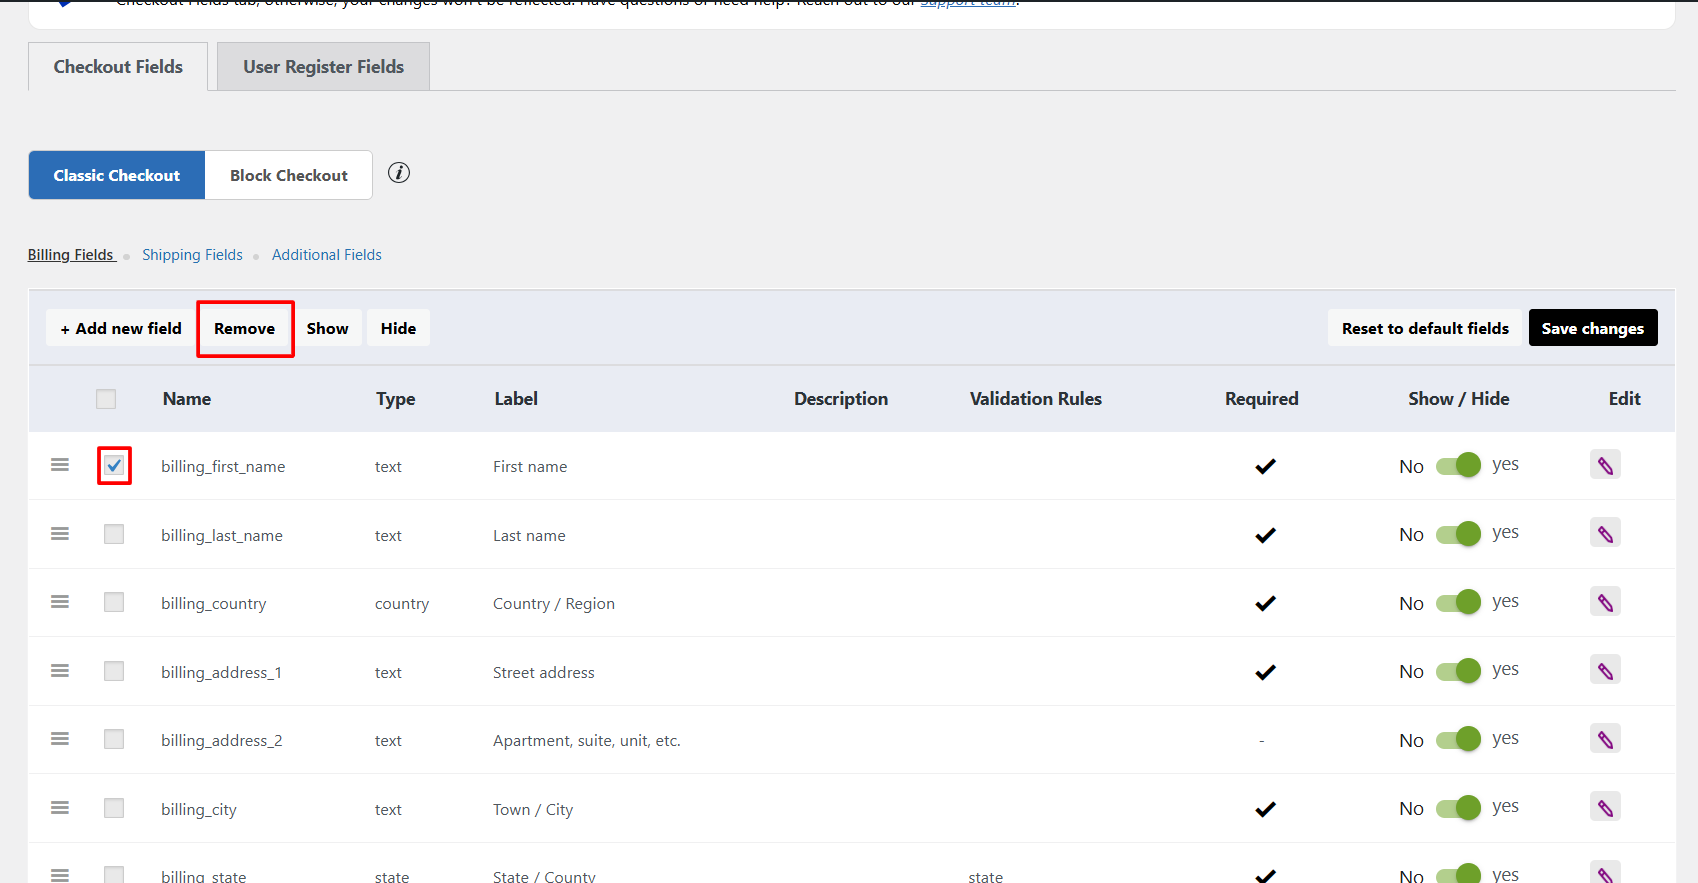
There are three significant sections here:
This dashboard shows all available fields. You can delete, edit, or reorder them via drag-and-drop.
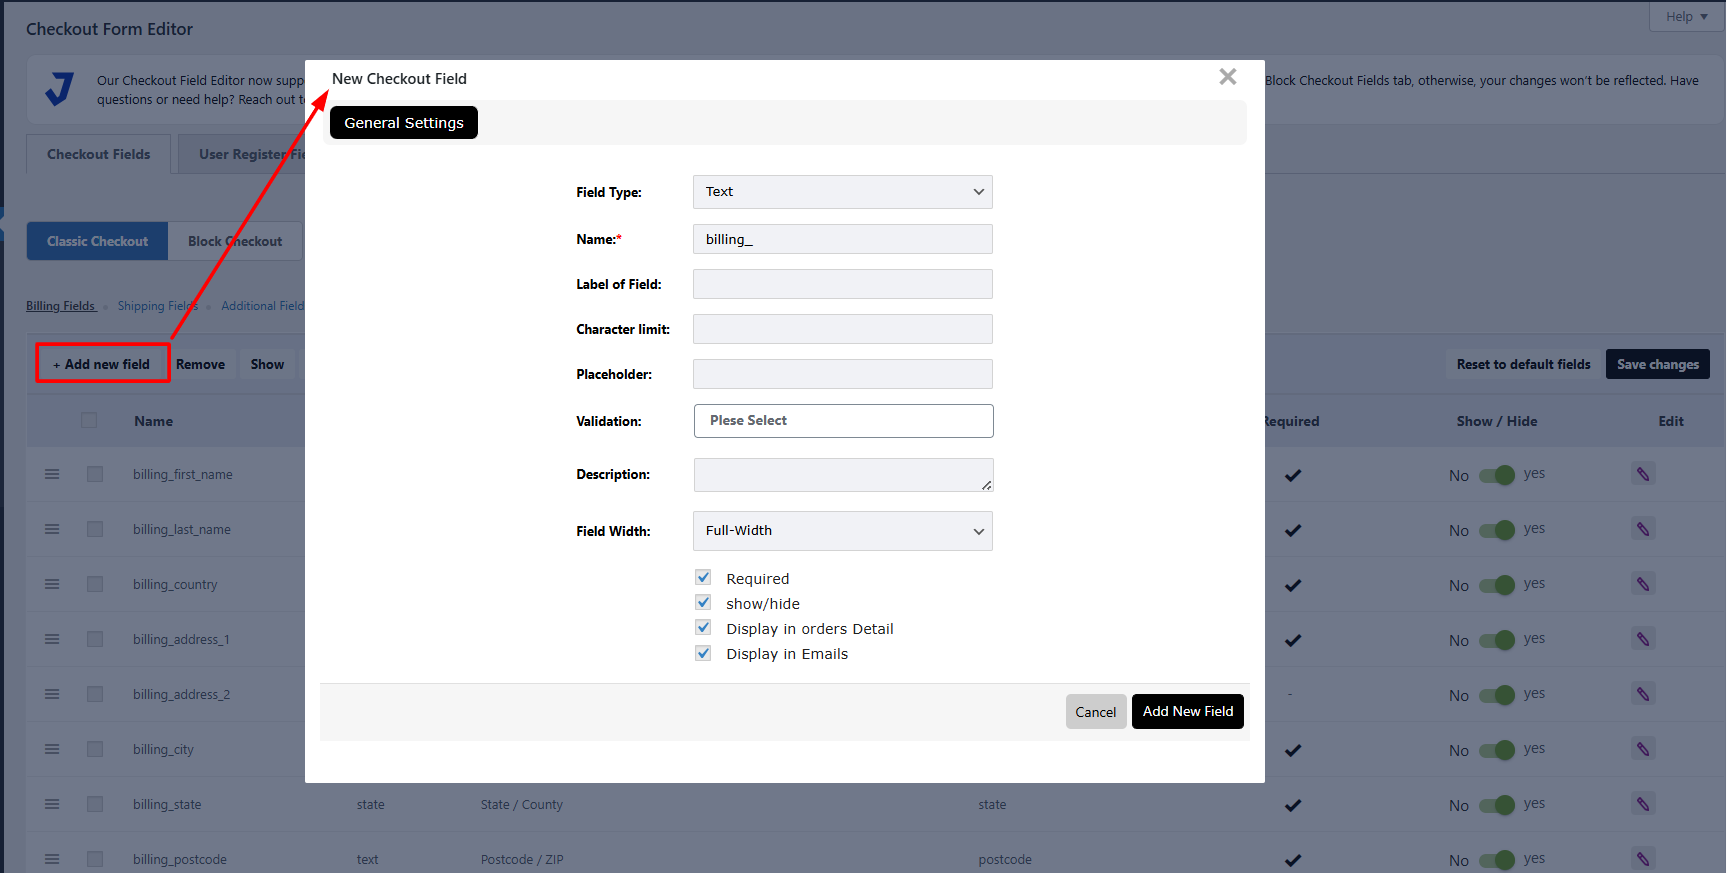
Click on Add Field and select a type of field that suits you:
Example:
Suppose you wish to create a “Preferred Delivery Date” field.
You would do so as:
Save settings, and your field will become visible on the checkout page immediately.
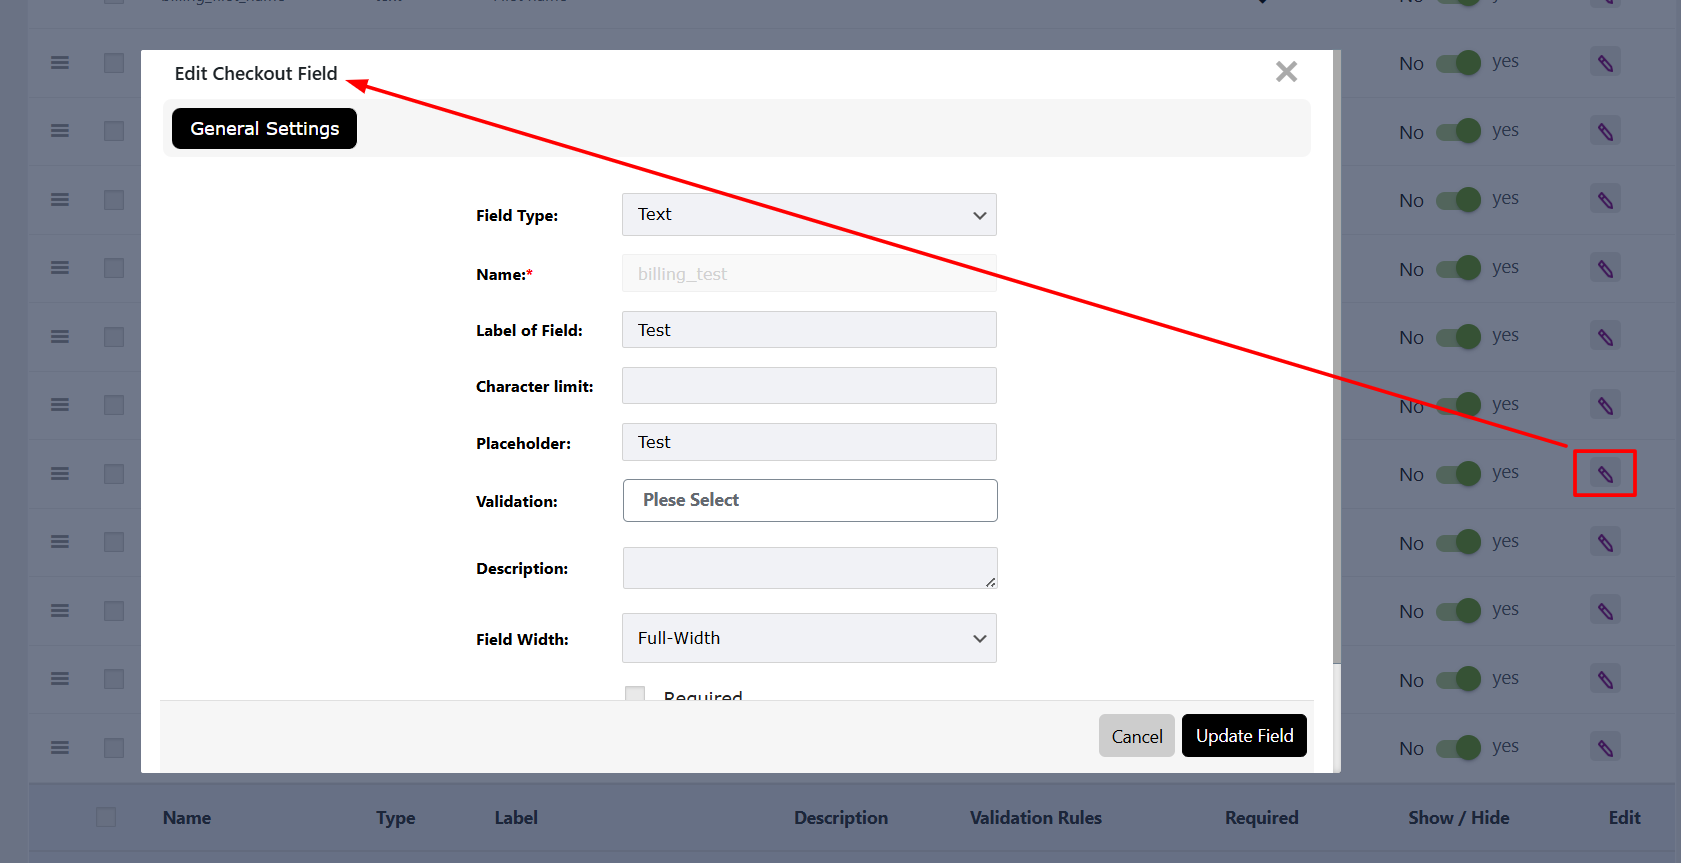
Other times, you might simply want to revise existing checkout fields in WooCommerce instead of creating new ones.
For example:
With a WooCommerce checkout editor, you can visually make these changes.
Click the edit button next to a field, resize or move the label, and save. No code, no stress.
You can also make your checkout form shorter by eliminating fields that are not needed.
For instance, if your store sells only digital downloads, you can entirely eliminate shipping fields.
A shorter, smoother form means customers checkout quicker and that will enhance conversions directly.
Whenever you make changes, always test your checkout page.
Add a product to your cart and checkout the whole process as a customer would.
Check that:
Testing ensures your modifications don’t disrupt payments or order handling.
If you want to take your checkout form to the next level, try these advanced techniques available in most WooCommerce checkout managers:
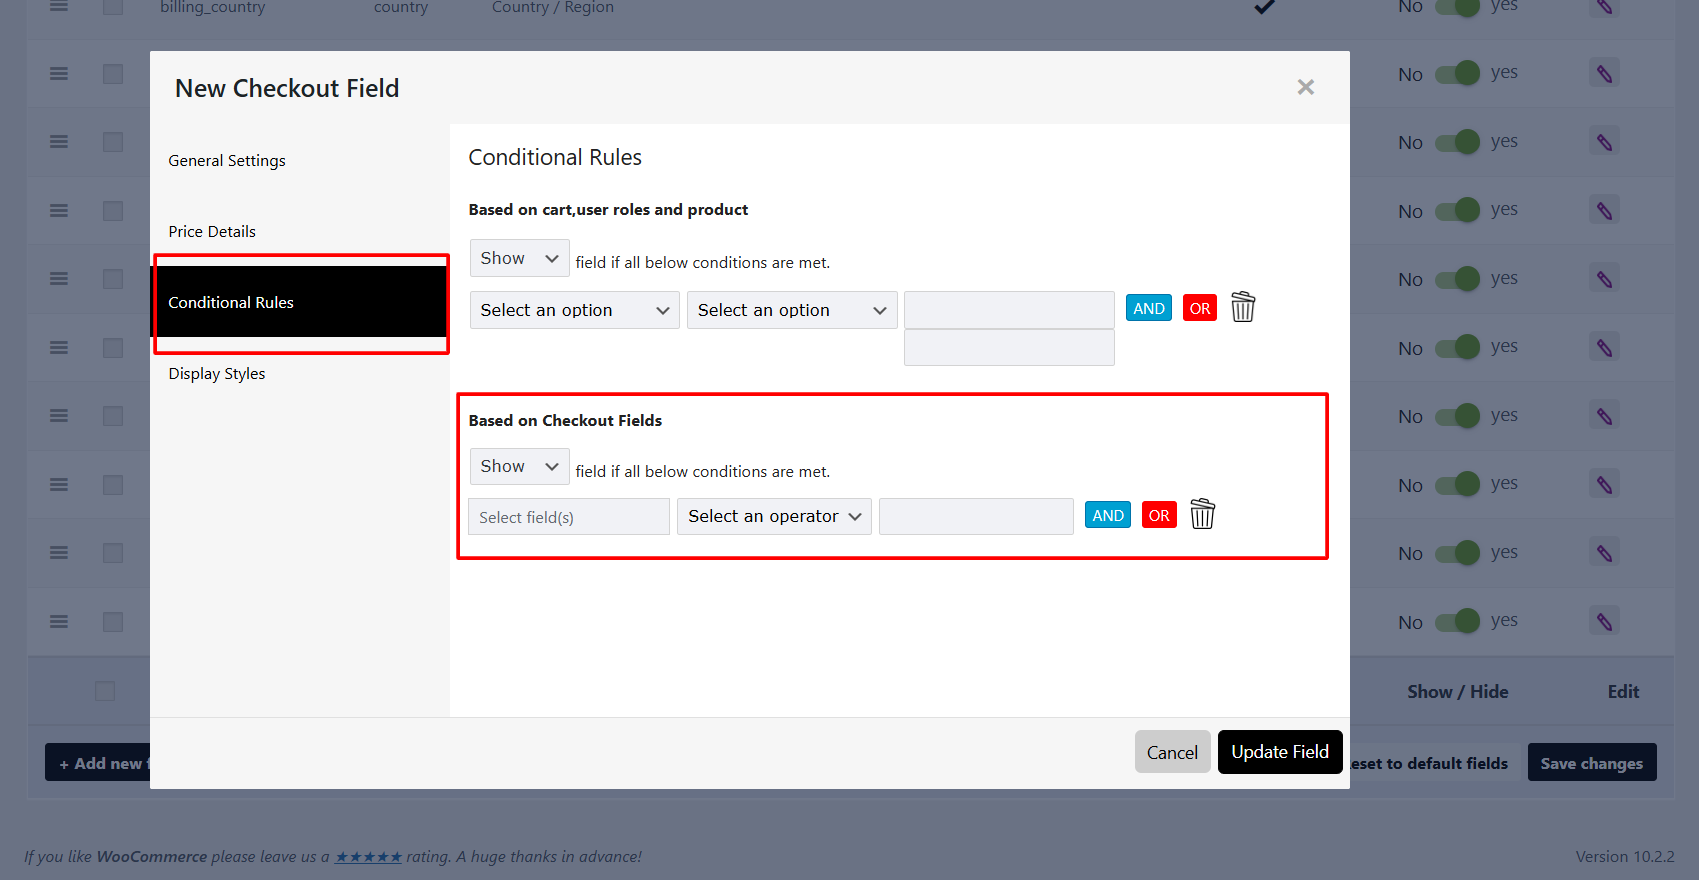
Show or hide specific fields based on user input.
Example:
If the customer checks “This is a gift”, display a new field for a “Gift Message.”
You can pre-fill certain fields to make checkout faster such as setting a default country or shipping option.
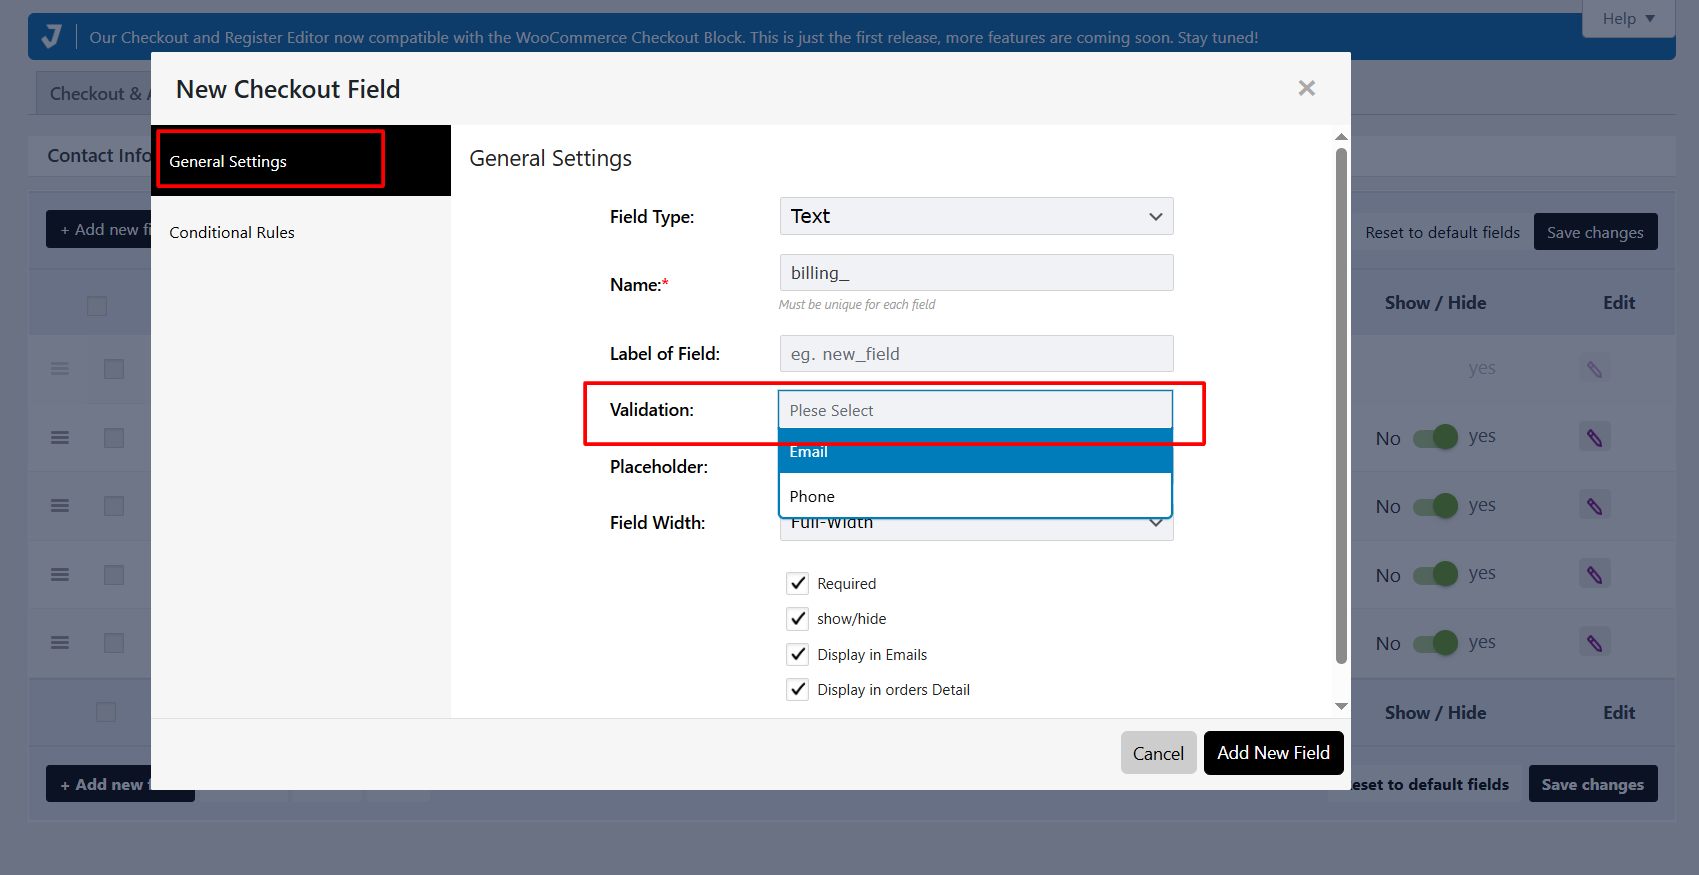
Ensure customers enter valid data (e.g., correct email format or numeric values).

You can reposition entire field groups for example, moving order notes above payment methods.
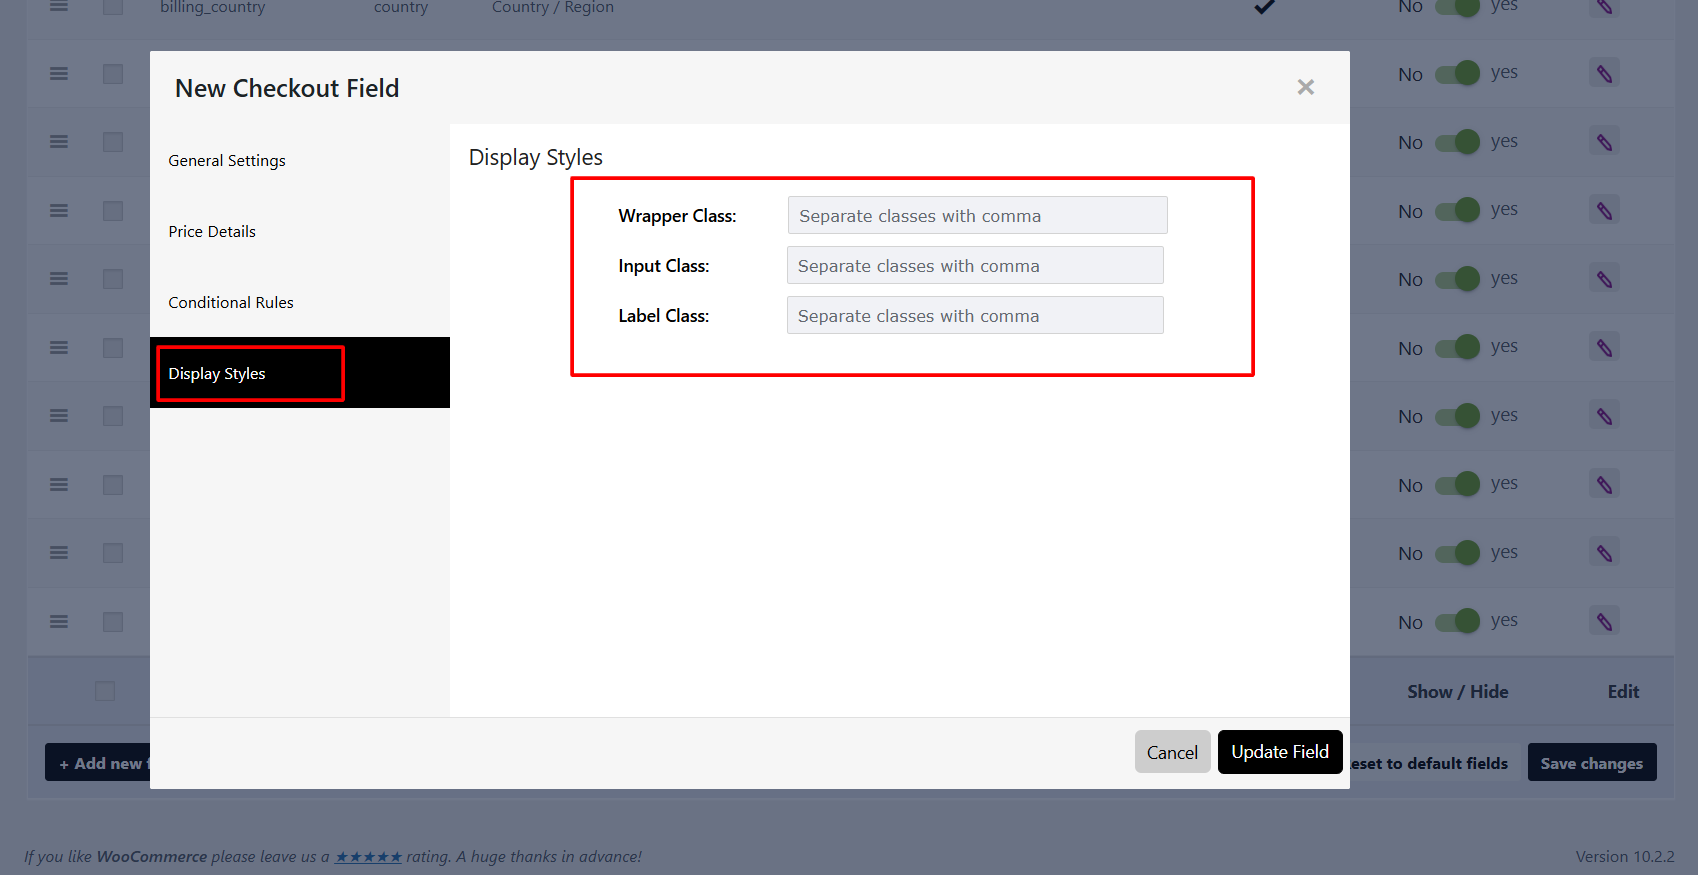
Most checkout editors let you insert custom CSS classes or modify the layout to be mobile friendly.
Not only does customizing your checkout form assist with user experience, it can also enhance the SEO performance of your site indirectly.
Here’s how:
Improved user interaction: Customized checkout pages tend to result in more repeat business.
Aside from that, a WooCommerce checkout builder plugin provides you with room to try out form structures to enhance conversions.
While modifying the checkout page, you can easily overdo things. Below are some errors to avoid:
❌ Adding too many fields. Only ask for information you truly need.
❌ Skipping testing. Always verify your changes on desktop and mobile.
❌ Inconsistent labeling. Keep labels short and clear to avoid confusion.
❌ Ignoring user flow. Keep important fields near the top for faster completion.
Keep in mind your aim is to simplify checkout, not complicate it.
Combining these methods with a clean, responsive checkout design can make a big difference in your conversion rate.
Here is a brief rundown of the most well-known choices for editing WooCommerce checkout fields:
Plugin Name | Key Features | Best For |
WooCommerce Checkout Field Editor | Add, edit, and rearrange fields visually | Store owners who want simplicity |
WooCommerce Checkout Manager | Conditional logic, file uploads, advanced rules | Complex stores or developers |
WooCommerce Additional Checkout Fields Customizer | Lightweight and beginner-friendly | Small stores needing quick edits |
WooCommerce Checkout Editor Tools | Drag-and-drop UI, validation rules, export options | Shops focused on UX optimization |
Each tool provides a simple way to achieve custom checkout functionality without manual coding.
Customizing your checkout form is perhaps one of the simplest methods to enhance your store’s user experience and conversion rate.
With the appropriate WooCommerce checkout field editor, you are able to:
And the best part is you can do all this without writing a single line of code.
Start by identifying which fields you truly need, install a reliable WooCommerce checkout manager, and begin crafting a checkout experience your customers will love.
A few smart tweaks today can lead to a smoother, more professional checkout and more sales tomorrow.